Sometimes the entire vehicle still looks dull even after washing. In other cases, the paint is generally clean, but one small area has paint transfer from another vehicle or a black scuff that rubber or plastic left behind.
How to use a paint cleaner is not a fixed procedure that automatically follows every car wash. It begins by identifying what remains, where it remains, and whether you need to remove it or conceal it. If the entire vehicle looks dull, treat the full painted surface. If only one paint-transfer mark remains, clean that mark and the surrounding working area.
What a Paint Cleaner Actually Does
Manufacturers often introduce paint cleaners as cleaning products. In practice, however, these products function more like simplified polishing products for vehicle owners.
Paint develops gloss when it reflects light evenly. Professional polishing achieves this by abrading and levelling the paint surface. A paint cleaner mainly restores gloss by removing material left on top of the paint and, depending on the product, filling microscopic surface valleys. It reorganizes part of the professional polishing process into a form that ordinary vehicle owners can manage.
📌 To choose between dry, wet, abrasive and glaze-containing formulas, see Types of Paint Cleaners|How to Choose Between Dry, Wet, Abrasive, and Glaze Formulas.
Key Takeaways (Click to Expand)
- A paint cleaner performs two jobs: removal and concealment. It removes contamination film and transferred material from above the clear coat, while glaze ingredients fill minor defects to make them less visible.
- The application order begins with the target, not with wash completion. Treat the whole vehicle when the entire finish looks dull. For one transferred mark, prepare only that area and the surrounding pad travel zone.
- Uniform pad contact creates the removal power. The product loosens the bond, while repeated and even pad contact separates the remaining film.
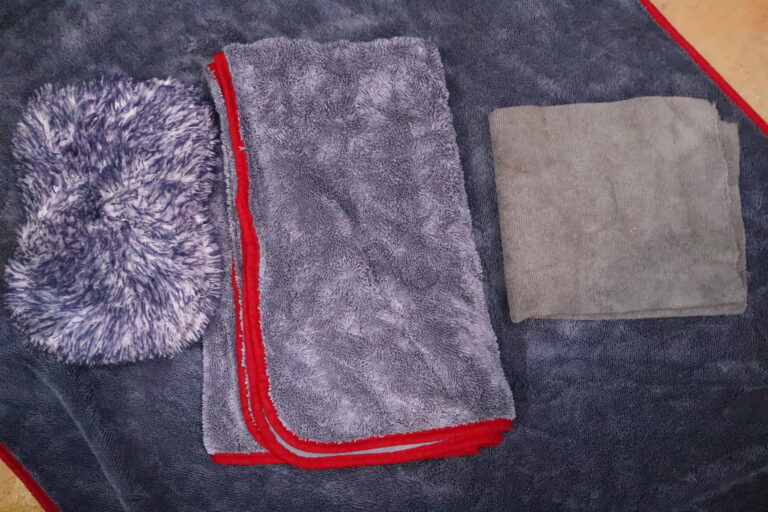
- Remove movable particles before increasing contact. The 2WASH preparation method gradually raises contact from a wash mitt to a fluffy microfiber towel.
- Wet and dry paint cleaners use different recovery methods. Apply a wet product after rinsing and recover it with water. Apply a dry product after drying and recover it with a towel. Protection completes both processes.
Table of Contents
- Two Functions of a Paint Cleaner|Removal and Concealment
- Removal Comes from Uniform Surface Contact
- Paint Cleaner Application Order
- Frequently Asked Questions
Two Functions of a Paint Cleaner|Removal and Concealment
There are two main ways to restore the appearance of automotive paint. The first removes material sitting on top of the clear coat. The second fills very shallow defects that cleaning cannot remove, making them less visible.
Not every paint cleaner performs both functions equally. Some products focus on removal, some provide a stronger glaze effect, and others combine both functions.
Removal|Lifting Material from the Paint Surface
Cleaning ingredients loosen the bond between contamination and the paint, while the applicator pad physically separates it from the surface. This process targets material deposited on top of the clear coat.
| Target | Condition |
|---|---|
| Oily film | A thin layer of exhaust residue, road oils or oxidized wax |
| Oxidized surface film | A degraded surface layer formed through exposure to air and ultraviolet light |
| Water spots | Mineral deposits left behind as water dries |
| Paint transfer | Paint transferred from another vehicle, wall or pillar |
| Black scuff marks | Rubber or plastic transferred through friction |
| Yellowing | Surface oxidation visible on light-colored paint |
| Old protection | Expired wax or sealant that you need to strip before new protection |
Thin black lines on a white vehicle may also belong in this category. The groove itself is not necessarily black. In many cases, contamination trapped inside a shallow line makes it appear dark.
However, a paint cleaner cannot restore clear coat after deep scratches, chips or peeling have already damaged it. If a light test on a small area produces no visible change, reconsider whether the mark is surface contamination or actual paint damage.
Concealment|Filling Defects to Make Them Less Visible
Glaze ingredients fill microscopic valleys and reduce irregular light scattering. The defects remain, but they become less noticeable as gloss and color depth improve.
This requires far fewer conditions than removing defects through abrasion.
| Removing by Abrasion | Concealing by Filling | |
|---|---|---|
| Requirements | Machine, experience and thorough preparation | Product, applicator and towel |
| Clear coat | Abrasion removes a small amount | Remains essentially unchanged |
| Repetition | Remaining paint thickness limits repetition | Repeat as needed |
| Result | Longer-lasting correction | Immediate but temporary improvement |
Fillers gradually disappear through washing and exposure, allowing the concealed marks to become visible again. This is not necessarily a weakness because the cost and risk of reapplication are low.
You can simply treat the affected area again. Because meaningful paint correction did not remove the defect, repeated maintenance does not consume the clear coat in the same way as machine polishing.
It works much like makeup. It may wear away, but you can apply it again. Temporary does not automatically mean inferior.
The situation changes when applying a ceramic or glass coating. Residual fillers and oils may interfere with coating adhesion, so clean the surface without leaving glaze residue.
The coating layer may provide a small amount of optical concealment, but it is thinner than a dedicated glaze. It may soften the appearance of very light wash marring, but visible swirl marks will normally remain. Do not simply conceal defects that need correction before coating.
Decide What You Are Treating and Where
Select a paint cleaner according to the target, not a fixed maintenance schedule. First determine whether you can remove the contamination or need to conceal a defect.
| Paint Condition | Purpose | Working Area |
|---|---|---|
| The entire vehicle looks dull and covered by a thin film | Remove accumulated surface film | Entire painted surface |
| You need to remove old wax before applying new protection | Strip the previous protection layer | Area receiving new protection |
| Hardened mineral marks remain on one panel | Remove the remaining deposit | Affected panel |
| Paint transfer or a black scuff is present | Remove transferred material | Mark and surrounding working area |
| Fine swirls and uneven reflections are distracting | Conceal with glaze | Panels requiring appearance improvement |
Confirm Whether Chemical Mineral Removal Is Still Effective
You may remove a thin mineral film in its early stage by weakening it with an acidic cleaner, followed by low-contact washing and rinsing. If the surface recovers at this stage, there is no reason to increase physical contact.
Increasing the concentration or reaction time of an acidic cleaner is not always the answer for an old, hardened deposit. If chemistry alone cannot separate it, use controlled pad contact and repetition as the next step.
Acid cleaning and paint cleaning are not simply weaker and stronger versions of the same process. Acid cleaning applies a chemical reaction suited to mineral deposits. A paint cleaner adds controlled physical contact to separate what remains.
📌 For a detailed explanation of this distinction, read Is a Paint Cleaner Really the Next Step After an Acid Pre-Wash?
Removal Comes from Uniform Surface Contact
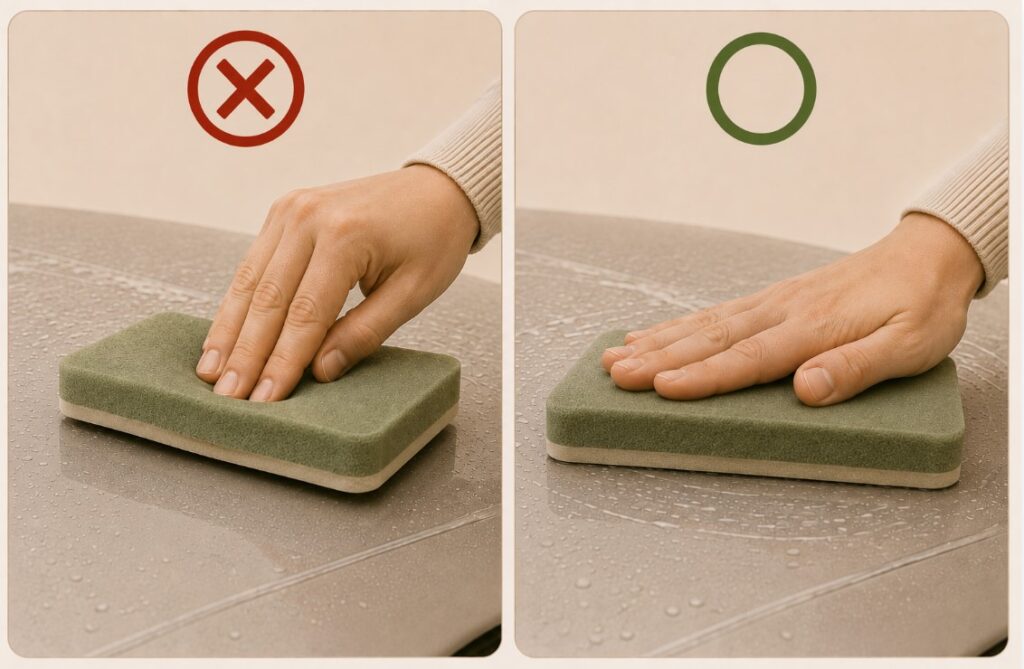
A paint cleaner is not a powerful chemical designed to dissolve hardened contamination on its own. Its cleaning ingredients loosen the bond. The applicator pad then maintains even contact and repeatedly moves over the same area, adding physical cleaning power.
Increasing contact does not mean pressing harder. Keep the pad flat against the paint and use light, even pressure so consistent contact continues across the working area.
Different Tools Produce Different Levels of Contact
The difference between ordinary washing and paint cleaning is not simply whether the tool touches the paint. A wash mitt also makes direct contact. The difference is how evenly the tool contacts the surface and how consistently it passes over the same area.
| Tool | Surface Contact | Main Target |
|---|---|---|
| Pressure washer | None | Loose contamination removed by water impact and flow |
| Wash mitt | Low | Contamination loosened by water and shampoo |
| Fluffy microfiber towel | Higher than a mitt | Thin residue left after the mitt wash |
| Paint cleaner pad | Higher and more uniform | Surface film, old protection and transferred material |
| Polisher and polishing pad | High | Paint defects removed by abrading the clear coat |
A pressure washer does not remain attached to the paint. A wash mitt touches the surface, but its long pile bends and moves while distributing force through the shampoo solution. A paint cleaner pad moves repeatedly over the same area with its broad face in more uniform contact. This allows it to remove material that lower-contact washing leaves behind.
Cleaning power does not increase only by changing to a stronger chemical. Changing the tool and increasing controlled surface contact can also increase cleaning power.
Higher Contact Also Presses Down Whatever Lies Between the Tool and Paint
As contact increases, the applicator also presses and drags anything trapped between it and the paint across the surface.
If soil, sand or other loose particles remain, those particles can scratch the paint. Abrasive particles formulated into a product have controlled size and shape. Dirt left on the vehicle does not.
This is why preparation comes first. Before increasing contact, bring the paint to a condition where you can safely use increased contact.
📌 To understand the relationship between contamination, contact and movement, read Why Scratch Risk Changes During the Car-Wash Process.
Paint Cleaner Application Order
Every paint cleaner process begins with preparation and ends with protection. The main difference appears after preparation.
Wet application
Preparation → Rinse → Wet paint cleaner → Final rinse → Drying → Panel wipe when coating → Protection
Dry application
Preparation → Drying → Dry paint cleaner → Residue removal with towel → Panel wipe when coating → Protection
The preceding wash process can follow your normal method. Whether it includes several prewash stages or an acidic cleaning step, the immediate goal before using a paint cleaner is the same: remove particles that the pad could drag across the paint.
Preparation|2WASH
Preparation removes contamination before the main paint-cleaning process. It has two purposes: improving efficiency and reducing risk.
Efficiency — If ordinary dirt remains, the paint cleaner must deal with that dirt first. This wastes product and pad capacity on contamination that normal washing could remove. The pad also becomes dirty more quickly and requires more frequent cleaning or replacement.
Risk — Higher contact presses and drags anything trapped between the pad and paint. Scratch risk increases according to the amount of loose particulate contamination remaining.
The goal is not to make the paint chemically perfect. It is to remove material that the applicator could drag across the surface.
Wash the surface twice to increase contact gradually. Applying a high-contact tool while larger contamination remains can press that contamination directly against the paint. The first wash removes larger material with a lower-contact mitt. The second wash increases contact only after the first wash removes that material.
Preparation|The 2WASH Method
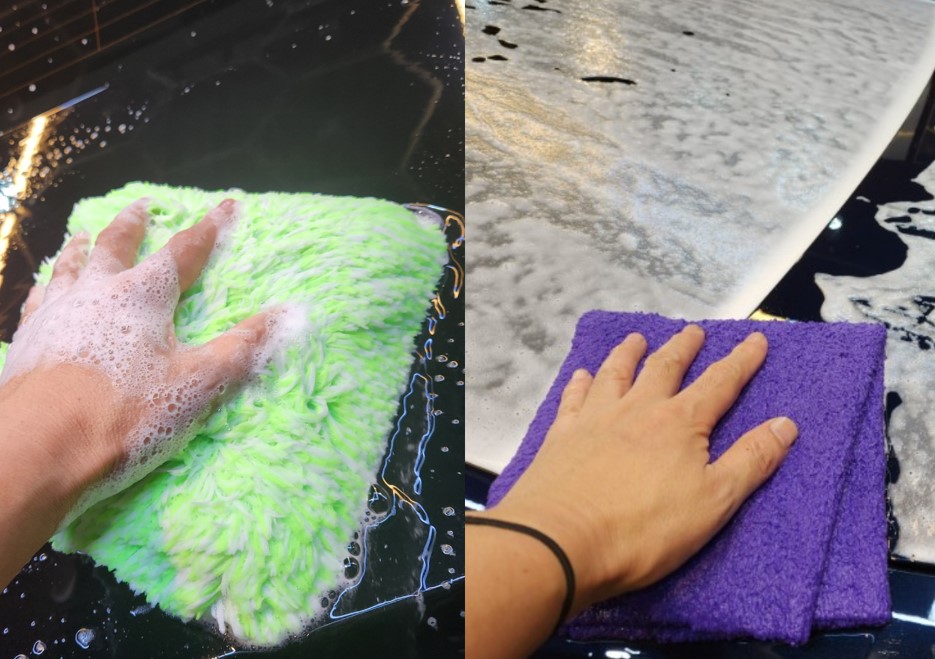
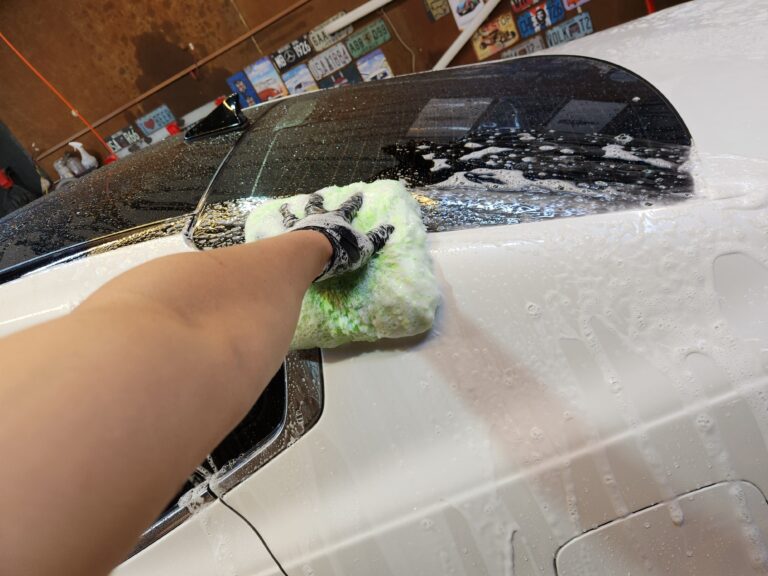
First wash — Wash mitt
A wash mitt loaded with shampoo solution does not maintain high surface contact. Its long pile and internal space retain a large amount of liquid, while the fibers bend and move as the mitt travels. The first wash removes larger contamination remaining after prewashing.
Inspection
Lightly feel the surface to determine how much contamination remains. This is not simply a pass-or-fail test. It helps establish how much contact or additional treatment the next stage requires.
Second wash — Fluffy microfiber towel
After the first wash removes the larger contamination, you can increase surface contact. A fluffy towel has less internal space than a wash mitt and sits closer to the paint. It removes the thinner contamination that the first wash may have left behind.
Rinse
Rinsing carries the separated particles away from the paint. Separating contamination does not mean it has already left the vehicle. It may remain suspended in shampoo, move downward and become trapped around panel gaps, mouldings or emblems.
The final rinse involves no physical contact, so extending it does not increase friction-related risk. Rinse from top to bottom, overlapping each section, and pay particular attention to areas where contaminated water can collect.
How Tool Structure Changes Surface Contact
| Tool | Internal Space | Contact | Primary Role |
|---|---|---|---|
| Wash mitt | Large; retains shampoo solution | Low | Larger contamination and movable particles |
| Fluffy towel | Smaller | Higher | Thin contamination left after the mitt |
| Clay bar | Almost none; full direct contact | Very high | Embedded particulate contamination such as fallout |
As the empty space within a tool decreases, its contact with the paint increases. This is one reason professional polishing preparation often includes claying. A clay bar has no pile structure and makes almost complete contact, allowing it to pull out embedded particles such as industrial fallout.
However, claying requires sufficient lubrication and controlled technique. Incorrect use can leave marring. A fluffy towel cannot remove deeply embedded contamination in the same way.
For an owner-level paint cleaner process, the immediate preparation target is material that could move with the applicator. Two washes followed by a thorough rinse remove as much movable contamination as reasonably possible with lower burden and risk.
If inspection reveals obvious tar, protruding fallout or other bonded particles, treat that specific contamination before continuing.
Removing one paint-transfer mark does not require washing the entire vehicle. Clean the mark and the surrounding pad travel area with a thoroughly wet microfiber towel. The towel must contain enough water to capture loose particles inside its fibers.
A dry towel provides little space for particle capture and may drag contamination across the paint. Use one clean towel face for each pass, then fold the towel to expose a fresh surface.
Application|Wet and Dry Products
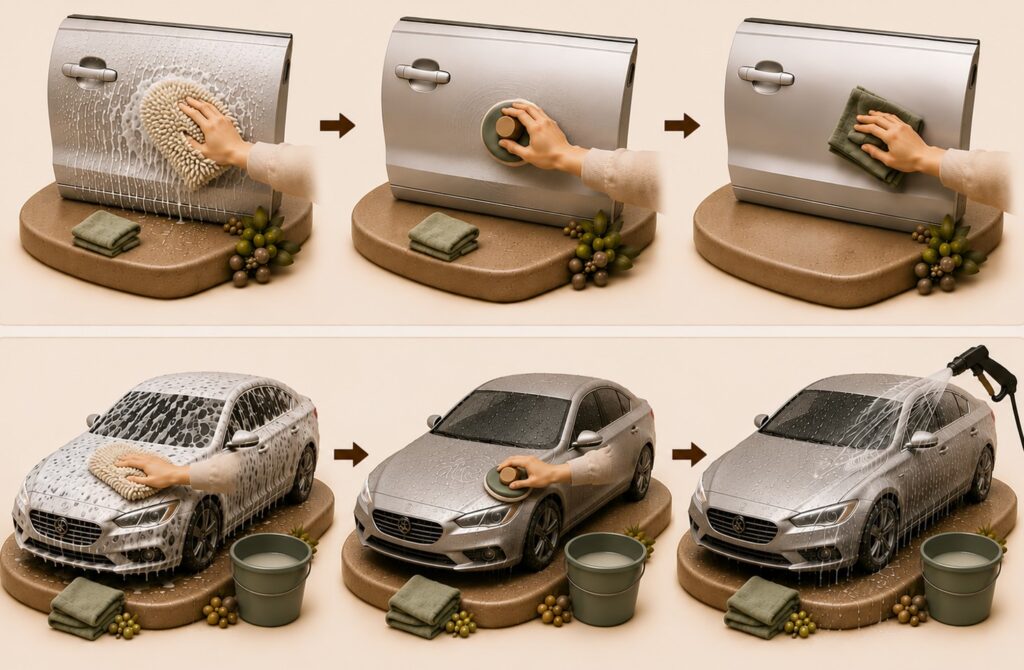
Use wet products after rinsing and dry products after drying. The form of the product determines the condition of the working surface.
| Wet Paint Cleaner | Dry Paint Cleaner | |
|---|---|---|
| Stage after preparation | Rinsing | Drying |
| Working surface | Wet paint | Dry paint |
| Residue recovery | Final rinse | Applicator and towel |
Water helps spread a wet paint cleaner across a wider area and supports applicator movement. A dry paint cleaner acts on the target without water diluting it, allowing its cleaning action to remain more concentrated in a smaller area.
Decide separately whether to treat the entire vehicle or only one section. The product form determines the working environment and recovery method. The distribution of contamination determines the working area.
Residue Recovery|Removing What Has Been Separated
Residue recovery carries the separated contamination away from the paint. The process does not end when the pad detaches the contamination. The loosened material still remains on the working surface.
Separation and recovery are different jobs. Cleaning ingredients and pad contact perform the separation. Water or a towel performs the recovery. This difference in recovery method is also what separates wet and dry paint-cleaner processes.
Insufficient rinsing after a wet application can allow product and contamination to dry back onto the surface. This effectively redeposits what was just removed.
During dry application, waiting too long before wiping can allow the residue to harden and become more difficult to remove. Continuing to use a pad loaded with separated contamination can also drag that material across the paint.
The surface indicates whether recovery is complete. Check whether water flows evenly, whether gloss remains after drying and whether a slippery or oily film remains when the surface is lightly inspected.
A panel wipe completes the recovery stage, and ceramic or glass coating preparation mainly requires it. Dry paint cleaners often leave lubricating oils, so use a panel wipe before coating. With a wet product, follow the coating and paint-cleaner manufacturers’ instructions.
If you plan to finish the surface with wax or sealant, you may not need to remove every remaining oil or glaze ingredient. Those ingredients can transition into the final protection stage.
Final Protection
The process ends by applying protection to the cleaned surface.
A paint cleaner removes contamination film, but it can also remove the wax or sealant covering that film. Once residue recovery is complete, the surface may be clean but unprotected.
If you remove the existing layer, replace it with protection.
When finishing with wax or sealant, you may retain the residual oils and filling effect of a compatible dry paint cleaner. Before applying a ceramic or glass coating, remove residual oils and fillers according to the coating manufacturer’s preparation requirements.
📌 To select a product according to residue and final protection, see Types of Paint Cleaners|How to Choose Between Dry, Wet, Abrasive, and Glaze Formulas.
Frequently Asked Questions
How clean must the paint be before using a paint cleaner?
Remove particles that the applicator could drag from its travel area and the surrounding surface. If treating the entire vehicle, prepare the entire painted surface. If removing one transferred mark, clean only the mark and the surrounding working area. The entire vehicle does not always need professional-level clay-bar preparation before an owner-level paint cleaner process.
Why wash the paint twice?
You are not repeating the same process at the same contact level. The purpose is to increase contact gradually. A low-contact wash mitt first removes larger contamination. After the mitt removes that contamination, a fluffy towel increases contact and removes the thinner remaining film.
Should you use a paint cleaner after every wash?
No. If normal washing removes the target contamination and restores the appearance, there is no reason to increase surface contact. Use a paint cleaner when there is a removable surface film, paint transfer or scuff, or when you need a glaze effect to conceal minor defects.
Should I keep repeating the process if a mark or cloudy area remains?
Do not continuously increase pressure or repetition. If the remaining mark is a deep scratch, clear-coat damage or mineral etching rather than surface contamination, a paint cleaner cannot remove it efficiently. If one or two controlled tests on a small area produce little or no improvement, stop and determine whether the surface requires machine polishing or paint repair.
Does a glaze permanently remove the defects it conceals?
No. A glaze fills microscopic valleys and reduces irregular light scattering. The defects remain underneath and may reappear as the filling ingredients disappear. Because significant clear-coat removal did not correct the surface, you can reapply the glaze when necessary.
Conclusion
A paint cleaner is not simply a stronger cleaning chemical used after ordinary washing.
It is an owner-level polishing product that removes contamination and transferred material sitting on top of the clear coat, while some products also fill microscopic defects to make them less visible.
Its removal power comes from controlled and uniform applicator contact. Because increased contact also presses and drags anything trapped between the applicator and paint, preparation must come first.
Professional polishing preparation may use a clay bar to remove embedded contamination. An owner-level paint cleaner process can use two progressively higher-contact washes followed by a thorough rinse to remove movable particles with less effort and lower risk.
Paint cleaners offer a strong improvement relative to the required effort. They need no polishing machine, require less experience and do not depend on meaningful clear-coat removal to restore appearance.
Remove the surface film and gloss returns. Fill microscopic defects and the marks become less visible.
Why Repeatability Matters
The result may not last as long as professional correction. Fillers gradually wash away, and contamination film accumulates again through normal driving. You can simply treat the surface again.
| Professional Polishing | Paint Cleaner | |
|---|---|---|
| Maintenance rhythm | Occasional and intensive | Regular and light |
| Result from one application | Long-lasting | Shorter-lasting |
| Repetition | Consumes clear-coat thickness | Low burden when used correctly |
Professional polishing aims to complete correction in one intensive process. Manufacturers design paint cleaners as repeatable maintenance products. Their shorter durability is not necessarily a defect. It is part of the design.
Once you select the target and working area, move to the actual application technique.
Part 3 explains how to control applicator choice, pressure, movement and repetition so the applicator transfers cleaning power safely. It also examines how far vehicle owners can use a cordless machine within an owner-level paint-cleaning process.