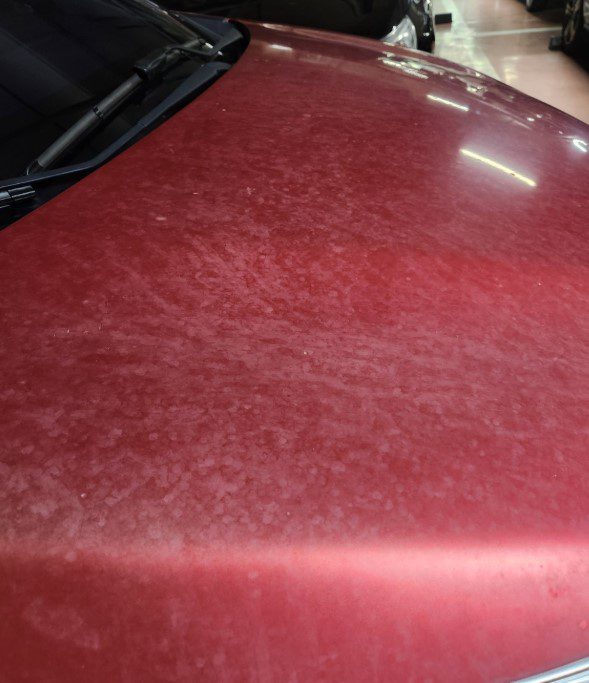
The same paint cleaner can produce very different results on the same paintwork. One person removes the contamination film cleanly, while another sees little change or leaves more marks than before.
When a mark refuses to come off, it is tempting to add more product and press the pad harder. A paint cleaner, however, does not rely on force from the start. The chemistry first loosens the bond between the contamination and the paint, and the pad then lifts away what the chemistry has weakened.
The key to how to use a paint cleaner is not simply applying the product and rubbing it. Spread a thin layer with almost no pressure, allow the chemistry time to work, and then use even pad contact to remove the loosened contamination.
If you apply pressure immediately, contact and movement increase before the chemistry has loosened the bond. You gain little cleaning power while increasing friction and scratch risk.
This guide explains how the pad creates the contact geometry, how hand pressure maintains that contact, and how the product and water provide enough lubrication for the pad to move safely. It also explains how a compact machine changes these three factors.
📌 For product selection, see Types of Paint Cleaner | Dry, Wet, Abrasive, and Glaze. To decide where paint cleaning fits into the wash process, see Paint Cleaner Process | From Preparation to Protection.
Key Takeaways (Click to Expand)
- Chemistry comes first; pad contact comes later.
Spread the product with low pressure, allow it time to work, and then use even pad contact to lift away the loosened contamination. - The pad creates the contact geometry.
Its structure determines how it touches the paint and how it collects contamination. - Pressure maintains the pad’s contact.
Use your palm, not your fingertips, to distribute light pressure evenly. - Lubrication allows the pad to move safely.
The product and water control friction. Stop when the product dries or the pad becomes contaminated. - Do not compensate for weak results with excess pressure.
First check whether the chemistry had enough time to work. Repeat only while the working conditions remain safe.
Contents
- Paint cleaner combines chemical cleaning with controlled contact
- The pad creates the contact geometry
- Pressure maintains pad contact
- The product and water provide lubrication
- How a machine changes the three factors
- Frequently asked questions
Paint cleaner combines chemical cleaning with controlled contact
A paint cleaner does not remove contamination through force alone. Its cleaning ingredients first loosen the bond between the contamination and the paint. The pad then removes what the chemistry has weakened.
Sequence matters. Chemistry comes first, and pad contact comes later. Contact should not tear away firmly bonded contamination; it should collect material that the chemistry has already loosened.
Spreading, dwelling, and removing are separate stages
Contamination removal has three stages: spread → dwell → remove. You may use the same pad throughout, but each stage requires a different purpose and pressure level.
| Stage | Purpose | Pad and pressure |
|---|---|---|
| Spread | Distribute the product evenly across the contamination and paint | Use almost no pressure and spread a thin layer |
| Dwell | Allow the cleaning ingredients to loosen the contamination | Lift the pad and wait for the time stated in the product instructions |
| Remove | Separate the loosened contamination from the paint | Maintain light, even contact across the whole pad and repeat only as needed |
Just as a polisher first spreads polish at low speed before the correction pass begins, a paint cleaner needs a separate spreading stage before removal. If you press and rub immediately, the contamination remains firmly bonded while contact and movement increase.
Removal and glazing are not the same process
The sequence above applies when you want to remove contamination. A glaze hides fine defects and does not need repeated contact to loosen contamination. Spread it thinly and evenly with a foam pad, then follow the product instructions for residue removal and curing.
Pad contact does not come from the pad alone. It results from the contact geometry created by the pad, the pressure distributed by the hand, and the lubrication supplied by the product. Cleaning power develops when that contact lifts away loosened contamination.
- The pad determines the shape of the contact against the paint.
- The hand distributes pressure so the pad maintains even contact.
- The product and water regulate friction so that contact can move safely.
If one factor fails, the others cannot work properly. Drying stops chemical action. Concentrated pressure breaks down even contact, while residue buildup in the pad weakens chemistry, contact, and lubrication at the same time.
Firm pad contact begins only during the removal stage, after the dwell stage has ended.
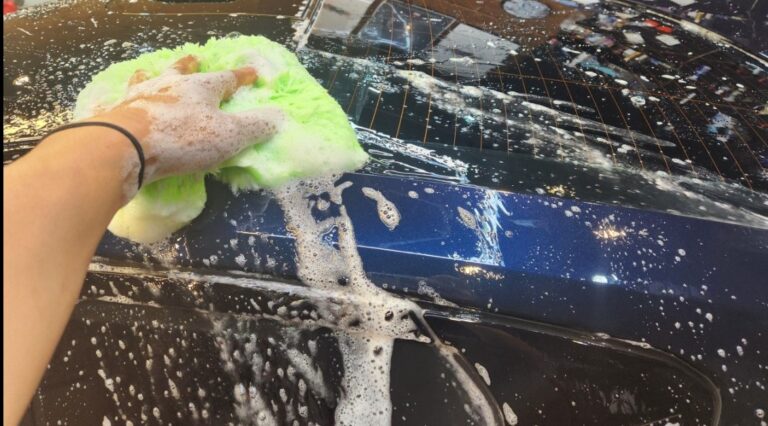
A wash mitt has low contact and offers some cushioning if a small amount of contamination remains. A paint-cleaner pad behaves differently. During removal, it stays close to the paint and presses anything trapped between the pad and the surface.
Preparation therefore does not guarantee safety for the rest of the job. Once removal begins, keep checking the pad, product, paint, and surrounding environment. Every precaution in this guide follows from this point.
The pad creates the contact geometry
The pad determines how it touches the paint. Its surface structure, pile density, and thickness create that contact geometry.
Surface structure|Microfiber and foam contact the paint differently
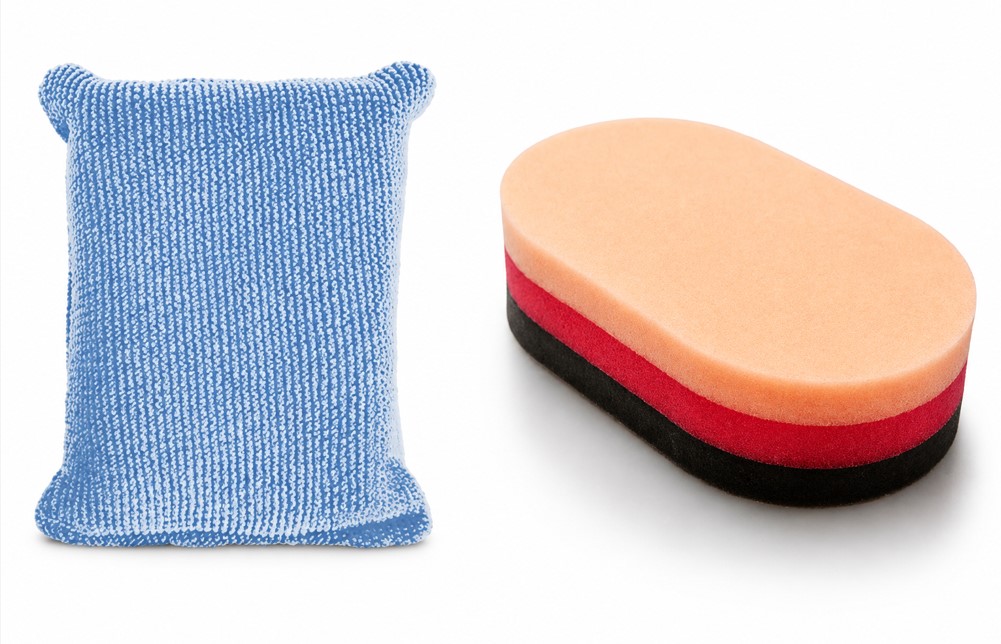
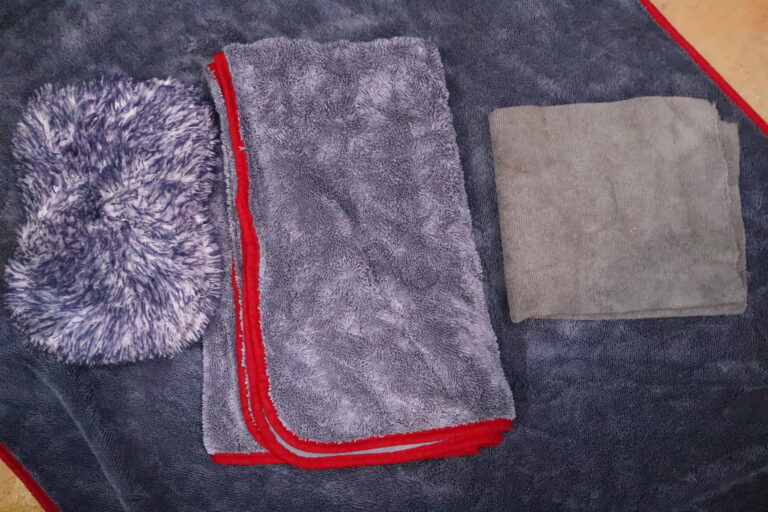
Two common hand applicators are a microfiber terry applicator and a foam German applicator pad.
A microfiber pad touches the paint through the tips of its fibers. Thousands of small points contact the surface, while the gaps between the fibers receive the contamination that the pad removes.
Each fiber tip has a small contact area, so it creates higher local contact pressure. The same hand force acts through smaller points and captures a contamination film more effectively. This pressure comes naturally from the pad structure; it does not mean that you should press harder with your hand. This structure explains the stronger cleaning ability of microfiber.
A foam pad contacts the paint across a broader surface. It spreads force more evenly and creates lower local contact pressure. The foam cells hold product and some residue, but they do not automatically isolate contamination from the paint. Check a foam pad regularly as well.
| Microfiber pad | Foam pad | |
|---|---|---|
| Typical tool | Terry applicator | German applicator pad |
| Contact type | Point contact through fiber tips | Broad surface contact |
| Local contact pressure | Relatively high | Relatively low |
| Residue capacity | Receives residue between the fibers | Holds product and some residue in the cells |
| Best suited to | Removing contamination films and paint transfer | Spreading product and finishing with a glaze |
This difference separates removal from filling. Fiber tips lift a contamination film, while a broad foam surface spreads a glaze thinly and evenly.
The extra cleaning ability of microfiber also brings extra risk. If a fiber tip catches a particle, it can drag that particle across the paint. Foam can create the same problem after it accumulates residue, but microfiber needs more frequent inspection because of its higher local contact pressure. Switch to a clean face or replace the applicator as soon as it loads up.
Pile density and open space|How freely can the fibers move?
This comparison assumes the same material and pile length and changes only the density. The key question is how freely the fibers can move.
Wide gaps allow the fibers to bend, spread, and collapse freely. Their contact points keep changing, and they distribute force across the open structure instead of maintaining consistent contact with the paint.
When higher density narrows those gaps, the fibers support one another. They resist collapsing or spreading, so the pad maintains its contact geometry. More fibers touch the paint consistently, and the broad face moves as one unit.
Good contact does not mean pressing harder. It means touching the paint evenly. To maintain even contact, the fibers must not move independently in every direction.
Those gaps also provide space for removed contamination. With the same material, pile length, and hand pressure, a denser pad places more fibers in consistent contact and raises cleaning ability, but it leaves less room to hold residue.
A pad with more stable contact also becomes contaminated sooner. Choosing an effective pad therefore means checking and replacing it more often.
📌 Paint Cleaner Process | From Preparation to Protection explains how contact changes across different wash tools. The same principle appears again within the pad itself.
Thickness|How the pad distributes pressure
A thick pad filters hand pressure before it reaches the paint. It spreads force across a broader area and follows curved panels more easily.
A thin pad transfers both hand pressure and surface feedback more directly. You can feel contamination or edges through it, but poor pressure control also reaches the paint without much cushioning. A thick pad suits broad or curved panels, while a thin pad suits flat panels and tight areas.
Which pad should you choose?
Choose a pad according to the task, not simply according to softness.
| Task | Pad | Reason |
|---|---|---|
| Remove a contamination film or paint transfer | Dense microfiber applicator | Fiber tips create higher local contact pressure and maintain their contact geometry |
| Spread product or finish with a glaze | Foam applicator | Its broad contact surface spreads the product evenly |
| Work on a curved panel | Thicker pad | It follows the panel and distributes pressure |
| Inspect and work a tight area | Small, thin pad | It preserves surface feedback and avoids nearby areas |
Pressure maintains pad contact
Contact and pressure are not separate forces. The result depends on where the same force acts.
Pressure distributed evenly across the pad maintains the contact geometry created by the pad. Pressure concentrated under a fingertip does not improve cleaning. It increases friction and risk in that one spot.
The hand should therefore spread force evenly, not add more of it.
This rule applies during removal. During spreading, your only goal is to deliver the product, so use almost no pressure. Lift the pad during the dwell stage. Apply only enough light, even pressure to maintain full-pad contact when removal begins.
The role of pressure|Keep the pad in place
The surface structure, density, and thickness of the pad determine how it contacts the paint. Hand pressure does not create a new form of contact.
Pressure simply keeps the pad’s existing contact surface evenly against the paint.
What matters is not how hard you press, but how evenly the entire pad touches the paint.
Hand position|Support the entire pad with your palm
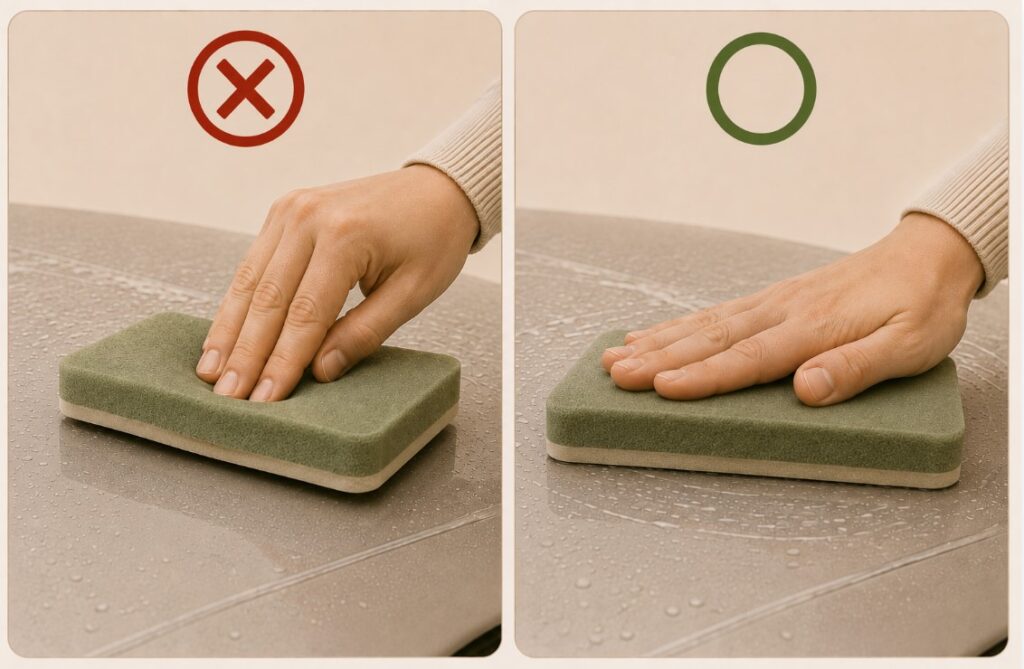
Pressing with your fingertips concentrates pressure beneath them. The center of the pad collapses, and contact becomes much stronger only under the fingers.
Supporting the pad with your whole palm distributes the same force across a wider area and helps the entire pad touch the paint evenly.
Fingertips concentrate pressure; the palm distributes it. Supporting the pad with your palm turns hand force into even contact across the applicator.
Curved panels|Pressure behaves differently than on a flat panel
On a flat panel, your palm can support the pad evenly. On a curve, the pad may fail to lie flat and touch only along one edge. Applying the same force then concentrates almost all pressure on that edge.
Reduce force on curves and adjust your hand angle so the pad follows the panel. A smaller applicator offers better control in narrow areas.
Excess pressure|It collapses the pad structure
Excess pressure does not improve contact. It deforms the pad.
- The contact surface bends or tilts to one side.
- Foam cells or the open spaces in microfiber collapse.
- The pad loses space for removed contamination.
- Pressure concentrates at the edge of the pad or beneath the fingers.
- The product film moves aside, increasing friction and heat.
Excess pressure does not hold the pad more securely. It destroys the structure designed to maintain even contact. If you press hard during spreading, physical contact increases before the chemistry has had time to work. The next section explains the relationship between the product film and friction.
When results fall short|Add time or a limited repeat, not force
Increasing pressure does not accelerate chemical bond loosening; it only raises friction. First check whether the chemistry had enough time to work. If contamination remains, repeat with light, even pressure only while the product remains wet and the pad remains clean.
Pressure cannot make chemistry work faster. Give the chemistry enough time, then repeat with even pad contact only while safe working conditions remain.
Repetition|Why it remains conditional
Every repeat increases the distance that the pad travels, so repetition itself raises scratch risk. Preparation lowers the amount of loose contamination that the pad can drag, while light, even hand pressure lowers the pressure component of that risk. Those two controls make a limited repeat possible.
Those conditions exist only at the start. They deteriorate as the work continues.
- Contamination builds up in the pad and raises the particle risk again.
- The product starts to dry and loses lubrication.
- In an outdoor wash bay, new dust can settle on the panel.
Repetition is not safe because you stay below a fixed number of passes. It remains acceptable only while the working conditions stay controlled, and every pass makes those conditions worse. Inspect the surface instead of relying on a preset count.
- Before the product dries
- Before the pad becomes contaminated
- Within the working time allowed by the manufacturer
Wind and airborne dust shorten this working window. A shaded area with little wind provides better conditions.
Repetition is not inherently safe. Preparation lowers the contamination risk and light pressure lowers the pressure risk, so you can use repetition only under controlled conditions.
📌 Why Scratch Risk Changes During the Car-Wash Process explains how particles, pressure, friction, and movement combine to create risk.
The product and water provide lubrication
When the product dries, chemistry and lubrication stop
Liquid performs different jobs during dwelling and removal. The pad does not move during the dwell stage, so lubrication matters less than keeping the cleaning ingredients in a liquid state. That liquid state allows the chemistry time to loosen the bond.
During removal, the same product film becomes the lubricant. It controls friction as the pad moves and provides time to collect the loosened contamination. When the product dries, both the chemical action and the lubrication stop. Moving a dry pad sharply increases friction and drags any remaining contamination across the paint.
The time before the product dries defines:
- the time available for chemical action,
- the time during which lubrication remains, and
- the usable working time.
All three refer to the same working window.
The right amount|Balancing contact and lubrication
Use a film thin enough for the microfiber or foam surface to contact the paint evenly, but wet enough to remain workable throughout the section. Too much product and too little product cause different problems.
| Condition | Surface signal | Problem | Response |
|---|---|---|---|
| Too much product | Product squeezes out from under the pad and residue keeps smearing | A thick film blurs pad contact and fills the pad’s open space too quickly | Remove the excess and spread a thinner layer |
| Product starts to dry | The pad begins to grab or the product clumps into dry residue | Chemical action and lubrication stop while friction rises sharply | Remove the residue from that section, then restart with a clean pad and fresh product |
When a section starts to dry, stop, remove the residue, and move to the next section. Continuing to rub a drying section causes many of the scratches associated with paint cleaners. This is often the moment when someone thinks, “It has not come off yet, so I should rub more.”
A thick product layer can reduce contact in a way that resembles a wash mitt loaded with shampoo solution. It does not completely separate the pad from the paint, but too much product dulls the pad’s cleaning action and increases the amount of residue that you must remove.
Dry-use products suit small sections; wet-use products cover more area
Dry-use and wet-use paint cleaners suit different working areas for more than cleaning-strength reasons. They receive lubrication from different sources and use different residue-removal methods.
| Dry-use | Wet-use | |
|---|---|---|
| Lubrication | The product creates the working film and lubrication | Water helps the product spread and supports pad movement |
| Residue removal | Pad and towel | Final rinse |
A dry-use product stops working after its own lubrication runs out. If you spread it across a large area at once, the far end can dry before the pad reaches it. Divide the panel into small sections and remove the residue before the product dries.
Water helps a wet-use product spread and supports pad movement, so you can connect larger sections more easily than with a dry-use product. Always follow the manufacturer’s instructions for section size and dwell time.
Part 2 explained why residue removal belongs to the same process. The main point here is that the removal method determines the working area. A dry-use product limits section size because you must wipe it before it dries. A final rinse gives a wet-use product more room.
A contaminated pad loses lubrication
As the job continues, the pad fills with contamination and product residue. Two problems develop at the same time.
- The pad loses open space for fresh product, so lubrication falls.
- Removed contamination remains on the pad surface and gets dragged back across the paint.
A pad that becomes dirty quickly may show that the product is working. The problem begins when you keep using it in that condition.
Changing the pad is risk management, not a matter of convenience. A loaded pad has less lubrication and drags the contamination that it has already removed.
Switch to a clean face or replace the pad, and prepare several towels before starting. The rate at which the pad becomes dirty also helps you estimate how much work remains.
How a machine changes the three factors
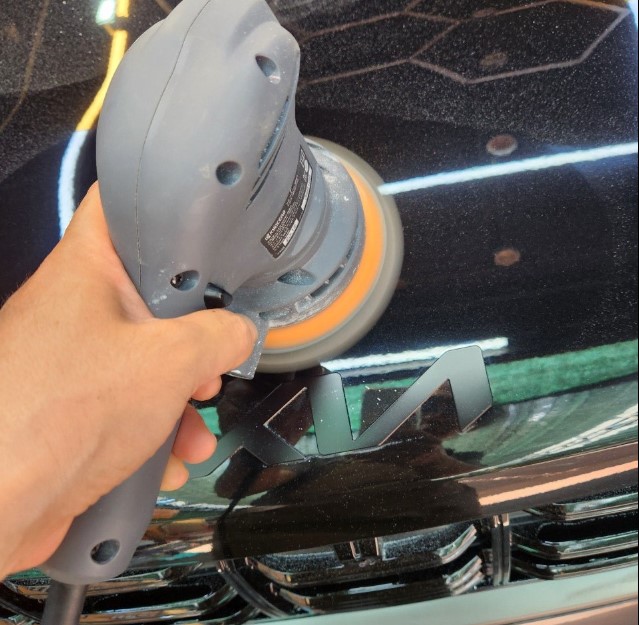
This section covers compact orbital or dual-action machines intended for product application and low-intensity repeated passes. The power source—battery or cord—does not determine suitability.
The sequence remains the same with a machine. Spread a thin layer at low speed, stop the machine, lift the pad from the paint, and wait for the time stated in the product instructions. Then use low speed and light pad contact to remove the loosened contamination. Do not keep the machine moving during the dwell stage. Starting at working speed only increases physical repetition before the chemistry can act.
Why avoid a powerful machine?
Professional paint correction may use a clay bar and complete decontamination before introducing a powerful machine. Paint-cleaner preparation usually stops earlier. It removes loose particles, but some bonded particles may remain.
High-speed rotation can drag any remaining particle across the same area many times in a short period.
The level of preparation must match the intensity of the machine.
Use low speed, light load, and a fine finishing pad.
- Choose dual action over rotary — It reduces the concentration of heat and action at one point.
- Use low speed and light load — Throw size alone does not determine safety. Speed, load, pad, and dwell over one spot determine the actual working intensity together.
- Use a fine pad — A cutting pad corrects paint. A paint cleaner needs product distribution and low-intensity repetition.
How contact, pressure, and lubrication change
| With a machine | |
|---|---|
| Contact | Movement and repetition become more consistent on flat panels. On curves and edges, however, the pad can tilt and concentrate contact on one side |
| Pressure | The machine’s weight supplies the base load, and the hand adds any extra pressure. Pressing beyond the machine’s weight distorts the contact surface and raises heat |
| Lubrication | Rotational heat dries the product faster, so you must work a smaller section |
A machine’s main advantage is consistent movement and repetition. It also creates many more contacts in the same amount of time, so both physical cleaning power and scratch risk rise compared with hand work. More consistent operation does not automatically mean safer operation.
Follow the same limits that apply to hand work.
- Do not stay over one area for too long.
- Avoid edges and tight curves where the pad cannot sit flat, or work them by hand.
- Inspect pad contamination frequently.
- Do not add pressure beyond the machine’s own weight.
Frequently asked questions
Why should I wait instead of rubbing immediately after application?
When you use a paint cleaner to remove contamination, the chemistry must loosen the bond before the pad collects the residue. Spread the product evenly with almost no pressure, lift the pad, and allow the product to dwell. Rubbing immediately replaces chemical cleaning with friction and repeated movement.
How long should a paint cleaner dwell before removal?
Follow the manufacturer’s instructions because products vary. The following times are only starting examples when the label provides no separate guidance: around 10 seconds for a wet-use product and roughly 30 seconds to one minute for a dry-use product. Do not treat these as fixed limits. The product must remain wet. Hot paint, direct sunlight, and wind can shorten the usable working time.
Can I press harder if the mark does not come off?
First check whether the chemistry had enough time to work. If contamination remains, repeat with light, even pressure only while the product stays wet and the pad stays clean. If the mark does not change, it may be damage within the paint rather than contamination on top of it.
Which applicator pad should I buy?
Choose according to the task. Use dense microfiber to remove a contamination film or paint transfer. Use foam to spread a glaze or wax. Choose a thicker pad when the vehicle has many curved panels.
How much product should I apply?
Use enough to keep a thin, workable film while allowing the microfiber or foam surface to touch the paint evenly. Product squeezing from under the pad and residue that keeps smearing indicate too much. A pad that suddenly grabs or product that clumps into dry residue signals the end of the working time. Follow the manufacturer’s quantity instructions when provided.
Can I spray water over dried product and continue working?
Do not simply spray water over dried product and continue rubbing. Water changes the product concentration and lubrication, while hardened residue and removed contamination may begin moving across the paint again. Remove the residue according to the product instructions, then restart with a clean pad and fresh product. For a wet-use product, rinse the section thoroughly before reapplying.
Does a glaze also need dwell time and repeated passes?
Contamination removal and glaze filling have different goals. A glaze fills fine valleys in the surface, so spread it thinly and evenly with a foam pad and follow its instructions for residue removal and curing. It does not need the increased contact and repetition used for contamination removal.
When should I replace the applicator pad?
Switch to a clean face or replace the pad when contamination becomes visible or the pad starts to move differently. A dense pad has less open space for contamination and can load up sooner.
Can I use a machine with a paint cleaner?
You can use a compact orbital or dual-action machine designed for product application and low-intensity passes. Use low speed, light load, and a fine finishing pad. Do not judge safety by throw size alone. Rotational heat dries the product faster, so reduce the section size.
Conclusion
Paint-cleaner results come from the pad’s contact geometry, the pressure distributed by the hand, and the lubrication supplied by the product. These factors do not begin at once. The process moves through product spreading, chemical dwell, and pad-assisted removal.
Very fine abrasives may remove some extremely light surface marks. Using a paint cleaner to correct scratches, however, remains inefficient. If the paint looks dramatically better immediately after use, glaze fillers may have contributed more than actual abrasion.
Spread the product with low pressure, allow the chemistry time to work, and then use even pad contact to lift away the loosened contamination. Do not compensate for weak results with excess pressure. Check the chemical dwell first, and repeat only with a clean pad, the correct amount of product, and safe working conditions.