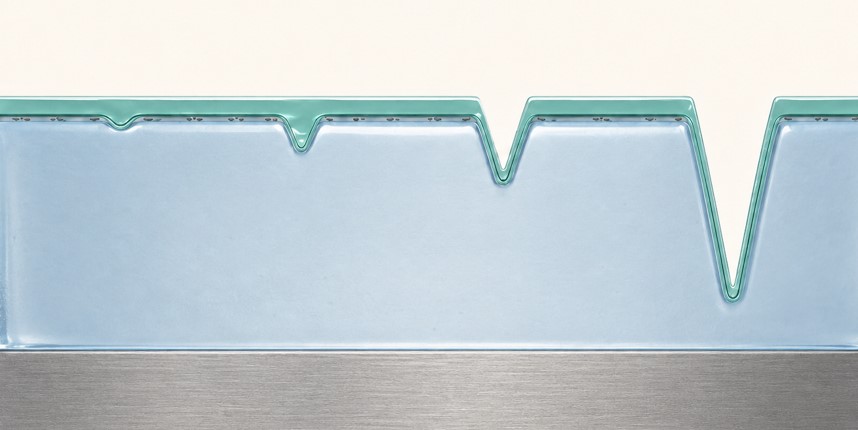
Some paint cleaner side effects may not appear immediately because the finish does not always show its true condition. Glaze and lubricating ingredients can fill microscopic valleys and reduce scattered reflection.
Unless you plan to apply a coating, you will rarely degrease the paint after using a paint cleaner. Most people inspect the result while the filling effect is still present.
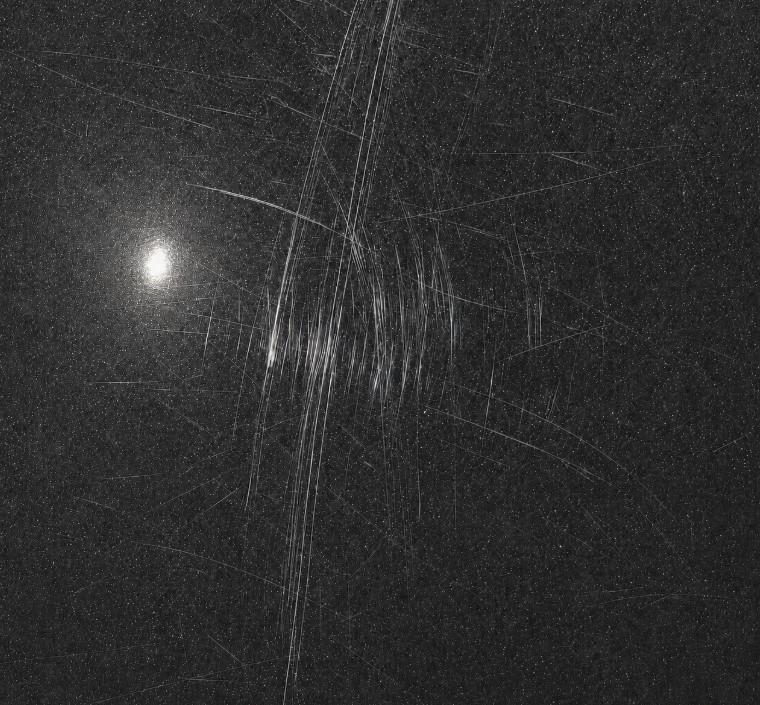
This helps explain why vehicles maintained carefully by their owners can still develop more swirl marks than expected.
The problem is not a lack of care. The problem is that each session ends while the paint still looks improved, so the owner loses the chance to adjust the contact used during washing and contamination removal.
A paint cleaner makes this risk especially difficult to notice. The pad creates closer contact than a wash mitt and passes over the same area repeatedly, yet the glaze can hide some of the fine marks immediately after the work.
By the time the filling ingredients wash away and the swirls return, it becomes difficult to identify which process created them. Meanwhile, the same pad, pressure, and technique may have been used again and again.
While contamination is still separating safely, pad contact restores clarity and gloss. Once little contamination remains to be removed, continued contact produces less visible improvement while scratch risk keeps accumulating.
Gloss is the reward for contact. Scratches are the cost of that same contact.
A paint cleaner is not a process for chasing every mark until it disappears. It is a process of deciding where to stop between the gloss gained through contact and the scratch risk that must be accepted.
The previous guide, How to Use a Paint Cleaner: Pads, Pressure & Dwell Time, explained how to perform the work. This guide explains why the work must stop at a certain point.
We will examine how particle contamination, excessive pressure, repeated passes, and outdoor conditions increase risk—and how glaze can take over once further removal is no longer the safer choice.
📌 For the working order and the practical control of pads, pressure, lubrication, and dwell time, see How to Use a Paint Cleaner: Pads, Pressure & Dwell Time.
Key Takeaways (Click to Expand)
- Glaze can delay visible side effects. It may temporarily hide fine marks created during the work, so the true paint condition often appears later.
- Scratch risk rises when particles remain under the pad, pressure becomes concentrated, passes continue, the product dries, or the pad fills with residue.
- Gloss and scratches can come from the same contact. Early contact removes contamination and restores clarity. Contact beyond the cleaning limit adds risk with little additional benefit.
- Stop when the visible change slows, the pad begins to drag, working conditions deteriorate, or you feel the need to press harder.
- After safe removal ends, let glaze refine the remaining appearance. Deeper scratches, etching, or paint damage require correction or repair instead of more rubbing with a paint cleaner.
Table of Contents
- Why Paint Cleaner Side Effects Appear Later
- When Does Scratch Risk Increase?
- Gloss and Scratches Come From the Same Contact
- Where Should You Stop Removing?
- After Removal Stops, Glaze Takes Over
- Frequently Asked Questions
Why Paint Cleaner Side Effects Appear Later
It Looks Like a Light Maintenance Product
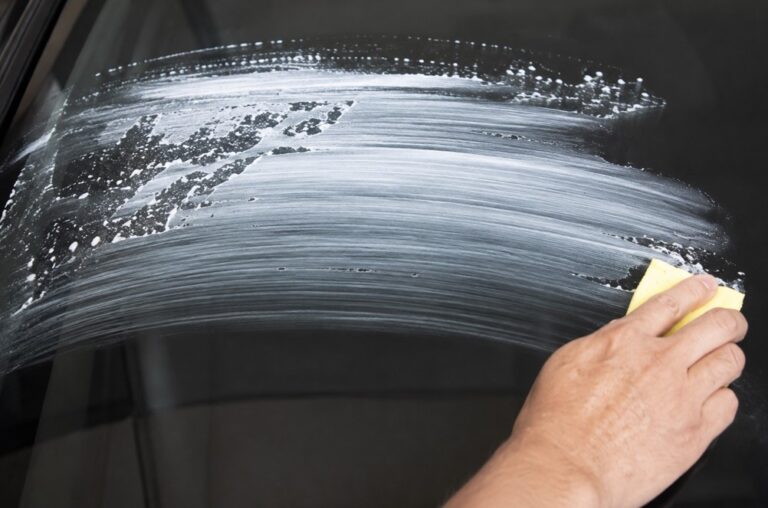
A paint cleaner does not look like a compound designed to correct the clear coat. Because you apply it by hand and wipe it away with a towel, it is easy to treat the process like waxing or sealing.
However, applying the product and removing contamination are different actions. During application, you spread a thin layer of product. During removal, the entire pad contacts the paint and travels repeatedly across the same area.
Compared with washing, this closer contact captures contamination directly. In that sense, the process moves in the same direction as machine polishing: more contact and more repeated movement.
Working by hand does not eliminate scratch risk. If particles remain on the surface, the pad can press and drag them across the paint.
When contact pressure becomes concentrated under the fingertips or along the edge of the pad, friction rises in those specific areas.
The main problem is perception. Because the product feels like simple maintenance, the user may skip the level of preparation and pad management normally expected before polishing.
The product may be easy to use, but the contact that removes contamination is not automatically light or harmless.
Glaze Temporarily Hides New Marks
Glaze ingredients fill microscopic valleys and reduce scattered reflection.
Existing swirl marks become less visible, while color depth and gloss return. This is one reason a paint cleaner can improve appearance without an extensive correction process.
However, the same effect may also make newly created fine marks less visible.
A particle caught under the pad may draw a fine line. Excessive pressure may create light friction marks. Yet the filling ingredients can prevent those marks from appearing clearly right away.
Glaze does not create the scratches. It simply performs its normal function by filling microscopic valleys.
That effect makes it difficult to separate the gloss gained by contamination removal from the new marks created during the work.
The Marks Return After the Fillers Wash Away
Before applying a ceramic or glass coating, detailers degrease the paint to create a clean bonding surface. When finishing with wax or sealant, however, they often preserve the oils and filling effect left by the paint cleaner.
The appearance immediately after the work therefore includes both the actual paint condition and the product’s temporary effects.
As washing and time remove the filling ingredients, the hidden swirl marks return.
If several washes, drying sessions, and buffing steps have taken place in the meantime, identifying the process that created those marks becomes difficult.
This delay encourages repetition. The result looks good immediately, so the same pad, pressure, and number of passes get used again next time.
Fine scratches often build through many small contact events rather than one obvious mistake.
When Does Scratch Risk Increase?
The name “paint cleaner” does not determine the risk.
Risk depends on what lies between the pad and paint, where the pressure concentrates, and how many times the pad travels over the same area.
Particle Contamination: What Remained and What Arrived Later
A paint-cleaner pad sits more evenly and closely against the paint than a wash mitt. If particles remain between the two surfaces, the pad presses and moves those particles with it.
A product’s abrasive particles have controlled sizes and shapes. Soil, sand, and dry dust do not.
📌 The preparation and working order used to reduce loose particles along the pad path are covered in How to Use a Paint Cleaner: Preparation to Protection.
Preparation establishes the surface condition at the start of the job. It does not guarantee that the surface will remain clean afterward.
Many self-service car washes operate outdoors or in open shared spaces.
Wind can deposit dust on paint that was just washed. Pressure washing or air-blower use in a neighboring bay can also send fine droplets and contamination toward the vehicle.
The surface may change even during the short time between drying the paint and preparing the product and pad.
For this reason, the current condition of the pad path matters more than the fact that preparation was completed earlier.
If you pause and restart or work one panel for an extended period, inspect the surface under suitable lighting. Clean that section again when necessary.
Excessive Pressure: Chasing a Mark That Will Not Move
When contamination remains, many people instinctively add pressure. Pressure, however, does not accelerate a chemical reaction. If chemistry has not loosened the contamination sufficiently, extra force increases friction before it improves removal.
Excessive pressure also collapses the pad structure. Microfiber spaces or foam cells compress, and contact pressure concentrates in the center of the pad or under the fingertips. The pad has less space to hold separated contamination, while the product film gets pushed aside and provides less lubrication.
If the contamination has not loosened enough, the process needs more reaction time—not more force.
Apply another thin layer, allow the product to work within the manufacturer’s instructions, and repeat with low pressure. This is safer and usually more effective than pressing harder over a drying product film.
Allowing reaction time does not mean allowing the product to dry. The manufacturer’s instructions always take priority. When the product provides no separate guidance, use 30 seconds to one minute for dry-use work and around 10 seconds for wet-use work only as cautious starting points.
Hot paint, direct sunlight, and airflow can shorten the actual working time.
The longer you chase a mark that refuses to move, the more naturally your hand begins to press harder.
At that moment, the process shifts. You are no longer collecting contamination that chemistry has loosened. You are trying to detach a bonded mark through friction.
Repeated Passes: Travel Distance and Pad Condition Accumulate Together
Repeated passes accumulate risk even under low pressure. Every additional movement gives trapped particles another opportunity to travel across the paint.
The pad also changes as it moves. Separated contamination and product residue collect in the material, the product gradually dries, and the hand begins to add movement or pressure to maintain the same feel.
In other words, the conditions become less favorable with each later pass.
Setting a fixed number of passes does not solve the problem.
Three passes with a clean pad and a wet product film do not create the same conditions as three passes with a residue-loaded pad. Inspect the pad and working conditions after each pass instead of relying only on a preset count.
Drying Product and a Dirty Pad: Conditions Keep Getting Worse
While the product remains liquid, its chemistry continues to work and its film lubricates pad movement.
Once the product dries, both functions weaken. The pad stops gliding smoothly and begins to grab the surface.
Pad contamination creates a similar warning. When residue fills the spaces between microfiber strands or the cells in foam, the pad has less room to accept fresh product. Contamination already removed from the paint also returns to the contact surface. A pad becoming dirty quickly can show that it is removing contamination, but continuing to use it in that condition creates a separate risk.
Adding more product may briefly improve movement. However, more product cannot fully restore lubrication when contamination has already filled the pad.
Remove the residue first, then switch to a clean side or a fresh pad.
📌 For a detailed explanation of how particles, pressure, friction, and movement change scratch risk, see How to Prevent Car Scratches: The Ultimate Detailing Guide.
Gloss and Scratches Come From the Same Contact
The Early Stage: Contamination Removal Produces a Large Benefit
When a contamination film still clouds the paint, pad contact produces a clear result. Chemistry loosens the bond, the pad collects the film, and the paint begins to reflect light more evenly.
Contamination appears on the pad and towel, while the treated section gains color depth and gloss.
During this stage, contact provides a large benefit. Low, even pressure and a limited number of passes produce visible change, so there is no reason to increase force.
This productive early stage is why a paint cleaner can deliver such a strong improvement for relatively little effort.
The Limit: Gloss Improves More Slowly While Risk Keeps Accumulating
Once most of the contamination that can separate safely has been removed, the rate of change slows.
Another pass transfers less contamination to the pad or towel, and the appearance under the same light changes very little.
The cost of contact does not disappear. The pad continues to move, residue continues to accumulate, and the remaining working time of the product becomes shorter.
Outdoors, the chance of new particles reaching the surface also increases with time.
Gloss improvement and scratch risk therefore do not rise at the same rate from start to finish.
At first, a small amount of risk produces a large visual change. Near the limit, the process requires much more contact for a much smaller improvement.
Beyond a certain point, new scratch risk begins to rise faster than the gloss you gain.
The Reward and Cost of Contact
Gloss is the reward for contact. Scratches are the cost of that same contact.
This does not mean that all contact should be avoided. Removing contamination requires necessary contact. The important part is evaluating both the result gained from that contact and the risk created by it.
If contamination continues to decrease, the contact still serves a purpose. If visible change has stopped while pressure and repetition keep increasing, the same contact no longer provides enough benefit.
Continuing at that point does not improve gloss. It exposes the result you have already achieved to additional risk.
Professional paint correction involves the same trade-off. More polishing can reduce more defects, but it also removes more clear coat.
A paint cleaner removes far less paint, especially when it contains no abrasives, but that does not eliminate the cost of contact scratches.
Where Should You Stop Removing?
The stopping point is not a fixed pressure level or pass count. Compare the surface with its starting condition, then check whether contamination continues to decrease, whether the pad still moves in the same way, and whether the environment remains suitable.
Visual Signal: Repeated Passes No Longer Change the Mark
Start with a small test area and low pressure. If one or two limited passes make the mark lighter or transfer contamination to the pad, the target is likely a layer sitting above the clear coat.
If the same conditions produce almost no change, stop. The remaining mark may be strongly bonded contamination, a scratch within the clear coat, or etching.
Using the same method more aggressively does not solve a change in the target itself.
If the whole panel already shows even gloss, do not keep expanding the working area to chase one small mark.
It is easy to repeatedly contact normal surrounding paint while concentrating on a single localized defect.
Tactile Signal: The Pad Begins to Drag
Sometimes your hand detects the warning before your eyes do. If the pad begins to drag, grab, or stop during movement, one of the working conditions has changed. Pressing harder may temporarily overcome that resistance, but it increases risk.
Lift the pad, remove the residue, and restart only if you can restore safe working conditions.
Environmental Signal: The Working Conditions Break Down
Outdoor variables continue to affect the surface after work begins. These changes cannot be corrected simply by adding more product or pressure. You must clean the paint again or change the working time or location.
If you cannot restore the conditions, stop the job for the day.
The Moment You Want to Press Harder
When a mark barely changes, the hand naturally wants to press harder.
That urge can itself signal that you have reached the end of what the current chemistry and pad contact can remove safely.
At that moment, reassess the target instead of adding force.
- Is the remaining material contamination above the clear coat?
- Does it require a different chemical reaction?
- Is it a minor visual defect that glaze can conceal?
- Is it paint damage that requires polishing or repair?
Once you identify the target correctly, you can choose the correct next process. Increasing pressure without that distinction treats every mark as if it were the same.
After Removal Stops, Glaze Takes Over
Remove Everything That Can Be Removed Safely First
Choosing glaze does not mean skipping preparation and contamination removal.
First remove loose particles that could travel under the pad, contamination that normal washing can remove, and films that separate under low pressure.
This preparation allows the glaze to spread evenly and prevents particles from being dragged during the final towel wipe.
Removal and concealment are not competing methods. They have an order.
Remove what can be removed safely → stop when further contact creates more risk → let glaze refine the remaining appearance.
Glaze is not a compromise made instead of cleaning. It becomes the appropriate choice after you accept the safe limit of removal.
Use Glaze to Refine the Fine Marks That Remain
Even after the contamination film has been removed, fine swirl marks, light etching, and uneven reflection may remain. Eliminating them completely requires stronger abrasion and a higher level of preparation than a paint cleaner.
If routine owner maintenance does not justify that level of correction, glaze can take over. Spread it thinly and evenly with a foam pad. The glaze fills microscopic valleys and reduces scattered reflection, improving color depth and gloss without chasing every mark or removing more clear coat.
The effect does not last indefinitely. Washing and time gradually remove the filling ingredients. However, reapplication requires little effort and causes almost no paint loss, which makes glaze well suited to repeat maintenance.
What Glaze Must Not Cover
Glaze does not make particle contamination safe. If you cover raised particles, tar, iron contamination, or loose dust, those contaminants may travel under the applicator or towel during application and buffing.
Glaze should address visual irregularities that remain after safe cleaning—not contamination itself. Distinguish between contamination that could have been removed safely and fine defects left because further removal would create too much risk.
Coating preparation also requires a different approach. The oils and fillers in glaze may interfere with coating adhesion, so remove them through an appropriate panel wipe. Inspect the uncovered paint, complete any required correction, and then apply the coating.
📌 For choosing between dry-use, wet-use, abrasive, and glaze formulas, see Types of Paint Cleaners: Dry, Wet, Abrasive & Glaze.
Marks That Need Paint Correction or Repair
Deep scratches that remain obvious under glaze, damage that catches a fingernail, and clear-coat failure sit outside the range of a paint cleaner. Pronounced etching and broad oxidation also require paint inspection before deciding whether professional correction is appropriate. When the mark does not respond, change the process instead of using the same process more aggressively.
Polishing cannot restore paint that has chipped, peeled, or worn through. Those areas require spot repair or refinishing. Stopping does not mean giving up. It means passing the defect to the process designed for it.
Frequently Asked Questions
Will the mark eventually disappear if I keep rubbing?
It may. However, each repeated pass removes less contamination while increasing pad travel and residue. New scratch risk can begin to rise faster than the gloss you gain. A paint cleaner is not meant to chase every mark to complete removal. It requires a stopping point. There is no fixed correct number of passes. Repeat only while the product remains wet, the pad remains clean, and the surface continues to show real change.
Can I cover contamination with glaze instead of removing it?
No. First remove particles that can move under the pad and contamination that normal cleaning can release. Glaze does not make contamination safe. It makes fine defects and uneven reflection less visible after safe cleaning.
Should I add more product when the pad begins to drag?
Do not add product immediately. First check whether the product has dried, the pad has filled with contamination and residue, or new particles have reached the surface. Remove residue from the section, switch to a clean pad, and restart with fresh product only when necessary.
Can I use a paint cleaner at an outdoor self-service car wash?
Yes, but the safe working window is shorter. Work in the shade with as little wind as possible, divide the vehicle into small sections, and inspect the surface again before placing the pad on it. If pressure washing or air-blower use in a neighboring bay introduces contamination, clean the affected area again before continuing.
How can I tell whether a remaining mark is contamination or paint damage?
Test a small, clean area according to the product instructions. If one or two passes make the mark lighter or transfer material to the pad, it likely sits above the clear coat. If it barely changes, catches a fingernail, or appears to lie within the clear coat, suspect a scratch, etching, or paint damage.
Can I apply a coating after using a glaze?
Do not apply the coating directly over it. Glaze oils and fillers can interfere with coating adhesion. Remove them with a panel wipe that suits the product instructions, inspect the exposed paint again, complete any required correction, and then apply the coating.
Conclusion
Paint cleaner side effects do not occur only because a product is strong. Risk grows when a process that appears simple fails to control particles, pressure, repeated movement, and pad condition. Because glaze does not reveal those marks immediately, the same technique can continue through multiple maintenance sessions.
Pad contact removes contamination film and restores gloss. Once safely removable contamination has decreased, however, continued contact produces less visible improvement while scratch risk keeps accumulating.
Remove everything that separates safely. Stop when the work begins to require greater pressure or more repeated passes. Let glaze refine the fine appearance that remains, and pass defects beyond the range of glaze to paint correction or repair. The best result is not the one created by the most rubbing. It is the one achieved with the least necessary risk.
A paint cleaner is complete not when every mark has disappeared, but when you have compared the gloss available with the scratch risk required, stopped removal at the right point, and used concealment to refine what safely remains.