If your car seems to collect more swirl marks after every self-service wash, weak cleaning power may not be the real problem.
Scratches often begin when contamination remains between the paint and a wash tool, then moves under pressure and friction.
Detailing is not simply about using stronger chemicals or adding more equipment. It is about removing contamination while controlling the risk created during washing, drying and buffing.
This guide is designed primarily for a vehicle maintained every one to two weeks, before everyday contamination becomes heavily bonded. It explains a five-step detailing wash that can be adapted to the wide variety of self-service and pay-and-spray car washes found across the United States.
Principle: Detailing begins by reducing contamination and ends by reducing friction.
Process: Cool-down and interior cleaning → pressure rinse, pre-soak and wheels → contact wash → final rinse and drying → protection and final buff
Risk formula: Contamination × Pressure × Friction × Movement = Scratch Risk
📱 Self-Service Car Wash: 5-Step Quick Guide — Tap to Open
Risk formula: Contamination × Pressure × Friction × Movement = Scratch Risk
-
Step 1|Check the Temperature and Clean the Interior
Check the temperature of the paint and wheels. If the surface feels uncomfortably hot, wait before applying water or chemicals. Clean the floor mats and interior while the vehicle cools so dust-producing work is completed before the exterior wash. -
Step 2|Pressure Rinse, Pre-Soak and Clean the Wheels
Keep the pressure wand about 12–20 inches (30–50 cm) from the paint as a starting distance. Move slowly from the top down and slightly overlap each pass. Apply pre-soak, high-pressure soap or foam without allowing it to dry. Clean the wheels with dedicated tools or a properly washed microfiber towel that has been reassigned from paint duty. -
Step 3|Contact Wash with a Fully Loaded Wash Mitt
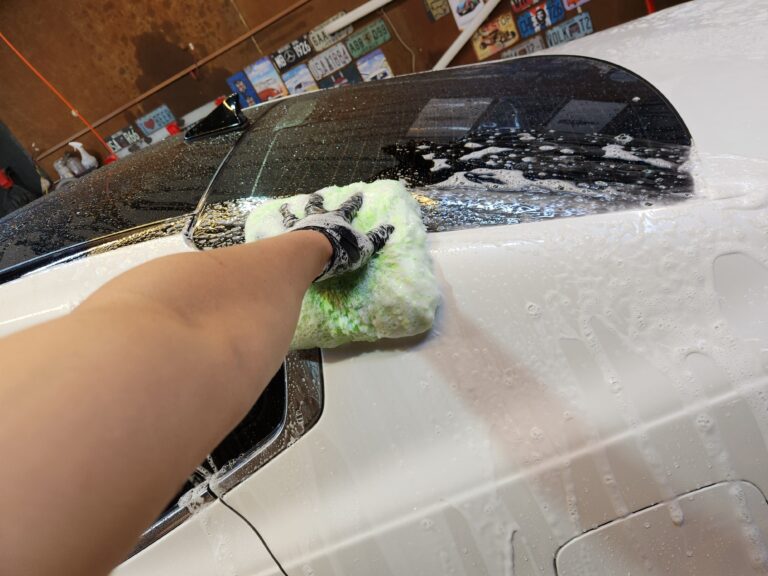
Rinse first if the foam becomes visibly dirty, begins to dry or contains an unknown bay chemical. Fully saturate the wash mitt with fresh car-shampoo solution and do not wring it dry. Shampoo flowing ahead of the mitt maintains lubrication and helps flush released contamination away from the contact point. When that flow becomes weak or stops, clean or replace the mitt and reload it before continuing. -
Step 4|Final Rinse and Drying
Rinse the grille, badges, mirror housings, handles and panel gaps thoroughly. Allow the largest sheets of water to drain, then place the drying towel on the paint and give it time to absorb. Fold a large towel for better control. If it must move, slightly lift its leading edge instead of pressing down or dragging the full weight of the wet towel. -
Step 5|Apply Protection and Perform the Final Buff
Inspect the paint for remaining water, dust and solid particles before applying protection. Apply a thin, even layer and remove only the excess residue with a clean, folded microfiber towel. Bonded iron, tar and mineral deposits require cleaners matched to the contamination, but chemical cleaning also has limits. Do not force the contamination off—once a scratch is created, the problem may require polishing rather than additional cleaner.
This quick guide is primarily intended for vehicles maintained every one to two weeks. Adjust the wash interval, chemical strength and process to the vehicle’s condition, local climate, road exposure and the posted rules of the self-service facility.
Contents
- The Difference Between a Basic Wash and a Detailing Wash
- Wash Frequency, Local Conditions and Personal Equipment
- Five-Step Self-Service Detailing Wash
- Self-Service Car Wash FAQ
- Final Thoughts|There Is No Single Correct Way to Wash a Car
1. The Difference Between a Basic Wash and a Detailing Wash
Both methods remove contamination
A basic car wash and a detailing wash share the same purpose: removing contamination and leaving the vehicle clean.
Detailing does not always require stronger chemicals, machine polishing or the complete removal of every bonded contaminant.
The main difference lies less in the final appearance than in the process used to reach it.
A detailing wash also asks: How well did the process control scratch risk while removing contamination?
Detailing controls scratch risk
Car-wash scratches do not appear simply because a tool touches the paint.
Contamination raises the risk when it remains between the paint and a wash tool, receives pressure and friction, and then moves across the surface.
Contamination × Pressure × Friction × Movement = Scratch Risk
A touchless pre-wash reduces the contamination that the wash mitt must handle. Shampoo solution lowers friction at the contact area.
Using the broad face of a mitt or towel distributes pressure. Avoiding unnecessary repeated passes limits how far the remaining contamination and wash tools move across the paint.
Temperature, wash order, dedicated tools and maintenance frequency all matter for the same reason.
- Temperature control: Gives water and chemicals enough time to work before they dry.
- Wash order: Removes as much contamination as possible before contact.
- Dedicated tools: Keeps wheel and lower-body contamination away from paint tools.
- Shorter maintenance intervals: Limit the time that ordinary contamination has to bond firmly to the surface.
A wash begins with contamination control and ends with friction control
During the contact-wash stage, contamination usually creates the largest variable.
As the process moves into drying and final product removal, less contamination should remain. However, the lubrication from water and car shampoo also disappears.
Friction then becomes a more important part of scratch control.
Reaching the final stages does not automatically make the wash safer. The early stages must reduce contamination, while the later stages must reduce friction.
For a deeper explanation, see Why Scratch Risk Changes During Washing, Drying and Buffing.
2. Wash Frequency, Local Conditions and Personal Equipment
Why wash every one to two weeks?
Fresh dust, road film and light environmental contamination usually release more easily than contamination that has remained on the paint for weeks.
Rain, heat and repeated wet-and-dry cycles gradually strengthen the connection between contamination and the surface. Washing every one to two weeks can help maintain the vehicle without aggressive chemicals or heavy physical contact.
A shorter interval especially helps black and other dark-colored vehicles because these colors reveal swirl marks and water spots more clearly.
Some contaminants need quicker action. Remove bird droppings, bug remains, tree sap and heavy mud as soon as practical instead of waiting for the normal schedule.
Good maintenance does not mean performing a deep wash every time. It means keeping the vehicle in a condition that does not require one.
The United States does not have one wash environment
A one-to-two-week interval provides a starting point, not a national rule.
The United States contains very different climates, road conditions and parking environments. Each driver should adjust the wash process to local conditions and the contamination on the vehicle.
- Hot and dry regions: Paint can become extremely hot, while water and chemicals may dry within minutes. Wash early, later in the day or in shade when possible.
- Snowbelt and mountain regions: Road salt and liquid brine collect on wheels, lower panels and the underbody. These areas may need rinsing before the normal maintenance date arrives.
- Coastal regions: Salt spray and sand add loose particles that require thorough touchless removal before contact.
- Humid, wooded or high-pollen regions: Pollen, insects, bird droppings, tree sap and organic debris may shorten the practical maintenance interval.
- Rural and off-road conditions: Thick mud and embedded grit can move the vehicle beyond the light-maintenance process in this guide.
These categories do not create rigid geographic rules. The vehicle’s actual condition matters more than the state on its license plate.
Self-service car wash culture varies by facility
Drivers in the United States may call the same type of facility a coin-op wash, pay-and-spray wash or self-serve bay.
Some locations provide only a pressure wand, high-pressure soap, a shared foaming brush and a rinse setting. Others offer tire cleaner, pre-soak, foam, wax, spot-free rinse, vacuums or air dryers.
No universal equipment menu exists.
One facility may allow bucket washing, personal chemicals and extended hand washing, while another may prohibit them. Some operators allow personal equipment only during quiet hours.
Read the posted rules before unloading your supplies.
Commercial self-service washes also offer a useful option where local rules restrict driveway washing or runoff would enter a storm drain. The U.S. EPA’s vehicle-washing guidance explains that commercial washes often recycle water or route it for treatment, while residential runoff can carry detergent and vehicle contamination into storm drains.
The Washington State Department of Ecology also recommends commercial self-service or machine washes when driveway runoff could enter local waterways.
Separate facility equipment from personal contact tools
You can generally use the pressure wand and touchless chemical programs without touching the paint.
The shared foaming brush creates a different risk.
Previous users may have placed it on muddy trucks, wheels, tires, truck beds or heavily contaminated lower panels. Even when the bristles feel soft, trapped particles can move across the paint under pressure.
Keep the shared foaming brush off the paint.
Use a personal wash mitt and paint-safe towels for every stage that directly touches the vehicle.
Choose a wash setup that fits the facility
Bring only the equipment that the facility permits and that you can use safely.
When the facility allows buckets and provides clean rinse water
You can use one bucket sequentially for a lightly contaminated maintenance wash.
If you use it for the wheels first, discard the dirty solution and clean the bucket thoroughly. Refill it with fresh shampoo solution before washing the paint.
Rinse the wash mitt outside the shampoo bucket after each small section. This method keeps released contamination from circulating through the clean shampoo solution.
When the facility allows buckets but provides no clean-water tap
Bring one shampoo bucket and several clean wash mitts or wash pads.
Use one clean mitt for a section, then place it in a separate dirty-tool bag or container. Never return a contaminated mitt to the clean shampoo solution.
You may also need a small wheel container because you cannot safely clean and refill the body-wash bucket at the facility.
When the facility prohibits buckets or hand washing
Use the bay only for the touchless stages that the operator permits.
Do not replace a personal wash mitt with the shared foaming brush. Complete the contact wash later at a location that allows hand washing, or choose another facility that supports detailing-style washing.
What personal equipment should you bring?
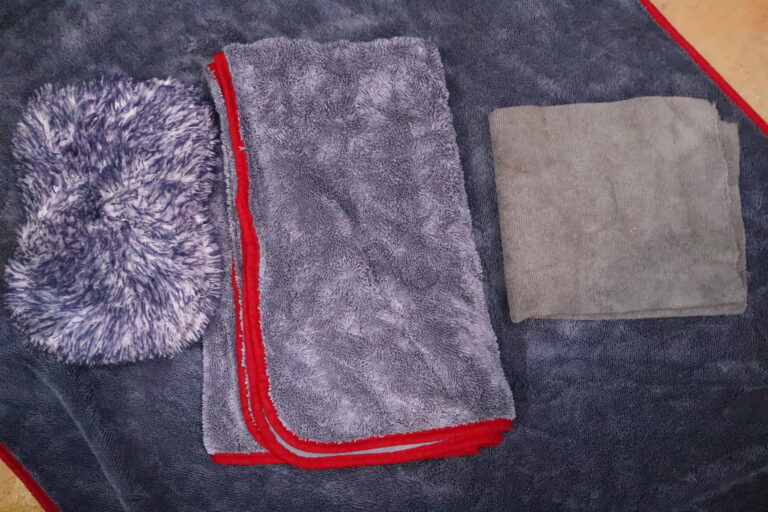
Wash mitt
Do not choose a wash mitt solely by how soft it feels when dry.
The mitt should remain soft after absorbing shampoo solution. It also needs to hold enough solution to carry it to the paint, allow liquid to flow through the fibers, keep the pile free to move and maintain enough outer-pile depth to distribute pressure.
A good wash mitt does not scrub contamination away through force. Instead, it carries shampoo to the contact area and manages contamination, pressure and friction together.
Why You Need a Wash Mitt to Reduce Car-Wash Scratches
Drying towel
A very thin towel may leave water behind and require repeated passes. An excessively large or heavy towel can become difficult to control after it absorbs water.
Choose a drying towel that balances absorption and control. A medium-weight twist-loop towel provides a practical starting point.
Car Drying Guide|How to Use Drying Towels and Air Safely
Paint-safe microfiber towels
Prepare several clean microfiber towels for protection, final buffing and small amounts of remaining water.
Look for sufficient pile, soft edges and enough towels to supply a clean face whenever the previous face collects residue. A 70:30 polyester-to-polyamide blend offers one useful specification, although construction and edge quality still matter.
Microfiber Towel Care and 70:30 Blends
You will also need car shampoo or car-wash soap, a bucket setup that fits the facility, paint protection and separate tools for wheels, tires and lower-body areas.
3. Five-Step Self-Service Detailing Wash
Step 1 – Cool the Vehicle and Clean the Interior
Check the surface temperature
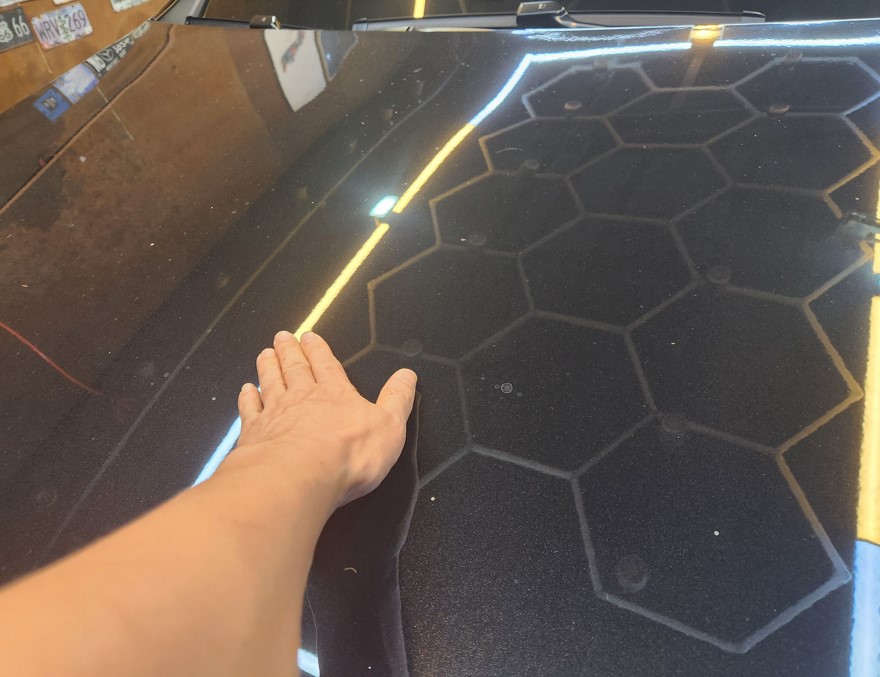
Do not begin the exterior wash immediately after a long drive or after direct sunlight heats the vehicle.
Hot paint makes water and chemicals dry too quickly. Fast drying can leave chemical residue and concentrate minerals into visible water marks.
Place your hand lightly on the hood or roof.
If the surface feels uncomfortably hot, wait before applying water or chemicals. In hot climates, an early-morning, evening or covered-bay wash usually provides more working time.
Cooling the vehicle means more than waiting. It creates enough time for water and chemicals to work before they dry.
Clean the interior while the exterior cools
Many U.S. self-service facilities provide a separate vacuum area.
Remove the floor mats, vacuum the interior and finish any dust-producing work before entering the wash bay when possible.
Interior cleaning after the exterior wash can move dust back onto freshly cleaned paint. Opening the doors and using compressed air or a blower can spread that contamination.
Use the separate vacuum area whenever the facility provides one, and avoid holding a wash bay while other customers wait.
Step 1 principle: Confirm that the paint feels cool enough to wash, then finish dust-producing interior work before cleaning the exterior.
Step 2 – Pressure Rinse, Pre-Soak and Clean the Wheels
Prepare before starting the timer
Many pay-and-spray bays charge by time.
Place the wash mitts, wheel tools and towels within easy reach and keep them off the ground. Choose the wash settings you plan to use before inserting payment.
Preparation prevents rushed rinsing and reduces the chance that chemicals will dry while you search for equipment.
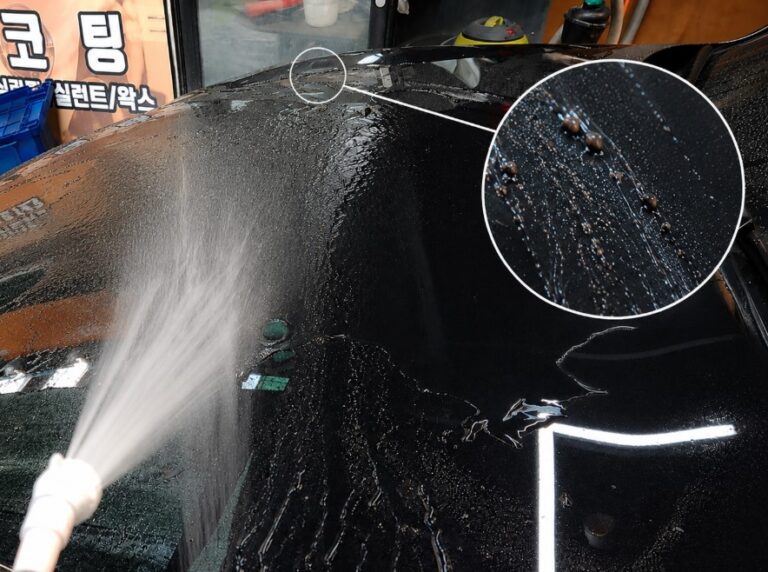
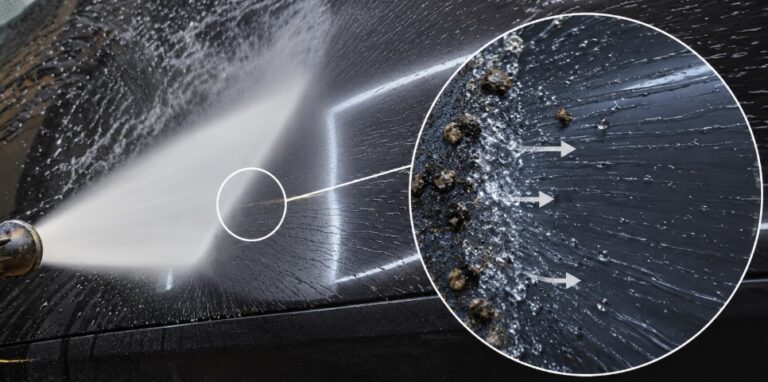
Remove loose contamination with the pressure wand
Hold the nozzle approximately 12–20 inches or 30–50 cm from the paint as a starting distance.
Pressure differs across facilities, so adjust the distance to the equipment and the condition of the surface. Give damaged paint, lifting clear coat, paint-protection film edges, wraps, decals and vulnerable trim more distance.
Do not wave the wand quickly over the vehicle just to make it wet.
Move slowly from the top down as though you were sweeping contamination off the surface. Overlap each pass slightly so the water does not leave untreated strips between passes.
Rinse the wheel wells and heavily contaminated lower sections thoroughly. At the same time, keep the pressure-washer hose from rubbing against the paint or catching around mirrors and corners.
Use pre-soak, high-pressure soap or foam
Not every U.S. self-service wash provides a foam cannon.
A facility may label its chemical program pre-soak, high-pressure soap, foam or presoak conditioner. Thick foam does not determine cleaning performance by itself.
The chemical should wet the remaining contamination, weaken its attachment and reduce the amount that the wash mitt must handle.
Give the product enough time to work, but rinse it before it dries.
If the bay supplies soap only through a shared foaming brush, keep the brush off the paint. Use a separate touchless soap setting or an approved personal sprayer when facility rules permit one.
Adjust the wheel order to the bay and weather
In a cool, covered bay, you can clean lightly contaminated wheels while the body pre-soak remains wet.
Hot, dry or tightly timed conditions require a different order. Clean the wheels before applying foam to the body so the body chemical does not dry during detailed wheel work.
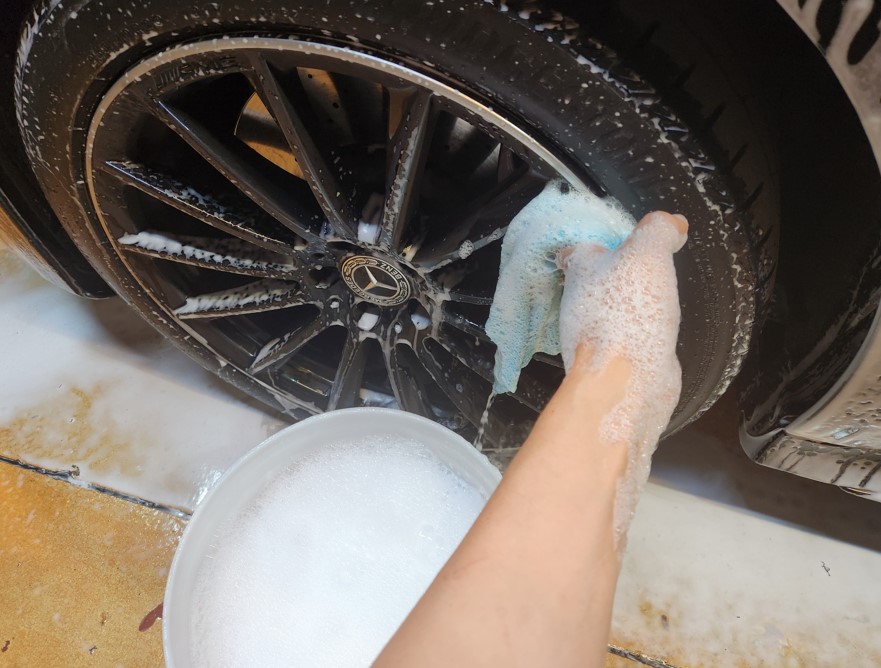
Use dedicated wheel tools or choose a clean microfiber towel that you have permanently reassigned from paint duty.
A reassigned towel does not simply mean a dirty or damaged towel. Wash it properly first, then move it to wheel duty when it no longer meets your standard for paint.
A towel may clean a lightly contaminated tire sidewall. Raised lettering, grooves and textured rubber, however, may require a tire brush.
If you use the same bucket for wheels and paint, discard the wheel solution and clean the bucket thoroughly. Refill it with fresh body-wash shampoo before moving to the paint.
Never return the wheel towel or tire brush to paint duty.
Step 2 principle: Remove as much contamination as possible before the wash mitt touches the vehicle.
Step 3 – Perform the Contact Wash According to Contamination Level
Lightly contaminated maintenance vehicles
A vehicle that you wash every one to two weeks may lose most visible loose contamination during the first pressure rinse.
Begin a contact wash while the foam remains wet only when:
- the facility permits hand washing;
- the foam uses a contact-safe shampoo rather than an unknown pre-soak;
- the surface remains wet; and
- the wash mitt holds plenty of fresh shampoo solution.
Manufacturers formulate many bay chemicals only to weaken contamination before rinsing. Those products may not provide enough lubrication for wash-mitt contact.
If you do not know the chemical type, rinse it away and begin the contact wash with your own car shampoo.
Vehicles with heavier rain, dust or road contamination
A vehicle with more outdoor contamination may turn the foam cloudy or create dirty streaks as the product runs down the paint.
Those streaks show that the foam now carries contamination that has separated from the surface.
Rinse the dirty foam away before beginning the contact wash.
When you cannot confidently judge the contamination—or when the chemical starts to dry—rinse first.
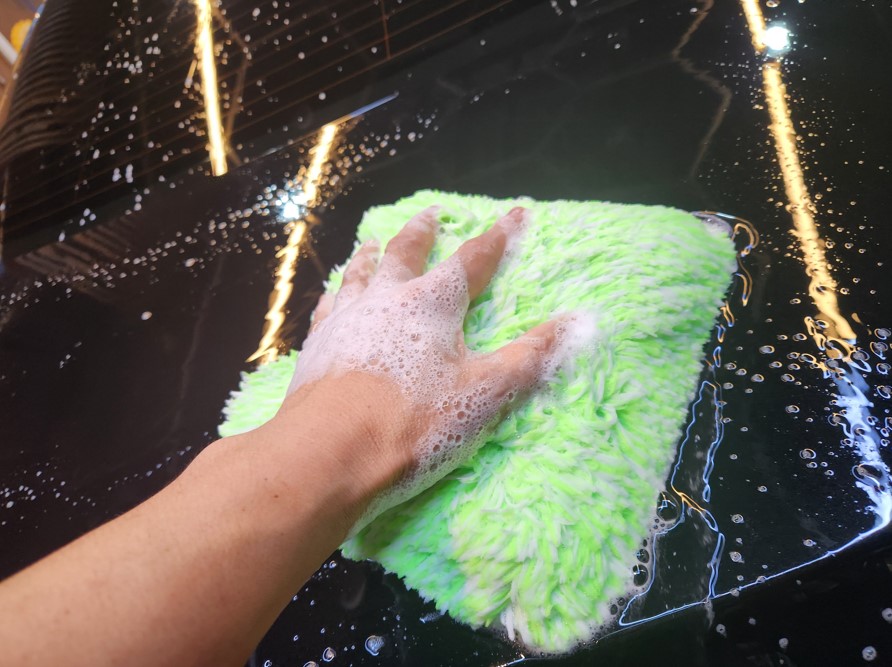
Use the wash mitt as a shampoo-transport tool
A wash mitt does more than provide a soft surface for rubbing dirt.
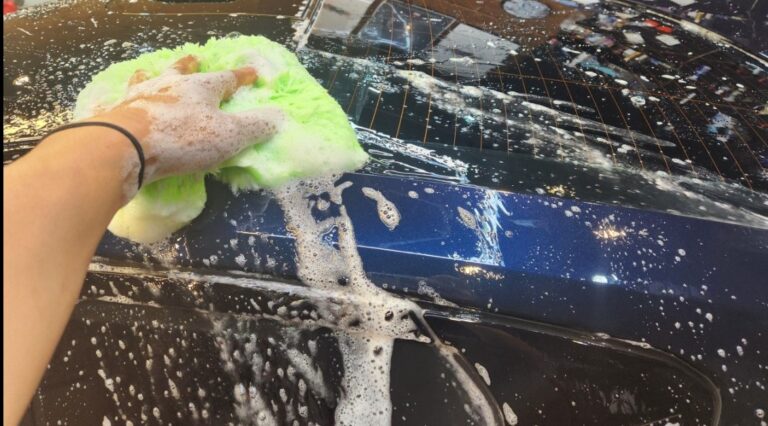
Its main job involves carrying a large volume of shampoo solution to the work area and releasing that solution as the mitt moves.
Fully saturate the mitt and do not wring it dry.
The mitt must hold plenty of shampoo solution so the liquid can flow across the paint, maintain lubrication and move released contamination away from the contact point.
Place the mitt lightly on the paint instead of pressing it down.
Wash the roof, glass and upper panels first. Leave the lower doors, rocker panels and other heavily contaminated sections until last.
Work in small areas and avoid repeatedly scrubbing the same spot.
Watch the shampoo flow ahead of the mitt
A fully loaded mitt should release shampoo solution through its pile and toward the direction of travel.
This visible flow means more than excess liquid.
It shows two important conditions:
- the mitt still holds enough shampoo to lubricate the contact area; and
- released contamination has a path away from the point where the mitt meets the paint.
As the mitt moves, shampoo flowing ahead of it helps stop loosened contamination from remaining at one pressured contact point.
Do not continue onto another panel when the flow becomes weak or stops.
At that moment, clean or replace the mitt and reload it with fresh shampoo solution.
Avoid pressing harder to force out more liquid. Extra hand pressure also increases the load on any contamination that remains between the mitt and the paint.
Remove contamination after each small section
After washing half a panel or another small area, remove the contamination that the mitt collected.
When clean running water is available, rinse the mitt outside the shampoo bucket, gently open the pile and reload it with fresh solution.
If the facility offers no clean rinse water, set the used mitt aside and continue with a clean one.
Shampoo cycle: Load shampoo → carry it to the paint → release it in the direction of travel → remove contamination from the mitt → reload with clean shampoo
This cycle stops contamination from one panel from passing through the shampoo bucket and reaching the next panel.
How Wash Mitt Flushing Moves Shampoo and Contamination
Step 3 principle: When shampoo stops flowing ahead of the mitt, stop washing, clean or replace the mitt and reload it.
Step 4 – Final Rinse and Drying
Rinse away shampoo and released contamination
Rinse the vehicle thoroughly from the top down.
Check the grille, badges, mirror housings, door handles and panel gaps where shampoo can collect.
The final rinse does more than remove visible foam. It also carries away contamination that the shampoo and wash mitt separated from the paint.
If the bay offers spot-free water, use it for the final pass. Spot-free water can reduce mineral residue, but you should still dry the vehicle instead of waiting for every droplet to evaporate.
Let the largest volume of water drain
After rinsing, give the largest sheets of water a moment to run off.
This step reduces the volume that the drying towel must absorb and limits unnecessary repeated passes.
Do not wait until the remaining droplets start to dry.
If the facility provides a separate drying area, move the vehicle there before continuing.
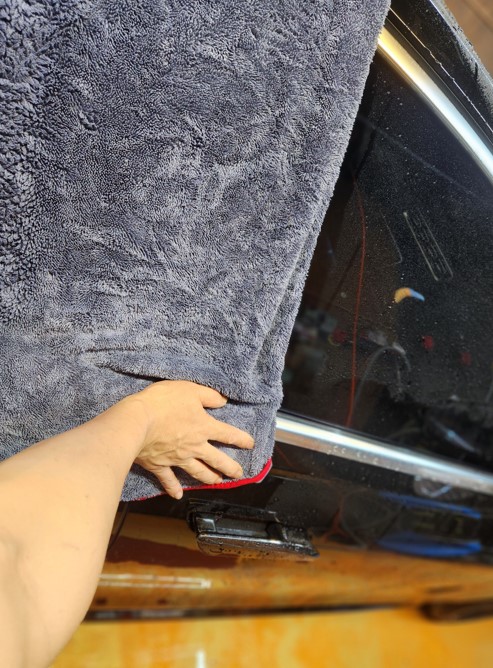
Place the towel and allow it to absorb
Drying does not require scrubbing.
Place the towel flat on the paint and allow water to move into the pile. Do not set the towel down and immediately drag it across the panel.
A short absorption period reduces contact between relatively dry fibers and the paint.
When the towel must move, lift its leading edge slightly. This technique reduces the contact area and limits the load from the wet towel’s weight.
If the towel starts to grab, push water or resist movement, do not pull harder. Change to a drier section or use another towel.
Fold a large drying towel for better control
A large drying towel can absorb water from a wide area, but saturation also makes it heavy. Loose edges may hang down and touch wheels, lower panels or the ground.
Open the towel across broad horizontal areas when that method gives you control. On doors, fenders and narrow panels, fold it to a manageable size.
Folding helps you:
- control the weight of the wet towel;
- keep loose edges away from contaminated areas;
- create several clean working faces; and
- distribute hand pressure across a broader area.
A personal car dryer or blower can remove water from mirrors, handles, grilles and panel gaps when facility rules permit it.
Not every U.S. self-service wash provides compressed air, so treat air drying as an optional step.
For the underlying mechanism, see Why Drying Towels Can Create Scratch Risk.
Step 4 principle: Give the towel time to absorb water while you control its weight, contact area and movement.
Step 5 – Apply Protection and Perform the Final Buff
Inspect the paint before applying protection
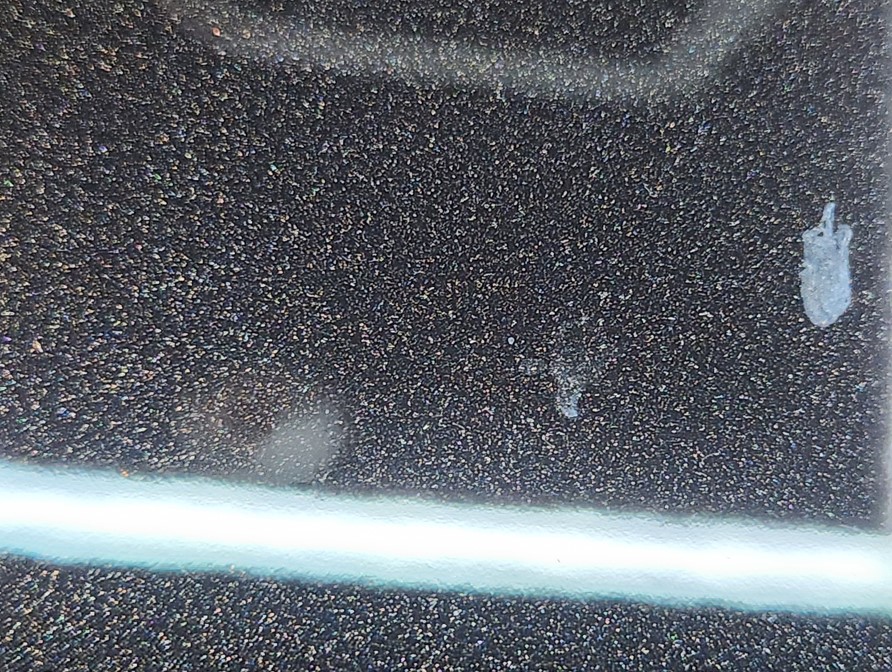
Check the paint for remaining water, dust and solid particles before applying protection.
Bright bay lighting makes leftover contamination and product residue easier to see on dark paint.
A buffing towel can drag solid particles across the surface. Do not increase towel pressure to remove bonded iron, tar or mineral deposits.
Light moisture and product residue may need only a clean towel. Bonded contamination requires a cleaner that matches the contamination, and even the correct cleaner has limits.
Apply a thin, even layer
A spray wax or spray sealant gives beginners a practical starting point.
Follow the product directions and apply a thin, even layer.
Too much product can overload the towel, leave smears and require additional passes. More product does not automatically create more protection.
Buff with a clean paint-safe towel
Use a clean, paint-safe microfiber towel.
Fold the towel into several sections so you can supply a clean face whenever the previous one collects residue. Support it with the broad area of your hand instead of pressing through your fingertips.
Apply light pressure and make only enough passes to remove the residue.
When the towel starts to smear product or loses its smooth movement, turn to a clean face or replace it.
In this guide, buffing means collecting excess product and leveling the remaining protection. It does not mean machine polishing.
Longer buffing does not automatically create more gloss. Once you remove the residue and leave an even protective layer, stop.
Car Buffing|Pressure, Towel Saturation and Product Removal
Step 5 principle: Buffing does not force gloss into the paint. It collects excess residue and leaves the protection even.
Know the limits of a maintenance wash
This process suits vehicles that owners wash every one to two weeks, before contamination bonds firmly to the paint.
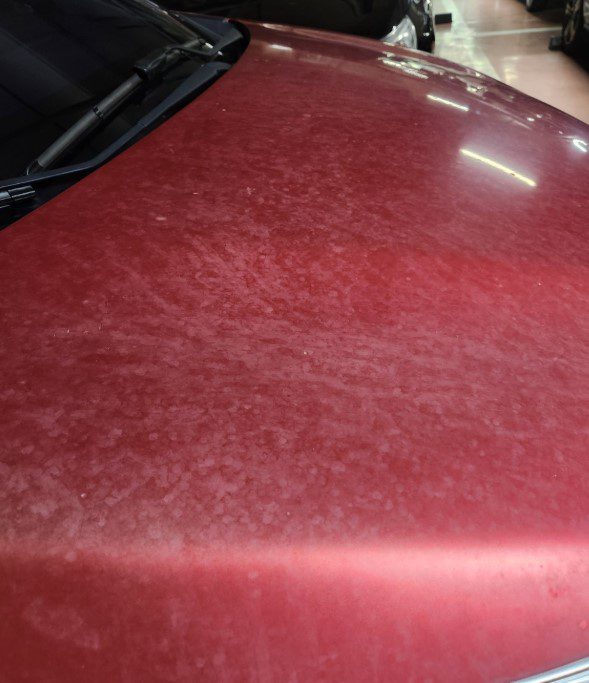
After washing, bright light may reveal small dots, stains or a rough texture.
Those marks do not automatically mean that the wash failed. Pressure water, ordinary foam, car shampoo and a wash mitt may have reached the limit of what they can remove safely.
Bonded iron, tar, mineral deposits and hardened bug residue require cleaners that match the type of contamination.
If light wash-mitt contact does not remove a contaminant, stop increasing pressure.
When you force contamination off mechanically, you lose the opportunity to remove it more safely with the correct chemical. The contaminant may disappear, but the scratch created during removal remains.
At that point, a cleaning problem becomes a paint-correction problem. Additional cleaner cannot remove the new scratch, and polishing may become the only remaining correction method.
Detailing requires judgment. Knowing when to stop protects the paint just as much as knowing how to continue.
Contamination that resists light wash contact may not need more force. It may have reached the limit of the maintenance wash.
Maintain wash mitts and towels after use
Wash mitts and towels remain part of the scratch-control system after the vehicle looks clean.
Contamination and product residue can dry inside the fibers and make the pile stiff or matted. Dried residue may reduce water flow, absorption and control during the next wash.
Separate paint, drying, buffing, wheel and lower-body towels before laundering.
Use a suitable microfiber detergent or a mild liquid detergent. Avoid fabric softener because it can coat the fibers and reduce absorption.
Rinse the tools thoroughly, gently restore the pile and follow the manufacturer’s drying instructions. Avoid excessive heat and store nothing until it dries completely.
If a towel no longer absorbs properly or its pile remains hard after washing, remove it from paint duty. Move it to wheels, door jambs or another lower-risk area, or replace it when necessary.
4. Self-Service Car Wash FAQ
Can I use the wash bay’s foaming brush?
Keep a shared foaming brush off the paint.
The brush may contain sand, wheel contamination, mud or debris from previous vehicles. Use a clean personal wash mitt whenever you perform a contact wash.
Does the facility allow buckets and personal chemicals?
Rules vary by facility.
Some self-service washes allow personal equipment, sometimes only during quiet periods. Other locations prohibit buckets, hand washing or outside chemicals.
Follow the posted rules and avoid occupying a timed bay for extended detailing work while customers wait.
What if the wash bay does not provide a foam cannon?
Use the available touchless pre-soak or high-pressure soap setting.
Thick foam does not create the main benefit. The chemical needs to wet and weaken contamination before contact.
Never use the shared brush as a substitute for a foam cannon.
Must I rinse after using pre-soak or foam?
Not in every situation.
You can sometimes begin a contact wash while suitable shampoo foam remains wet on a lightly contaminated vehicle.
However, many bay chemicals serve only as pre-soaks and may not provide enough lubrication for wash-mitt contact. Rinse first when you do not know the chemical, see heavy contamination or notice the product starting to dry.
Can I use one bucket?
Yes, but the facility determines the safest method.
When clean rinse water is available, clean the mitt outside the shampoo bucket after each section.
Without a clean-water tap, use several clean mitts and set each used one aside. If you used the bucket for wheels, clean it thoroughly before filling it with body-wash shampoo.
Must I wash every one to two weeks?
No. One to two weeks provides a maintenance guideline, not a fixed rule.
Climate, mileage, parking conditions, road treatment and contamination level determine the practical interval.
A garaged vehicle in a dry area and an outdoor vehicle that faces pollen, road salt or coastal spray should not follow the same schedule automatically.
Should I wash immediately after rain?
Not always.
Rain can combine with dust and road film to leave a dirty layer. When visible contamination remains, washing before repeated drying can make maintenance easier.
Judge the surface instead of treating every rain event the same.
What should I do if water spots remain?
Absorb wet droplets with a clean drying towel before they dry.
White rings or marks that remain after drying may indicate bonded mineral deposits. Do not scrub them with more pressure. Use a cleaning method that targets mineral contamination.
What if the wash mitt cannot remove a contaminant?
Stop increasing pressure.
Iron, tar, mineral deposits and hardened organic residue require dedicated cleaning methods. A mark that resists a wash mitt does not automatically require more force.
Can I dry and wax the vehicle inside the wash bay?
Follow the facility’s rules.
When the location offers a separate drying area, move the vehicle there before drying, inspecting the paint or applying protection. Do not hold a wash bay for extended finishing work while customers wait.
What changes during winter?
Road salt and liquid de-icers become the priority.
Do not wait for the normal schedule when the wheels, lower panels and underbody carry heavy contamination. Pressure-rinse those areas when the temperature and facility conditions allow safe work.
Avoid contact washing when water may freeze on the vehicle or the ground.
5. Final Thoughts|There Is No Single Correct Way to Wash a Car
No single wash routine works correctly for every vehicle.
The right process depends on maintenance frequency, parking conditions, local climate, road treatment, facility rules and the contamination currently on the paint.
Two ways to manage contamination
Vehicle care generally follows two approaches.
One approach involves washing more frequently and removing contamination before it bonds firmly to the paint. While ordinary contamination still releases easily, you can use fewer chemicals and fewer wash stages. Each wash may also take less time.
When bonded contamination develops, add targeted cleaners and additional stages. Iron, tar, mineral deposits and hardened organic contamination require products and methods that match the contamination.
Personal hygiene offers a useful comparison.
A quick shower after normal daily activity may handle fresh sweat and light contamination. If you allow buildup to remain, you may need to soak it and add more cleaning steps.
Vehicle care works in much the same way.
Match the process to the vehicle
For routine maintenance, a shorter wash interval keeps the process light and reduces the need for aggressive cleaning.
As bonded contamination increases, add targeted chemicals and extra stages instead of forcing the contamination off with pressure.
Frequent light maintenance and occasional deeper decontamination do not compete with each other. Together, they form one maintenance system.
The five-step process in this guide offers one practical method for vehicles that owners wash every one to two weeks before deep cleaning becomes necessary.
More frequent washing does not automatically create the correct answer, and more chemicals do not automatically produce a better wash.
Inspect the vehicle, understand the available wash environment and choose only the process that the contamination requires.
The correct wash does not depend on how few or how many steps it contains. It matches the vehicle’s condition while avoiding unnecessary pressure, fric