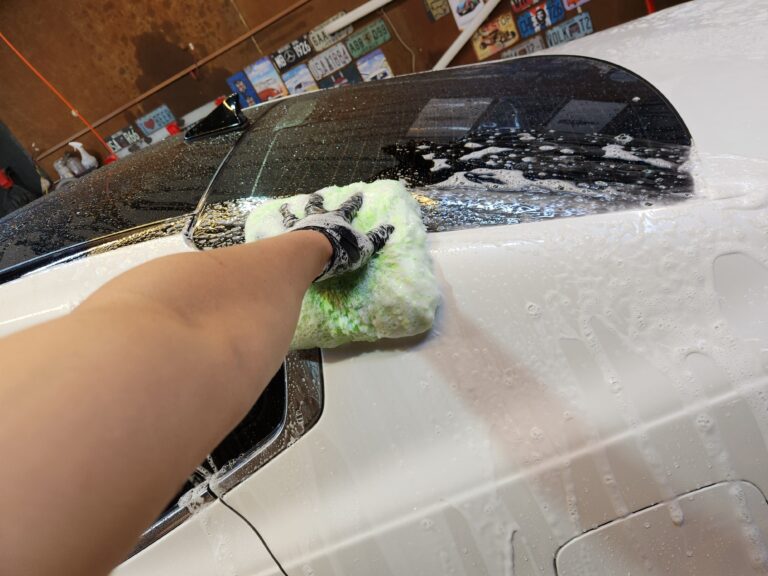
This article is the practical companion to How to Buff Car Wax by Hand Without Streaks.
The theory guide explains why fingertip pressure becomes concentrated, why a saturated microfiber towel begins to spread residue again, and how unnecessary contact can increase swirl-mark risk.
This guide focuses on the actual working process: selecting and preparing the towel, priming the working face, controlling the amount of spray wax, separating the first and second buffing passes, and checking the final surface.
In this article, buffing means leveling and removing spray-wax residue by hand with a microfiber towel. It does not refer to machine polishing or abrasive paint correction.
Spray wax buffing may look simple. Spray the product, wipe the panel, and move on.
In practice, the result changes according to:
- Towel thickness and size
- Pile structure
- Folding method
- Product quantity
- Hand pressure
- Working-face cleanliness
- The condition of the final dry face
I prefer to prepare several sufficiently thick multipurpose microfiber towels rather than trying to finish an entire vehicle with only one or two towels.
The goal is not to use the fewest towels possible.
The goal is to keep supplying the paint with clean working faces, controlled product quantity, and the least pressure necessary.
Part 1. Towel Selection and Preparation for Spray Wax Buffing
Before applying spray wax, the towel must be selected, inspected, and folded correctly.
A soft towel alone is not enough. Its thickness, edges, pile structure, cleanliness, and previous use all affect how safely and consistently it performs on paint.
Choose a Towel With Enough Thickness
Avoid extremely thin microfiber towels for paint buffing.
When a towel is too thin, the shape and pressure of the fingers transfer more directly through the fabric. Even after folding, it may not create enough cushioning between the hand and the paint.
As a practical workshop reference, I prefer a multipurpose towel with at least the general thickness of a typical Kirkland Signature microfiber towel.
This does not mean that one particular brand is required. It is simply an easy reference for the amount of body and cushioning I prefer during hand buffing.
A towel that is too thin may:
- Transfer fingertip pressure more directly
- Fold or twist during movement
- Feel unstable in the hand
- Become saturated quickly
- Provide fewer reliable working faces
The towel should remain stable after folding and should create a noticeable layer between the hand and the panel.
Use a Practical Towel Size

A size of approximately 40 × 40 cm, or 16 × 16 inches, is convenient for spray wax buffing.
After being folded twice, the towel should remain slightly wider than the palm.
This gives the hand enough room to support the towel broadly without exposing the fingertips or allowing the fabric to bunch underneath the hand.
A towel that is too small may:
- Slip out of the hand
- Twist while changing direction
- Expose the fingers
- Concentrate pressure in a small area
- Provide too few clean faces
A very large towel may also become difficult to control once folded.
The correct size is one that creates a compact, stable pad slightly larger than the palm.
Choose an Edgeless Towel When Possible
For paintwork, an edgeless microfiber towel is generally easier to control safely.
The center of a towel may feel soft, while the stitched border can be firmer or less flexible.
When the towel is rotated or flipped, the edge may unexpectedly contact the paint and concentrate friction in a narrow area.
If an edged towel is used:
- Check that the stitching is soft and flexible
- Fold the border toward the inside
- Keep only the microfiber surface against the paint
- Stop using it on paint if the edge becomes hard or damaged
The condition of the edge matters just as much as the softness of the center.
Remove Tags and Labels
Tags and labels should be removed before the towel is used on paint.
A label is often harder than the surrounding microfiber. It may rotate onto the panel while the towel is being flipped or refolded.
Cut the label carefully without damaging the nearby stitching or fibers.
Do not pull it out by force if doing so may tear the towel.
A paint-safe towel must be evaluated by its edges, labels, cleanliness, and condition—not only by the softness of its center.
Choose the Working Face According to the Task
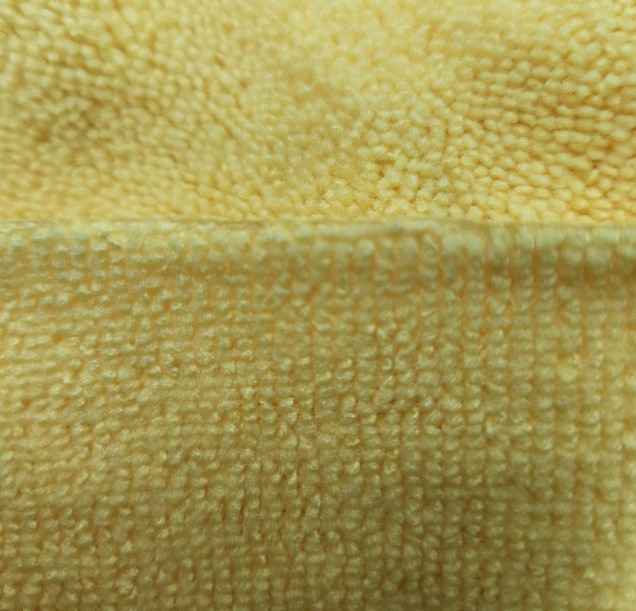
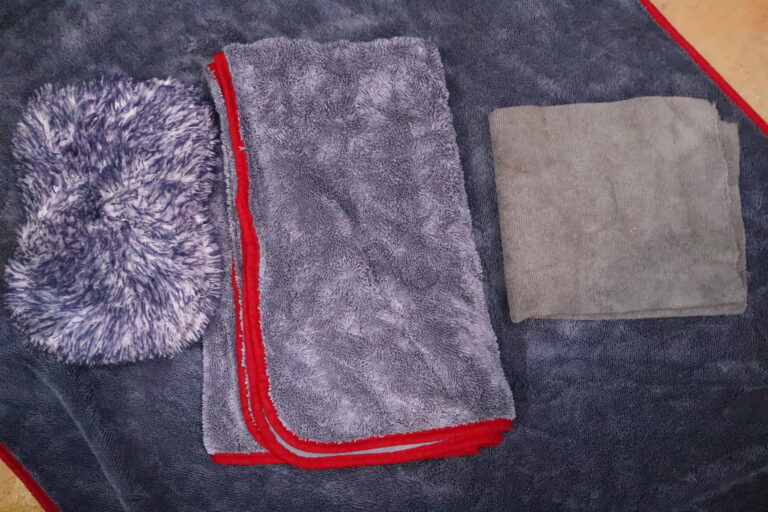
Many multipurpose microfiber towels have two different pile structures.
On the dual-pile towels I use, the short, dense side provides better control for spreading spray wax and collecting a thin oily film.
It follows hand movement more precisely and makes it easier to feel changes in product thickness and towel drag.
The longer pile may be more useful for:
- Collecting remaining water
- Cleaning door jambs
- Reaching panel gaps
- Holding light contamination deeper inside the fibers
- Adding extra cushioning on sensitive surfaces
However, pile length alone does not determine whether a towel is safe.
The towel’s current cleanliness and previous use matter more.
Once a towel has been used on dirty jambs, lower panels, wheels, the engine bay, or other contaminated areas, it should not return to paint buffing.
Inspect Even a New Towel
A new towel should not automatically be assumed to be perfectly clean.
Loose lint, packaging dust, and small particles may remain after manufacturing, transportation, or storage.
Before using it on paint, inspect both sides under good light.
Check for:
- Loose lint
- Hard particles
- Rough stitching
- Damaged fibers
- Packaging debris
- Manufacturing residue
Shake the towel thoroughly by hand before folding it.
Use Compressed Air Only When It Is Clean
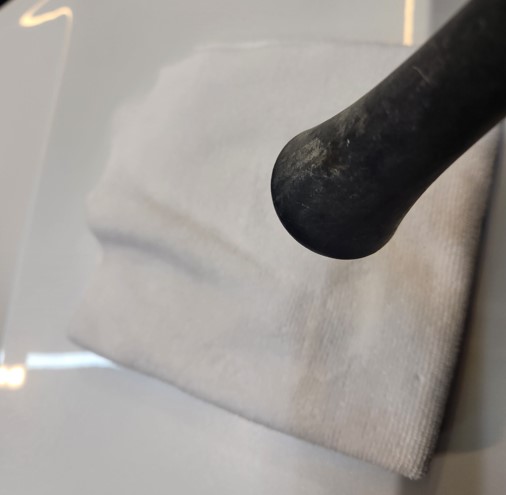
When clean, dry, and oil-free compressed air is available, I also blow across both sides of the unfolded towel.
Unfolding it first makes it easier to remove lint and particles trapped inside the folds.
Do not use an air gun that may release:
- Compressor oil
- Moisture
- Rust particles
- Dust from the hose
- Contamination from previous work
Compressed air is useful only when the air supply itself is clean.
Otherwise, it may add contamination instead of removing it.
Fold the Towel Twice
Do not use the towel fully opened.
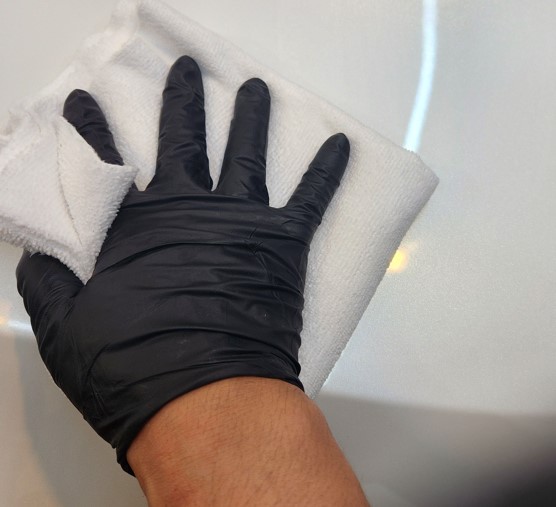
Fold it twice to create a compact pad slightly larger than the palm.
The layered microfiber provides cushioning and creates several separate working faces that can be rotated as residue accumulates.
Each folded section should remain flat and stable.
Do not roll the towel into a tight ball or crush it inside the hand. A tightly bunched towel reduces the usable contact area and makes pressure harder to control.
Manage Each Working Face Separately
When one face becomes loaded with product, stop using it.
Turn or refold the towel so that a clean section contacts the paint.
Do not fold a heavily used face directly against an unused clean face. Product and particles may transfer into the section intended for final finishing.
The working unit is not the entire towel. It is one clean towel face.
Part 2. Practical Spray Wax Buffing Process
Once the towel has been prepared, the next step is to control the product, pressure, working area, and final inspection.
The process should remain simple:
- Prime the towel
- Work in a small section
- Spread and collect the product
- Finish with a clean, dry face
- Inspect the panel
- Stop when the residue is gone
Step 1: Prime the Working Face
A completely dry microfiber towel can absorb the first application of spray wax deep into one small area of the fibers.
When this happens, very little product may remain near the towel surface to move smoothly across the paint.
The first pass can then feel inconsistent or slightly grabby.
Towel priming means lightly distributing a small amount of product across the working face before beginning the first panel.
It is not the same as soaking the towel.
The purpose is to prevent the first spray from disappearing into one dry section and to create a more even working surface.
How to Prime the Towel
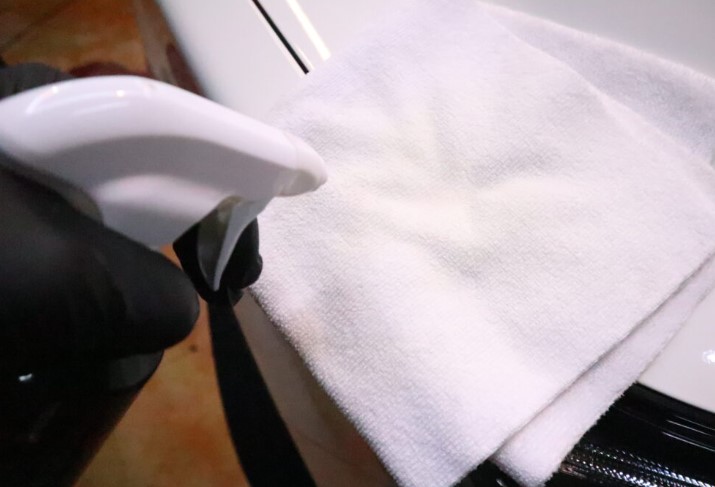
Apply approximately two or three light sprays to the short, dense working side.
Then gently bring the towel faces together and lightly press or rub them so the product spreads across a wider area.
Do not twist, crush, or tightly roll the towel.
Maintain the folded shape and distribute only enough product to lightly prepare the fibers.
The towel should feel prepared, not wet.
If visible liquid is collecting inside the towel or the working face feels heavily damp, too much product has been used.
Priming prepares the towel. It should not saturate it.
Two or three sprays should be treated as a starting reference rather than a fixed rule.
Adjust the amount according to:
- Product concentration
- Spray-head output
- Towel density
- Panel temperature
- Manufacturer instructions
Step 2: Work in Small Sections
Do not pre-spray the entire vehicle.
Divide the paint into sections that can be spread and finished before the product begins to dry unevenly.
A practical starting point is:
- One door
- One fender
- Half of the hood
- Half of the roof
- One trunk section
The correct working area is not determined by a fixed measurement.
It is the area you can spread and finish without rushing and without allowing the product to dry unevenly.
Reduce the Section Size When Conditions Change
Use smaller sections when:
- The paint is warm
- The air is dry
- Wind is present
- The product flashes quickly
- The panel shape is complicated
- There are many badges or trim edges
Large sections often encourage the user to apply more product and move faster.
This increases the chance of excess residue, missed edges, and uneven finishing.
Smaller sections make product quantity, towel pressure, and inspection easier to control.
Step 3: Support the Towel With Minimal Pressure
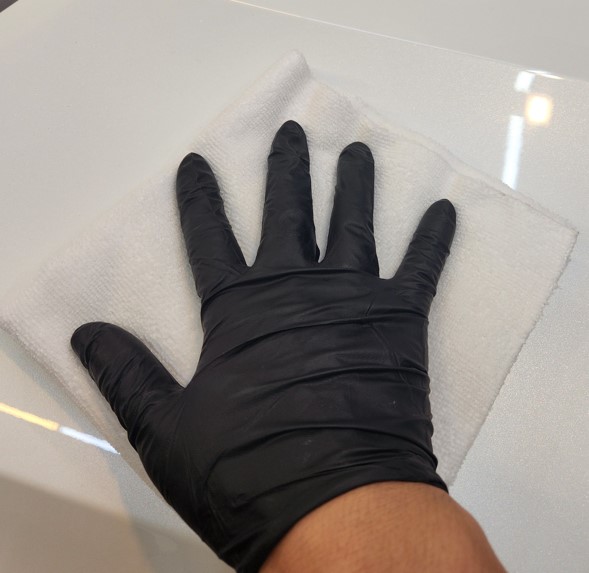
Secure the folded towel lightly between the thumb and index finger.
Spread the remaining fingers across the towel and allow the palm to support a broad area.
The hand should keep the towel flat and prevent it from slipping.
It should not push the vehicle panel downward.
My working reference is simple:
If I can clearly feel that I am pressing the panel, I reduce the force until it feels as though only the towel is contacting the paint.
The towel still needs enough contact to spread and collect the product.
The goal is not zero contact. It is minimum necessary downward force.
Do Not Solve Towel Drag With More Pressure
When the towel begins to drag, do not immediately press harder.
First check whether:
- Too much product was applied
- The product has begun to dry
- The working face is becoming saturated
- A clean towel face is needed
- The panel contains remaining contamination
- The towel has folded underneath the hand
More pressure may temporarily force the towel to move, but it does not correct the cause of the increased resistance.
For the full explanation of pressure distribution and towel saturation, read How to Buff Car Wax by Hand Without Streaks.
Step 4: Separate the First and Second Buffing Passes
The first and second passes have different purposes.
Treating both passes as the same action makes it easier to spread residue back across the paint.
First Pass: Spread and Collect
Use the primed working face to spread the spray wax thinly and evenly across the section.
This pass performs two jobs:
- It distributes the fresh product.
- It collects most of the excess.
The movement does not need to be fast or aggressive.
Use controlled, overlapping motions and watch how the product changes on the paint.
The fresh product should become a thin, even film rather than a heavy wet layer.
Because the first-pass face receives the product directly, it becomes loaded faster than the final finishing face.
As soon as it begins to feel noticeably damp, heavy, or resistant, rotate to another usable face or replace the towel.
Second Pass: Finish With a Clean, Dry Face
Turn the towel to a completely clean and dry face.
Use this section to remove the remaining oily film, faint lines, and uneven residue.
This is not simply another repetition of the first pass.
The second pass is the final residue-control step.
The face used for this pass must remain dry enough to collect what the first face left behind.
Continuing with the same damp face may spread the product again rather than remove it.
The first face spreads and collects. The second dry face confirms the finish.
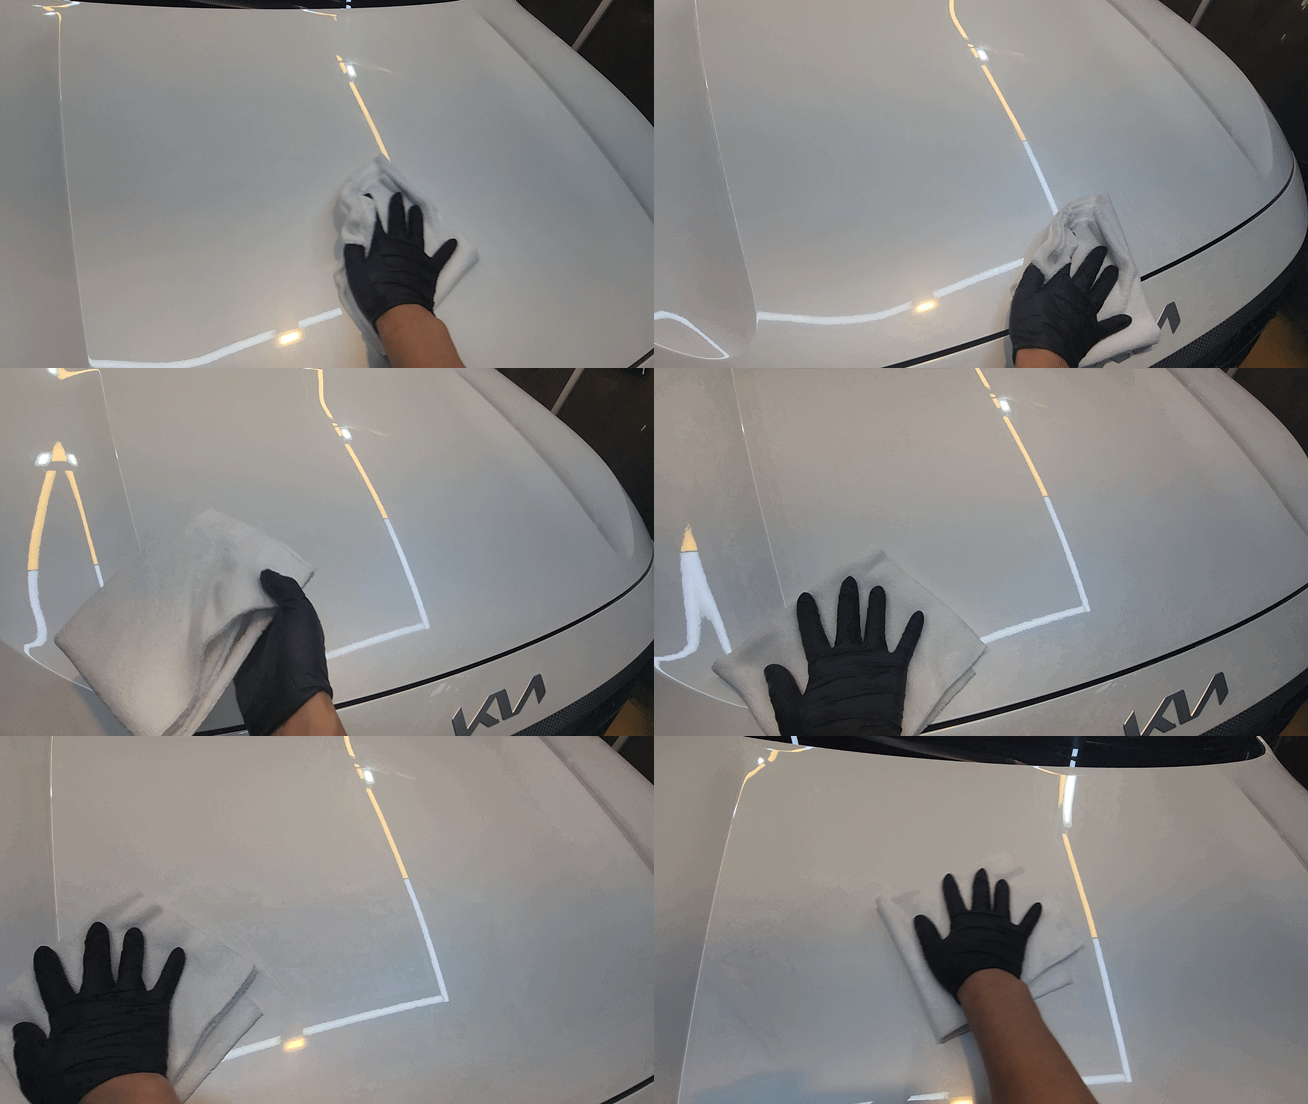
Use light contact and stop as soon as the finish becomes uniform.
Some spray waxes, spray sealants, and maintenance coatings use different application methods or curing times. Always follow the product manufacturer’s instructions before adapting this process.
Step 5: Replenish Product on the Towel
Spray wax is often applied directly to the panel.
Direct spraying is fast, but it may also create several control problems.
It can:
- Concentrate too much product in one area
- Allow mist to reach glass or trim
- Leave product inside panel gaps
- Increase the amount the towel must collect
- Cause pre-sprayed areas to begin drying
- Saturate the towel more quickly
- Allow wind to carry the spray away from the target area
For these reasons, I generally prefer to replenish the product on the first-pass towel face.
Add Product Only When the Towel Needs It
After completing one section, check how the first-pass face behaves before adding more product.
If it still spreads smoothly and evenly, additional spray may not be necessary.
When the application begins to feel dry or inconsistent, add one light spray to the first-pass face and continue.
Do not spray product onto the final dry buffing face.
That face must remain clean and dry enough to remove the remaining film.
Priming prepares the towel before the first panel. Replenishing maintains consistent application as the work continues.
This towel-first method is not a universal rule for every product.
Some products are specifically designed to be sprayed directly onto wet or dry paint. In those cases, follow the official instructions while still controlling overspray and product quantity.
Step 6: Use Two Towels When Necessary
Beginners often apply more spray wax than necessary.
When this happens, one towel may become damp before the vehicle is finished.
At that point, it becomes difficult to find a truly dry face for the final pass.
Do not force one saturated towel to finish the entire car.
Use two towels instead.
First Towel: Application and Initial Collection
Use the first towel for:
- Priming
- Product spreading
- First-pass buffing
- Initial residue collection
Second Towel: Final Dry Finishing
Keep the second towel completely dry for:
- Final haze removal
- Streak correction
- Edge inspection
- Confirmation of the finished surface
The two-towel method makes each towel’s role clear.
It is especially useful when:
- Learning product quantity
- Working on a large vehicle
- Using a rich or oily spray wax
- Working in humid conditions
- The first towel becomes damp quickly
- The paint shows repeated streaking
With experience, several faces of one towel may be sufficient for smaller sections.
The decision should be based on the towel’s condition, not on the desire to use fewer towels.
Step 7: Inspect the Paint With Angled Light
A thin oily film may be difficult to see when looking directly at the panel.
Move the light source or your viewing position so that the reflection travels across the paint at an angle.
Useful inspection lights include:
- Wash-bay lighting
- A handheld detailing light
- A phone flashlight
- Natural light near the entrance of the bay
What to Look For
Check for:
- Fine lines following the towel direction
- Dark or oily patches
- Residue near panel edges
- Product around emblems and trim
- Streaks visible only from certain angles
- Uneven gloss between adjoining sections
Do not inspect from only one fixed position.
A panel may appear clean when viewed directly but reveal residue when the light angle changes.
Stop When the Finish Is Uniform
Once the surface looks even from several angles, stop wiping.
Repeatedly touching a finished panel does not automatically improve the result.
It only adds more contact.
Buffing should stop when the residue is gone—not after a predetermined number of passes.
Spray Wax Buffing Workflow Summary
The complete process can be summarized as follows:
- Inspect the towel and remove the tag.
- Shake out loose lint and particles.
- Fold the towel twice for cushioning and multiple working faces.
- Select the short, dense working side.
- Apply two or three light sprays to prime the towel.
- Work on one small section at a time.
- Support the towel broadly with minimal downward force.
- Use the primed face for the first spreading and collection pass.
- Turn to a completely clean, dry face for the final pass.
- Replenish product on the first-pass face only when needed.
- Replace the towel when a clean, dry face is no longer available.
- Inspect the paint under angled light.
- Stop as soon as the finish becomes uniform.
The purpose of spray wax buffing is not to complete the vehicle with the fewest towels or the greatest number of wiping passes.
The real standard is to finish every panel with a clean working face, controlled product quantity, and the least pressure necessary.
When a towel no longer performs consistently on paint, it can later be reassigned to less sensitive work such as interior finishing, door jambs, or lower areas.
It should not be returned to paint buffing once its condition or previous use makes that role uncertain.