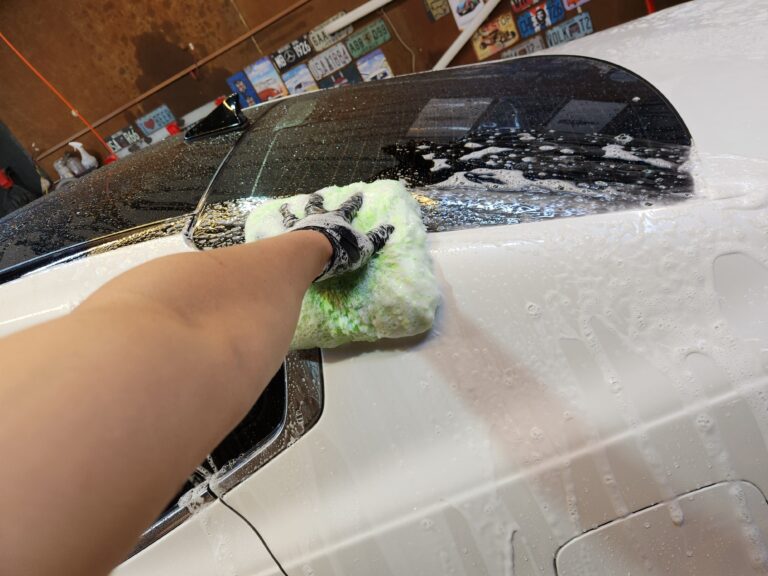
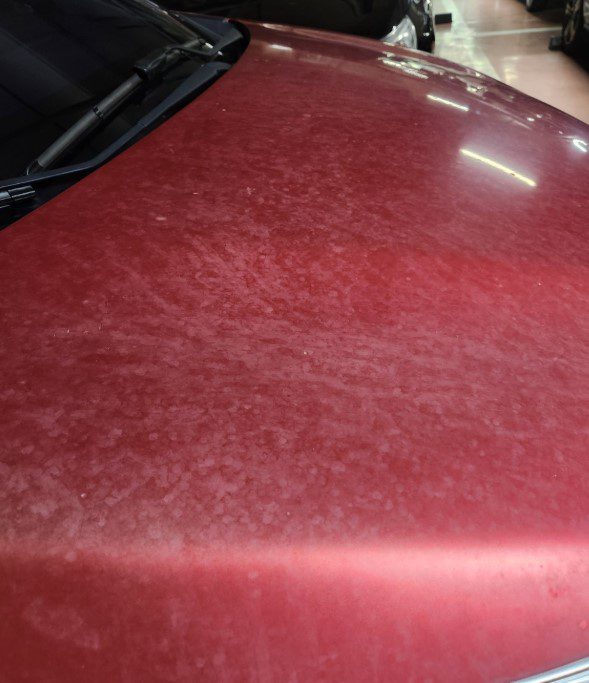
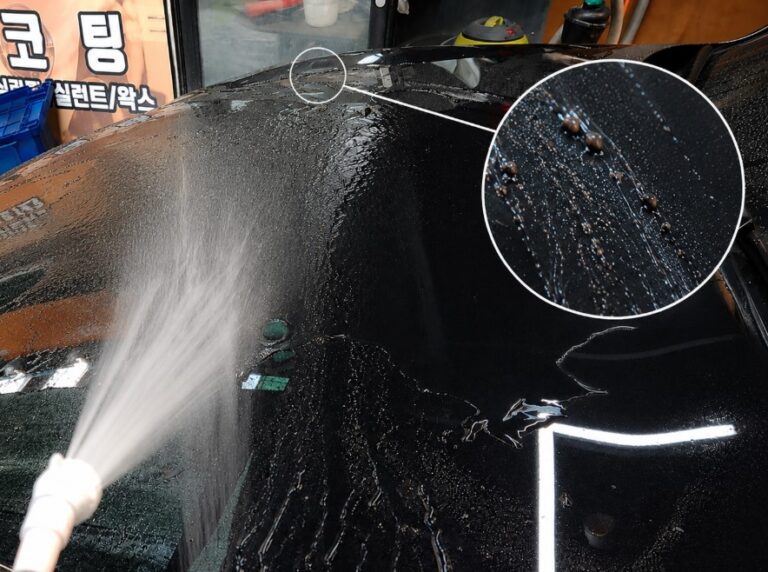
When car paint feels rough after washing, many people reach for an iron fallout remover first. The dramatic purple reaction makes the product look as if it is removing contamination immediately.
Yet a strong color change does not always mean that the bonded iron has been removed. The difference comes down to how iron fallout attaches to the paint, how the remover reacts with it, and whether the reaction reaches the area holding the particle to the surface.
🚗 Iron Fallout Removal in 30 Seconds
- How iron is removed: Purple discoloration shows that iron and the remover are reacting. The reaction must reach the particle’s attachment point and weaken it enough for pressure rinsing to carry the particle away.
- Four conditions that control the result: Complete the contact wash first, reduce standing water to preserve product concentration, allow the recommended dwell time, and rinse thoroughly before the product dries.
- What to check afterward: Work on cool paint in the shade. If the purple reaction has nearly disappeared but the surface still feels rough, check for tar, mineral deposits, industrial fallout, and other bonded contamination before choosing a paint cleaner or clay treatment.
Table of Contents
- Characteristics of Iron Fallout
- Why Iron Fallout Removal Matters
- How Iron Fallout Remains on Car Paint
- How an Iron Fallout Remover Works
- Four Conditions That Determine Removal Performance
- How to Remove Iron Fallout from Car Paint
- Iron Fallout Remover Precautions
- Frequently Asked Questions
- Key Takeaways
Characteristics of Iron Fallout
Several types of contamination can make washed paint feel rough. Iron fallout is one form of particulate contamination, along with tar, paint overspray, industrial fallout, and mineral deposits. An iron remover targets ferrous contamination, so other bonded particles may continue to create a rough texture after the iron treatment is complete.
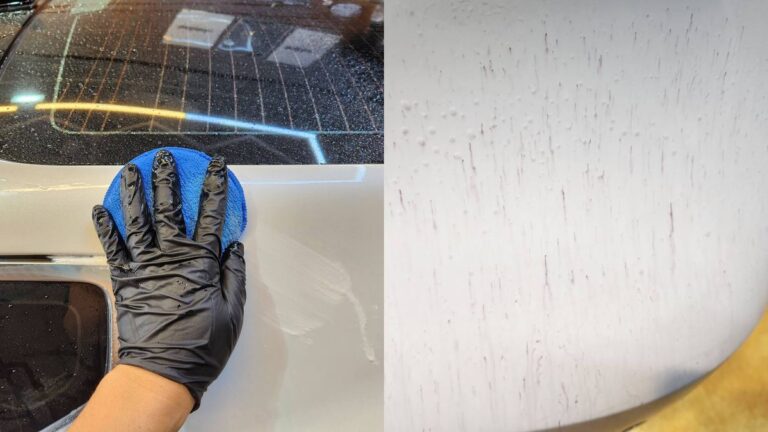
As iron oxidizes, it may appear as dark red dots or brown rust stains. Particles that remain after washing can produce both visible spotting and a gritty sensation under the fingertips.
Most iron particles sit on top of the clear coat or remain attached through other contamination. Particles become physically embedded in the clear coat mainly when hot metal fragments, such as grinding sparks, strike the surface directly.
Why Iron Fallout Removal Matters
Iron left behind after washing continues to oxidize. Dark red dots and rust-colored staining may spread, while the particles become more difficult to remove as they combine with other contamination. Removing bonded iron helps protect the paint, improve surface texture, and prepare the vehicle for later detailing work.
- Reducing the risk of paint damage: Continued exposure to water and oxygen can enlarge rust staining and increase removal difficulty. Around damaged paint or hot metal particles embedded in the coating, local expansion of corrosion products may contribute to pitting and further paint damage.
- Restoring texture and appearance: When iron is a major cause of roughness, removal can leave the paint noticeably smoother. Dark red specks and rust staining also become less visible.
- Preparing for polishing, waxing, or coating: Removing bonded iron reduces the chance of hard particles transferring to pads and towels during later work and provides a cleaner surface for paint correction or protection.
How Iron Fallout Remains on Car Paint

Iron reaches a vehicle as fine dust or small fragments. The particles have a high surface area relative to their size, so they are readily exposed to air and moisture. Their irregular shape can catch on microscopic surface texture or become entangled with other contamination.
Stage 1: Iron Particles Are Generated and Deposited
Brake dust, railway fallout, and industrial emissions release fine iron particles that settle on the vehicle. Most remain on top of the paint or mix with road film and oily residue. Hot grinding sparks can partially embed in the clear coat when they strike it directly.
Stage 2: The Particles Oxidize and Combine with Other Contamination
Iron particles may catch on microscopic surface irregularities or remain with tar, mineral deposits, and hardened road film. Oxidation begins where the particle is exposed to oxygen and moisture, producing dark red spots or brown rust staining.
The larger volume of corrosion products can create cracks and pores within the rust layer. The exact structure depends on the environment and the type of iron oxide, so the layer may be porous or relatively dense. Research on rust-layer structure
Stage 3: Bonded Particles Remain After Washing
Loosely attached iron mixed with removable road film may come away during washing. Particles caught in surface texture or hardened together with bonded contamination can remain, leaving dark red dots and a gritty feel.
Long-term exposure can expand rust staining and make decontamination more difficult. Around embedded hot metal particles or damaged paint, corrosion-product expansion may also increase local pitting and coating damage.
How an Iron Fallout Remover Works
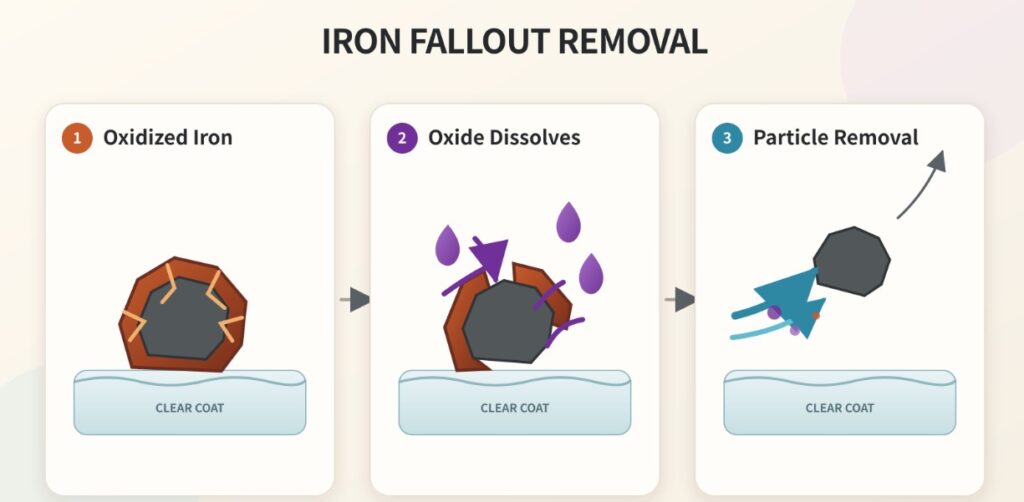
An iron fallout remover begins reacting with the oxidized outer surface of the particle. As that layer dissolves, the reaction can progress toward the section attached to the paint. The contact area becomes smaller and the particle’s grip on the surface weakens.
Removal depends on this attachment point. Once the bonded section has been weakened sufficiently, the entire particle can detach even if some metallic iron remains inside. Pressure rinsing then carries away the loosened particle and the reaction products.
| Stage | What Happens |
|---|---|
| 1. Oxide reaction | The remover gradually dissolves the oxidized outer surface. |
| 2. Attachment weakens | The reaction reaches the bonded contact area and reduces adhesion. |
| 3. Particle removal | Pressure rinsing carries away the loosened iron and reaction products. |
Why Does Iron Remover Turn Purple?
Many iron fallout removers use thioglycolate-type reactive ingredients. These ingredients bind with iron ions released from oxidized iron and form a water-soluble purple complex.
The purple color confirms that iron and the remover are reacting. Color intensity does not directly measure how much bonded iron has actually left the paint.
Metallic iron reacts more slowly because it must first release iron ions. Oxidized iron already contains iron in an oxidized state and is generally more accessible to the remover. Cracks and pores formed during corrosion can also allow the liquid to move farther into the oxide layer.
For these reasons, an iron remover often reacts faster with oxidized iron and may appear to selectively target rusted particles.
Four Conditions That Determine Removal Performance
Actual removal performance depends on direct contact, product concentration, reaction time, and drying control.
1. Direct Contact with Bonded Iron
Iron remover reacts with oxidized iron whether the particle is loose or bonded. When applied before washing, some of the active ingredient may be consumed by loose oxidized particles that a normal wash could remove. Road film and oily contamination can also obstruct contact with the iron that remains bonded to the paint.
Pre-washing and contact washing remove loose particles and ordinary contamination first. The iron remover can then contact the remaining bonded iron more efficiently.
As the remover dissolves the oxide layer and reaches the attachment point, the contact area and adhesion decrease. Once the particle has been weakened sufficiently, pressure rinsing can remove it together with the reaction products.
2. Product Concentration
Iron fallout remover relies on a chemical reaction and must remain on the particle at a useful concentration.
Large amounts of water left on the paint can dilute the product and cause it to run off quickly. Drain or blow away as much standing water as practical, then use the product at the concentration or dilution ratio specified by the manufacturer.
Heavily contaminated areas may need more than one application. Follow the product instructions and, when necessary, rinse before applying fresh product again.
3. Sufficient Reaction Time
Iron does not dissolve instantly. The reaction progresses gradually from the oxidized surface exposed to the liquid.
As the outer material dissolves, fresh oxide underneath becomes available for further reaction. This process must continue toward the attachment point before the particle becomes loose enough to remove.
Purple discoloration can appear soon after the reaction begins, while the bonded section may require more time. Allow the manufacturer’s recommended dwell time, rinse, and apply again if dark red spots or a localized reaction remain in the same area.
4. Preventing the Product from Drying
Iron remover reacts within the liquid film covering the surface. The liquid allows the active ingredients to move into the oxide layer and helps carry dissolved iron and reaction products outward.
Evaporation restricts this movement. It also concentrates the product and the purple reaction residue, increasing the risk of staining or deposits.
Allow the remover to work while the surface stays wet, then rinse it completely before it dries.
How to Remove Iron Fallout from Car Paint
Use the following sequence for practical iron decontamination:
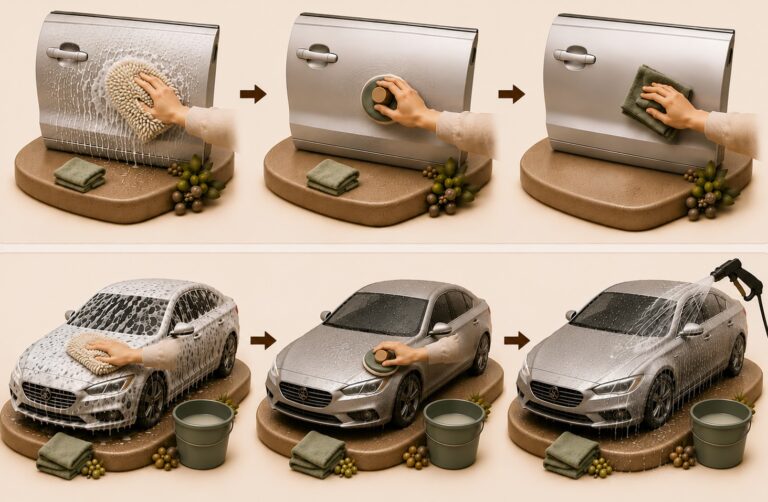
Pre-wash and contact wash → Reduce surface water → Apply and allow to react → Lightly agitate with a wet towel or wash mitt when permitted → Pressure rinse → Check for remaining iron → Reapply if needed → Final pressure rinse
1. Wash and Prepare the Surface
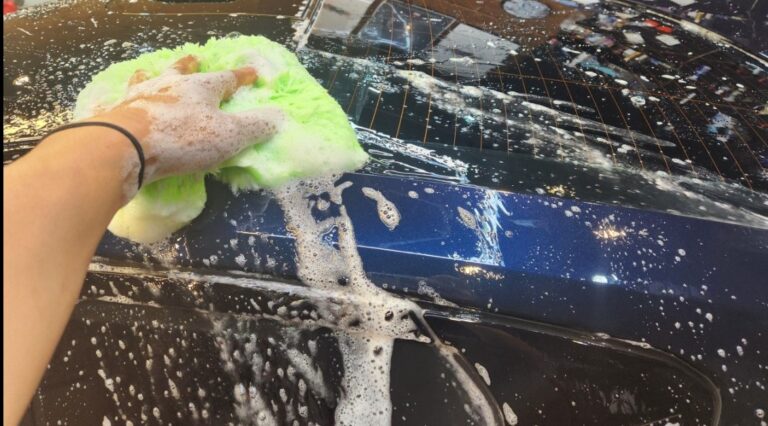
Use a pre-wash and contact wash to remove loose iron and general contamination. Check the clean surface for dark red spots, then allow hot paint and wheels to cool fully.
Let excess water drain away or use a blower. A small amount of moisture is acceptable, but heavy water coverage can dilute the remover and shorten its dwell time.
2. Apply the Iron Remover and Allow It to React
Apply the remover evenly until the affected area is thoroughly wet. Follow the product’s recommended dwell time and monitor the surface continuously so that the liquid does not dry.
Look for a reaction concentrated at specific points on the paint. Purple liquid running down the panel may include material that has already separated, so the amount of runoff alone does not confirm complete removal.
3. Lightly Agitate, Then Pressure Rinse
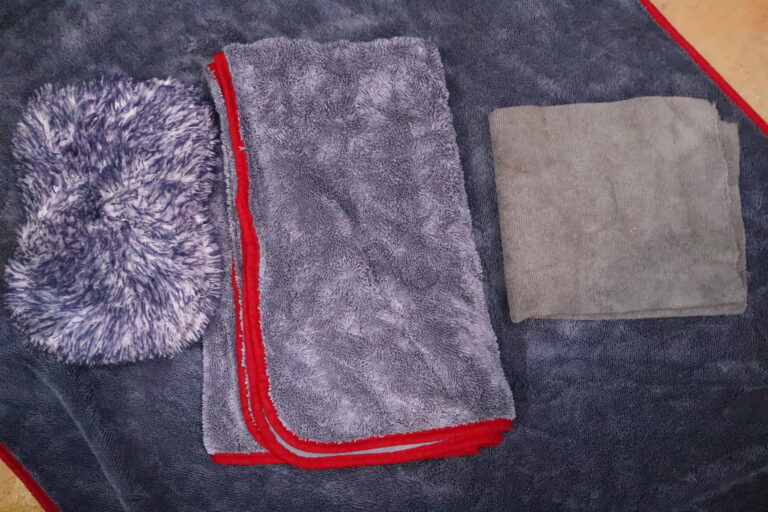
If the manufacturer permits contact agitation on painted surfaces, use a wet plush microfiber towel or wash mitt after the chemical reaction has weakened the particles. Light agitation can separate iron caught in microscopic surface texture or still resting on the paint after the reaction.
Keep the contact extremely gentle. Iron particles and reaction residue can collect in the towel or mitt, and pressure or repeated rubbing can create fine scratches.
- Use minimal pressure: Maintain plenty of lubrication and move the towel or mitt only a short distance with light contact.
- Keep the tool clean: Switch to a clean face or replace the tool after it collects iron and residue.
- Rinse immediately: Pressure rinse as soon as agitation is complete to remove the separated particles, chemical, and reaction products.
4. Reapply to Areas Where Iron Remains
After the first rinse, check the same locations for dark red points or a renewed iron reaction. If iron remains, reduce the surface water again and apply fresh product.
Allow the recommended reaction time and, when the product permits it, use a clean, thoroughly wet towel or mitt with very light contact. Fresh remover can continue reacting with oxide and attachment points that remain.
5. Complete the Final Pressure Rinse and Inspect Again
Pressure rinse the product, reaction residue, and loosened particles thoroughly. Pay particular attention to panel gaps, trim, wheel nuts, and the inner sections of wheel spokes where chemical residue can collect.
Repeat the process if the same location still produces a clear iron reaction, provided each application remains within the product instructions and is rinsed before drying.
When the purple reaction has nearly disappeared but roughness remains, inspect for tar, paint overspray, industrial fallout, minerals, or other bonded contaminants and select the next treatment accordingly.
Iron Fallout Remover Precautions
A full iron removal process may take approximately 10 to 30 minutes depending on the contamination and the size of the working area. This total includes application, reaction, light agitation, rinsing, inspection, and repeated treatment.
The dwell time for each individual application must follow the manufacturer’s instructions. Do not leave one application on the surface for the entire working period.
1. Avoid Direct Sunlight and Strong Wind
Hot paint and wheels cause the product to dry quickly. Strong wind also accelerates evaporation, often beginning at the edge of the liquid film.
- Prepare the environment: Work in a shaded, low-wind area and cool the paint and wheels before application.
- Divide the vehicle into sections: Treat one manageable panel or area at a time instead of spraying the entire vehicle at once.
- Control drying: Adding product can help maintain a wet film, but it should not be used to extend one application beyond the recommended dwell time. If drying begins, rinse immediately and restart with fresh product.
2. Do Not Press Hard with a Towel or Wash Mitt
Light agitation can help separate particles that have already been weakened by the chemical reaction. The towel or mitt may also collect hard iron particles.
- Use minimal pressure: Keep the tool thoroughly wet and move it gently over a short distance. Repeated rubbing or added pressure can drag particles across the paint and create fine scratches.
- Maintain the tool: Change to a clean face or a clean tool as soon as contamination accumulates. Confirm that the product manufacturer allows contact agitation on painted surfaces.
3. Rinse Before the Product Becomes Concentrated
As water evaporates, both the active ingredients and reaction products become concentrated. The remaining material may thicken, cling to panels and crevices, and become more difficult to rinse away.
- Rinse promptly: Pressure rinse immediately after the reaction or agitation step.
- Flush collection points: Rinse trim edges, panel gaps, wheel nuts, and inner spoke areas from several angles.
- Remove gel-type residue: High-viscosity gel products may leave residue after water rinsing. If the instructions allow it, wash lightly with a pH-neutral car shampoo and a clean mitt before pressure rinsing again.
4. Use a Paint Cleaner When Other Contamination Remains
If the iron reaction has decreased but the paint still feels rough or looks cloudy, bonded road film, mineral deposits, oils, or other contamination may remain. Repeating the iron remover has limited value against these materials and can add time and chemical use.
Rinse the iron remover completely, then use a suitable paint cleaner to clear the remaining contamination layer. If the paint cleaner exposes additional iron underneath, reapply iron remover only to those areas.
Recommended sequence: Iron removal → Thorough rinse → Paint cleaner → Recheck for iron → Treat only the remaining spots
5. Plan Clay Treatment Together with Polishing
Clay can remove particulate contamination that remains after the iron remover and paint cleaner. Because clay works through direct physical contact, it can also create fine scratches or visible haze even when used with sufficient lubrication.
- Dark-colored vehicles: Clay marks are easier to see under sunlight or inspection lighting. For maintenance washing, minimize clay use and stop when the risk of additional marring outweighs the benefit of removing the last particles. If clay is necessary, plan a finishing polish afterward.
- Light-colored vehicles: Dark red iron dots are easier to see, while minor clay marring may be less visible. Paint color changes visibility, not the underlying risk of contact damage. Choose the treatment area according to the current paint condition and polishing plan.
When polishing is planned: Iron removal → Paint cleaner → Local iron recheck and treatment → Clay → Polishing
For maintenance washing: Pre-wash and contact wash → Chemical iron removal → Paint cleaner → Stop when additional physical removal would create more risk than benefit
Frequently Asked Questions
Can I Use Iron Fallout Remover Before Washing the Car?
Pre-washing and contact washing first is usually more efficient. Washing removes loose iron and general contamination so that the iron remover can contact the bonded particles that remain.
Does a Darker Purple Reaction Mean More Iron Was Removed?
Purple discoloration shows that iron and the remover are reacting. Iron that has already separated from the paint may continue reacting in the liquid, so color intensity and actual removal are not directly proportional.
How Long Should Iron Fallout Remover Dwell?
Follow the dwell time specified by the manufacturer. A total process time of 10 to 30 minutes includes inspection and repeated applications; it does not mean leaving one application on the vehicle for that long. Rinse before the product dries.
Can I Use Iron Remover When the Paint Is Still Wet?
A small amount of water is acceptable, but heavy water coverage can dilute the product and make it run off quickly. Let the water drain or use a blower to reduce it before application.
Do I Have to Agitate Iron Remover with a Towel or Mitt?
Agitation is an optional supporting step when the manufacturer permits contact work on painted surfaces and bonded particles remain. Use ample lubrication, minimal pressure, and short movements.
Why Does the Paint Still Feel Rough After Using Iron Remover?
When the iron reaction has nearly disappeared, check for tar, paint overspray, industrial fallout, mineral deposits, and other bonded contamination. Choose a paint cleaner or clay treatment according to the remaining material and the paint condition.
Should I Clay the Car After Iron Removal?
Consider clay only when significant particulate contamination remains after chemical iron removal and paint cleaning. Clay is effective but may create fine scratches or haze, so base the decision on the current finish and whether polishing will follow.
Key Takeaways
The purple reaction confirms that iron and the remover are reacting. Complete removal occurs when the reaction weakens the section attaching the particle to the paint so that rinsing can carry it away.
Basic iron fallout removal process
Pre-wash and contact wash → Reduce surface water → Apply and allow to react → Lightly agitate with a wet towel or mitt when permitted → Pressure rinse → Check for remaining iron → Reapply if necessary → Final pressure rinse
If the purple reaction has nearly disappeared but the surface still feels rough, inspect for tar, mineral deposits, paint overspray, and other bonded contamination. Select a paint cleaner, clay treatment, or polishing process according to the contamination and the condition of the finish.
The goal is to remove bonded iron to a safe, practical level while limiting the risk of paint damage. Stop at the point that fits the vehicle’s current finish and the next stage of the detailing plan.