EEven after washing a vehicle, circular water marks or runoff streaks may remain on the paint. Detailers commonly call them water spots or mineral deposits.
At first, they may look like simple traces of dried water. However, only the water has evaporated; the minerals dissolved in it have not disappeared. If the mineral concentration is high, or if water dries quickly on a hot panel, a distinct water spot can form after a single drying cycle.
While mineral deposits remain on the paint, repeated wetting and drying can make the deposit layer harder. If dust, oils, wax, or silicone residue accumulates over it, the result is no longer a simple mineral deposit but a layered film of mixed contamination. The longer these deposits remain, the greater the possibility that they will leave etching in the clear coat.
Therefore, do not leave water spots until etching develops and then rely on polishing. Remove them as soon as possible while the minerals still remain on top of the paint as film or deposits.
This does not mean you should reach for a strong acidic product or compound as soon as a water mark appears. First identify what actually remains on the paint rather than judging only by product strength.
Choose the process according to what the surface shows: a broad, thin early-stage mineral film, a visible mineral deposit, or clear-coat damage that remains after deposit removal.
Table of Contents
- Acidic Pre-Wash|Managing Minerals Before They Become Visible
- Water Spot Removers|How to Remove Visible Mineral Deposits
- Polishing|Correcting Etching Left After Deposit Removal
- Water Spot Care Is Not One Fixed Sequence
- Frequently Asked Questions
You do not need to follow these three processes in order. They are stages that show when the removal principle must change as the material on the paint changes.
1. Acid Pre-Wash|Managing Minerals Before They Become Visible
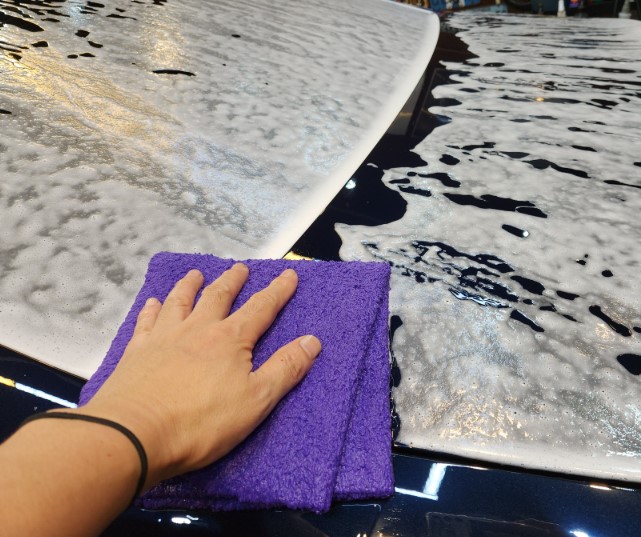
Water evaporation leaves both mineral film and water spots, but different conditions create different forms on the paint.
Mineral film on paint develops when small amounts of moisture contained in dust, oils, and other contamination dry over a broad area. Because minerals remain as a thin film over a broad area, the first signs may appear as reduced paint clarity, uneven water sheeting, and heavier drying towel movement before distinct marks become visible.
Water spots, by contrast, form when a relatively large amount of water—such as a raindrop or wash water—dries in one place and concentrates minerals locally. A clear circular edge or runoff mark can remain after just one drying cycle.
Mineral film does not necessarily build up and turn into water spots. They involve the same type of mineral contamination, but the amount of water and the area over which it evaporates create different visible forms.
Distinguish broad, thin mineral film that lowers gloss from locally concentrated, visible water spots.
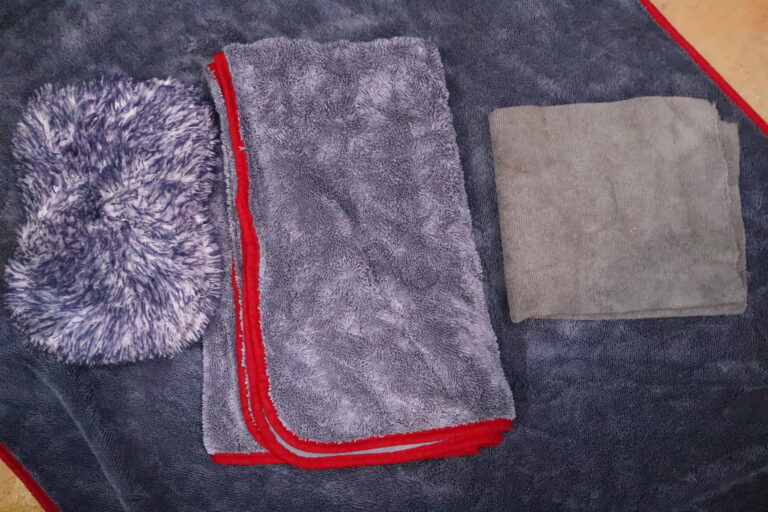
Drying Towel Drag Can Signal a Contamination Layer
Mineral contamination does not appear only as circular water spots. When dust, road film, aged wax, and silicone residue accumulate over a thin mineral film, they can form a mixed contamination layer across the paint even when few visible marks are present.
As this layer builds up, surface friction increases and water may no longer spread evenly across the paint. A drying towel then encounters greater resistance, which can be felt as persistent drag or a heavy pulling sensation.
Brief drag can occur at the beginning of drying while moisture is still spreading through the towel. Once the towel has absorbed enough water, that moisture generally helps reduce resistance on a clean paint surface. If the towel continues to drag after it has become evenly damp, mineral buildup or a mixed contamination layer may still remain on the paint.
Greater resistance also requires more force to keep the towel moving. The user may respond by pressing harder or making repeated passes, increasing the load placed on the towel, remaining contamination, and clear coat. This raises the risk of fine scratches during drying and subsequent buffing.
A side-by-side test on the same panel can make the difference easier to identify. When one section is treated with a water-spot remover while the other is left untreated, the cleaned section may allow the towel to move more smoothly while persistent drag remains on the untreated section. This makes towel movement a useful practical signal for contamination that may be difficult to judge by appearance alone.
If a drying towel continues to drag after it has absorbed enough water, check the paint for mineral buildup and mixed surface contamination.
The Role and Limits of an Acidic Pre-Wash
Chemical loosening followed by physical contact generally removes bonded contamination more effectively than chemical reaction alone. The Alkaline Pre-Wash Complete Guide explains how to manage ordinary contamination before the mineral-removal stage.
An acidic pre-wash is a maintenance process that prevents a thin mineral film from accumulating across the entire vehicle. Its scope is different from directly removing each clearly visible water spot.
Calcium- and magnesium-based mineral deposits become easier to loosen or dissolve when they react with acidic ingredients. The degree of reaction, however, varies according to the mineral type and the condition of the deposit.
The acidic reaction weakens the early-stage mineral film, the following second wash separates it from the paint, and the final rinse carries it away.
An acidic reaction weakens the mineral film, the second wash separates it, and the rinse carries it away. Only then does the acidic pre-wash end.
The process does not end simply by spraying an acidic product and waiting. The acidic reaction weakens the mineral bonds, but the loosened contamination does not automatically disappear from the paint.
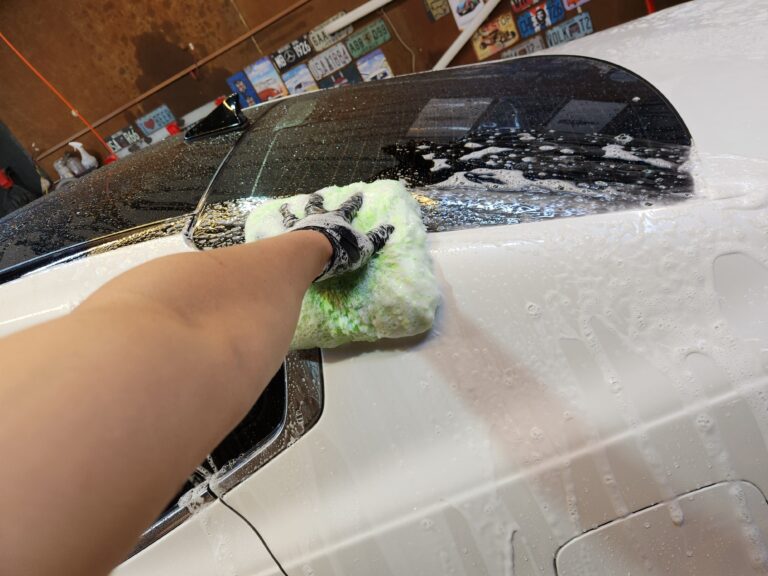
During the following wash, use a wash mitt holding plenty of shampoo solution to separate the loosened film without excessive pressure. The final rinse must then thoroughly remove both the chemical and the released contamination.
If the overall haze and uneven water behavior improve after this process, maintenance-level mineral removal ends here.
If visible mineral contamination remains—such as circular outlines or runoff marks—the problem is outside the scope of an acidic pre-wash. Do not keep repeating the same process or continue increasing the concentration and dwell time.
Inspect and remove the remaining marks directly, then move to the next stage: a water spot remover.
Decision Point
If overall haze, uneven water sheeting, and persistent drying towel drag improve, the process can end with the acidic pre-wash. If circular outlines or water-run marks remain, move on to targeted water-spot removal.
2. Water Spot Removers|How to Remove Visible Mineral Deposits
Start with the Removal Principle, Not the Product Name
Remove visible water spots as soon as practical. When minerals still sit on top of the paint, you may finish without substantial polishing. However, deposits that remain in place can cause etching, which may leave a mark even after you remove the minerals.
Terms such as mineral deposit remover, water spot remover, paint cleaner, and compound do not accurately identify the removal principle by themselves.
Not every product marketed as a water spot remover uses acidic dissolution. Some are cream products that contain fine abrasives. Paint cleaners also vary: some are non-abrasive cleaning products, some contain fine abrasives, and others include oils or glaze.
When you build the process around product names alone, you may use products with similar principles unnecessarily in sequence or repeat polishing without need.
The first thing to identify is not the product name but the principle by which it removes the water spot.
There are two main ways to remove visible mineral deposits:
- Loosen and dissolve the mineral deposit through an acidic reaction
- Soften the contamination layer chemically, then remove it with fine abrasives
These are not fixed consecutive stages. Choose between the two methods within the same removal stage according to the contamination currently present.
Loosening and Dissolving Deposits Through an Acidic Reaction
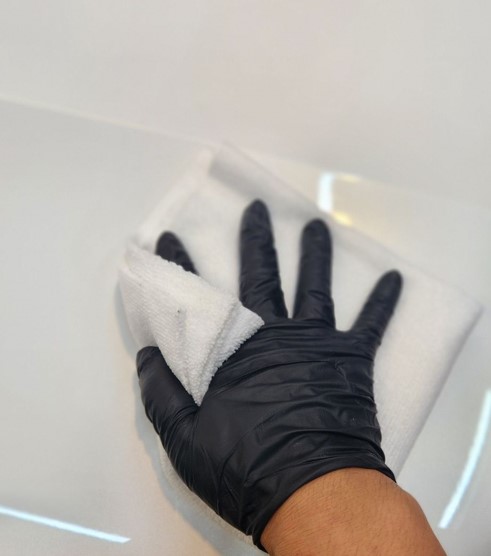
AAn acidic dissolving remover uses a chemical reaction to weaken the bonds of minerals remaining on the paint and dissolve them.
If the mark consists mainly of inorganic deposits such as calcium and magnesium, allowing the acidic ingredients to react directly with the minerals may be more effective than repeatedly rubbing the area with a pad.
The focus of this method is not scrubbing the mark away through aggressive contact. It is controlling panel temperature, working area, and dwell time so the product can react sufficiently with the minerals.
An acidic water spot remover does not erase mineral deposits through force. It uses a controlled, localized acidic reaction to loosen and remove them.
How to Use a Water Spot Remover
Before using a water spot remover, wash the work area thoroughly to remove sand, soil, and other particulate contamination. Any particles left on the paint may create scratches when a cloth or applicator moves across them. Why Scratch Risk Changes During the Car-Wash Process explains how contamination and friction affect scratch risk.
Work out of direct sunlight and let the paint cool completely. When the product requires a dry surface, remove all remaining wash water because moisture can dilute the remover and weaken its reaction with mineral deposits.
Test the product first on a small, inconspicuous area. When the paint and surrounding materials show no adverse reaction, work only on a small section that you can control directly.
- Apply the remover to a soft cloth or applicator.
- Spread it evenly over a small working area.
- Follow the manufacturer’s specified dwell time.
- Do not let the product dry on the surface.
- Use light contact to separate the loosened deposit.
- Rinse thoroughly or remove the residue as the product instructions direct.
- Inspect the mark under the same lighting and from the same angle.
- Repeat only where you see improvement and only within the product’s stated limits.
Do not compensate for weak results by increasing dwell time or pressure. Control the process through cool paint, a small working area, the specified reaction time, and thorough removal of both chemical residue and loosened minerals. When controlled treatment no longer reduces the mark, stop. The remaining mark may indicate clear-coat etching rather than a removable mineral deposit.
Precautions When Using an Acidic Remover
Do not spread an acidic water spot remover over the entire vehicle and leave it for an extended period. Work only within a small area where you can directly observe and control the reaction.
- Do not use it in direct sunlight or on hot paint.
- Do not allow the chemical to dry on the paint.
- Follow the product instructions for dwell time and the number of repeat applications.
- Do not mix it with other cleaners, degreasers, or paint cleaners.
- When using different products, remove the first product completely before beginning the next process.
- Rinse thoroughly so acidic residue does not remain in gaps and crevices.
- Wear safety glasses and chemical-resistant gloves before starting.
- Avoid contact with nearby materials such as glass, aluminum, metal trim, and unpainted plastic.
- If the product contacts surrounding materials, rinse them immediately with plenty of water.
- Always pre-test single-stage paint without clear coat, severely deteriorated paint, repainted panels, and special-pigment finishes.
- Acid may not remove tree sap, resin, grease, or other non-responsive contamination.
- The product label and instructions take priority when determining compatible materials and the correct application method.
Alternating between an acidic remover and a paint cleaner does not mean the two products should react together. Complete each process separately: fully remove the chemical and residue, rinse thoroughly, and only then use the next product.
When a Visible Water Spot Does Not Respond to the Remover
A visible water spot does not necessarily expose the mineral surface that the acid needs to reach.
If oils, wax, silicone residue, or an old protective layer remain on the paint, the mark may still be visible while the acidic ingredients are unable to reach the mineral deposit itself. If the first application produces no change, do not immediately increase the acid concentration, extend the dwell time, or assume that etching has already changed the clear coat.
First, use a residue-free maintenance paint cleaner to remove the organic contamination film and old protection from the surface. Products rich in glaze or oils are not suitable for this step because they may cover the mineral surface again.
Afterward, fully remove the released contamination and residue according to the product method. If necessary, degrease the surface to remove remaining oils. Then rinse thoroughly with water so different chemicals do not mix on the surface, and dry the paint again.
Reapply the acidic remover in this condition and check whether it now reacts with the mineral deposit.
When there is no reaction, inspect the upper contamination film covering the minerals before increasing the strength of the acid.
This is not a fixed sequence that progressively increases product strength, such as remover → paint cleaner → remover.
Use the paint cleaner as a conditional preparation step that exposes covered minerals and allows the chemical reaction to occur. Why Paint Cleaners Work the Way They Do explains the cleaning principle.
If cleaning the surface allows the acidic remover to react and the mark disappears, a mineral deposit caused the water spot. If a depression or scattered reflection remains after you remove both the upper contamination and the minerals, inspect the clear coat for possible etching.
Softening the Contamination Chemically, Then Removing It with Fine Abrasives
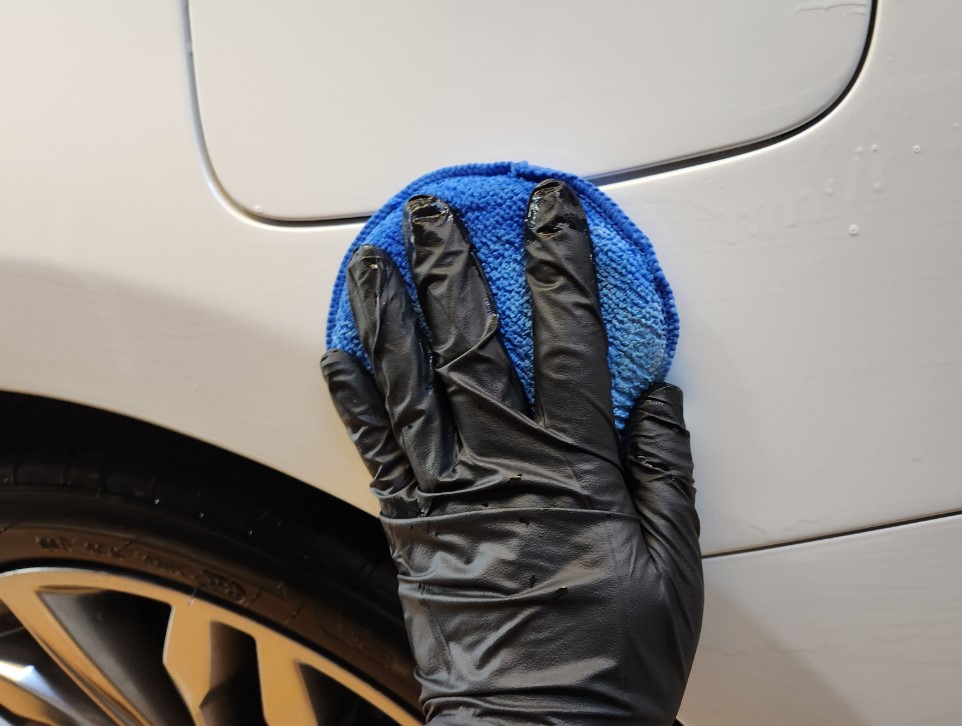
Another method combines chemical cleaning with fine abrasives. It does not begin by aggressively cutting the paint. The chemical ingredients first soften the contamination layer, and the abrasives then help separate the weakened residue from the surface.
Depending on the formula, the product may contain solvents, chelating agents, acids, surfactants, cleaners, or dispersants. These ingredients can weaken mineral deposits, loosen oils, wax, silicone, and other residue that covers them, and help prevent released contamination from bonding to the paint again.
After the specified dwell time, place the pad or applicator evenly against the paint and use light back-and-forth movements. Keep the pad fully seated instead of concentrating pressure on one point. The fine abrasives support the chemical action by lifting softened contamination and residue that still clings to the surface.
This method first softens the contamination chemically, then removes it through even pad contact and repeated fine-abrasive movement.
At this stage, fine abrasives mainly clean softened contamination and altered surface residue. They do not perform the full clear-coat correction associated with polishing.
Product names do not identify the removal method by themselves. Some water spot removers contain fine abrasives, while some paint cleaners combine chemical cleaning with abrasion. Types of Paint Cleaner explains the differences between dry-use, wet-use, abrasive, and glaze-type products.
The formula alone does not determine removal power. Pad construction, paint contact, pressure, working-area size, and the number of passes all influence both cleaning strength and paint impact. How to Use a Paint Cleaner explains how to control pad contact, pressure, and working time.
Begin with a small test area, follow the specified dwell time, and use low pressure. Continue only while the same product, pad, pressure, and number of passes keep reducing the mark.
When improvement stops, stop increasing pressure or passes. Additional work may shift the process from contamination removal to unnecessary clear-coat abrasion.
The Two Methods Are Not a Strength Ladder
Neither the acidic dissolving method nor the chemical-and-fine-abrasive method is always stronger or safer. They remove contamination by different principles, and their risks arise at different points.
The acidic dissolving method can react directly with minerals without abrasion, but you must control panel temperature, drying, dwell time, and residue in gaps.
The chemical-and-fine-abrasive method can remove a mixed contamination film containing oils and protective-product residue, but its effect on the paint increases as pad pressure and the number of passes increase.
The selection criteria are not the product name or its advertised strength.
- Whether the mark covers a broad area or stays localized
- Whether minerals dominate the contamination
- Whether oils or protective-product residue coat the deposit
- The condition of the paint and surrounding materials
- How you can remove the chemical and released contamination from the surface
Consider these conditions together when selecting the method that fits the current mark.
You do not have to use a fine-abrasive product after an acidic remover. If the acidic reaction removes the minerals, end the process there. Conversely, select a chemical-and-fine-abrasive product from the beginning when it better suits the mixed contamination.
Water spot removal is not a process of adding progressively stronger products. It is a process of selecting the removal principle that matches the contamination currently remaining.
Check Whether the Mark Was Removed or Merely Hidden
A mark that disappears immediately does not complete the assessment.
Some cream-type water spot removers and paint cleaners contain oils and lubricants that help the pad move smoothly, as well as glaze ingredients that fill minor defects.
Glaze can fill and temporarily hide a remaining mark. Oils and lubricants can also leave a thin film that changes reflection and surface feel, making it difficult to tell whether the process fully removed the minerals or whether etching remains beneath the former deposit.
Inspect the result under the same lighting and from the same angle used before the work. If the product contains oils, lubricants, or filling ingredients, degrease a small section of the treated area and inspect the actual paint condition again.
Degreasing does more than remove product residue. It strips away the appearance created by oils, lubricants, and glaze so you can inspect the paint’s true condition.
If the mark remains absent after degreasing, consider the deposit removed.
If the mark reappears, the process may not have removed all contamination, or clear-coat etching may already have existed beneath the deposit.
Before applying the remover again, inspect the surface feel, the mark’s shape, and the way light breaks across it. Determine whether removable material still sits on the paint or whether the deposit has gone and damage has altered the paint, then choose the next process.
When to Stop Using the Remover
A water spot remover can remove mineral deposits and mixed contamination films from the top of the paint. If correct application continues to reduce the mark, removable material still remains.
However, stop using the remover if a depression and scattered reflection remain after you remove the upper contamination film and mineral deposit.
An acidic remover can remove raised mineral material, but it cannot restore clear coat after etching lowers or deforms it.
Decision Point
If the mark remains absent after degreasing, end the removal process.
If the surface holds no removable material but a depression and scattered reflection remain, inspect for etching.
Repeating the remover in this condition will not improve the etching; it will only increase the risk to the paint and surrounding materials. If the mark remains after the surface deposit has disappeared, do not use a stronger remover. Change the assessment to clear-coat etching and determine whether polishing is appropriate.
3. Polishing|Correcting Etching Left After Deposit Removal

Why a Mark Can Remain After Deposit Removal
After water spot removal, a circular edge or difference in gloss may remain in the same location. It is easy to assume that the remover was too weak, apply a stronger acidic product, or keep rubbing the same area.
But once you remove the deposit from the paint, the nature of the problem changes.
Minerals that still remain on the surface do not create the visible mark at this stage. Chemical and thermal effects deform the clear coat while a deposit sits on hot paint or repeatedly becomes wet and dries; this deformation is etching.
The altered area can develop a minute height difference relative to the surrounding paint. When the surface is no longer even, light cannot reflect uniformly and instead scatters.
The surface may therefore feel clean and contain no minerals, yet inspection lighting still reveals the former droplet outline and scattered reflection. Removing the deposit has exposed the etching beneath it.
An acidic remover can react with minerals on top of the paint, but it cannot raise clear coat after etching lowers it or restore a deformed surface to its original height.
Use a remover on a water spot that sits on top of the paint. Use polishing on etching that remains after deposit removal.
Polishing Is Not a Stronger Form of Mineral Removal
Polish is not simply a cleaner one step stronger than a water spot remover.
A remover eliminates minerals and mixed contamination films remaining on top of the paint. Polishing uses abrasion to reduce clear-coat deformation and height differences that remain after the deposit is gone, restoring more uniform light reflection.
Failing to distinguish these purposes creates two problems.
Polishing from the beginning removes paint to deal with mineral deposits that a remover alone might eliminate. Conversely, repeatedly applying an acidic remover after the deposit has disappeared will not improve etching and will only increase the risk to the paint and nearby materials.
Before polishing, wash away particulate contamination and remove deposits with a product that suits the mark. Then inspect the surface under the same lighting and from the same angle. If the previous product contained fillers, degrease a small section to reveal the actual condition.
Change the purpose to paint correction only when the same mark remains after you remove all material from the surface.
Polishing Reduces Height Differences in the Paint Surface
Polishing does not remove a mark through heavy pressure. Instead, keep the pad flat and evenly seated against the paint while the abrasives move repeatedly across the working area. This controlled movement gradually levels the surrounding clear coat and reduces the minute height difference created by etching. It does not fill the mark. Instead, the abrasives level the surrounding paint and reduce the height difference itself.
The core of polishing is not excessive pressure, but even pad contact and repeated abrasive movement.
When the pad sits steadily against the paint, the abrasives move consistently through the working area and level the surface.
Excessive pressure, by contrast, slows pad movement, concentrates heat, and may remove more paint than the correction requires.
Pressure alone therefore does not create the actual cutting power.
- The cut of the compound
- The material and construction of the pad
- Contact between the pad and paint
- Pad movement and working speed
- Working time and number of cycles
- Paint hardness and current paint condition
These factors work together to produce the result.
Fine Abrasion in a Remover and Polishing Have Different Purposes
Cream-type water spot removers and abrasive paint cleaners may also contain fine abrasives. At that stage, however, the abrasives mainly clean contamination that chemical ingredients have softened and remove altered surface residue.
Polishing begins with a different purpose. It no longer targets contamination on top of the paint; it directly corrects deformation in the clear coat.
- Fine abrasion in a remover: cleans chemically softened contamination and surface residue
- Abrasion during polishing: reduces height differences in the deformed clear coat
Rubbing a remover for longer does not automatically turn the process into polishing. Reassess the surface and deliberately change the purpose from contamination removal to paint abrasion.
Begin with the Least Aggressive Polishing Combination
Even when polishing is necessary, there is no need to begin with a strong compound and an aggressive pad.
Test a relatively soft pad and low-cut combination on a small area first, then inspect how much the mark improves.
Keep the pad flat and evenly seated against the paint. Rather than applying excessive pressure, maintain pad movement so the abrasives travel repeatedly and consistently across the work area.
It is safer to work in short cycles, wipe away the residue, and inspect the change under the same lighting and from the same angle than to polish continuously for a long period. If the compound or polish contains substantial oils and lubricants, degrease a small section to verify the true level of correction.
Continue only within the necessary area while the same combination and amount of work keep reducing the mark. When improvement stops, do not automatically add pressure or cycles.
Reassess whether the mark requires more aggressive polishing and whether the remaining paint film can tolerate it safely.
The goal of polishing is not to keep cutting until the mark is invisible. It is to level the surface within the amount of correction the paint film can safely allow.
If the etching is deep, or you cannot confirm the paint condition and repaint history, stop after reasonable improvement rather than pursue complete removal. Preserving the remaining clear coat matters more than eliminating every trace of the water spot.
Deep Etching Requires Paint Repair
Polishing cannot completely remove every case of etching.
If the etching is too deep to reduce the height difference safely, do not continue polishing in pursuit of complete removal. Damage deeper than the clear coat’s safe correction range, or a mark that affects the basecoat, is beyond what polishing can restore.
In that case, finish after improving the mark as much as safety allows. When the vehicle requires complete restoration, assess paint-repair options such as clear-coat repair or localized repainting.
Polishing may correct shallow etching, but deep etching beyond the safe correction range requires paint repair—not more aggressive polishing.
Water Spot Care Is Not One Fixed Sequence
You do not always need to complete acidic pre-wash, water spot removal, and polishing in order. The paint condition determines where the process ends.
- Broad, thin mineral film: acidic pre-wash
- Visible mineral deposits: water spot remover
- Shallow etching remaining beneath the deposit: polishing
- Deep etching beyond the safe polishing range: paint repair
If an acidic remover does not react, check whether an organic contamination film or protective layer is covering the mineral surface before automatically increasing product strength. When necessary, remove the upper film with a residue-free paint cleaner and then reapply the acidic remover.
If the mark disappears during removal, polishing is unnecessary. If a depression and scattered reflection remain after you fully clean the surface, inspect the paint film and decide whether polishing is appropriate.
This is not a fixed sequence that adds products one by one. It is a decision framework that identifies what remains and changes the purpose of the process accordingly.
Frequently Asked Questions
Should I Polish as Soon as I See a Water Spot?
No. First remove any mineral deposit or mixed contamination film from the top of the paint. If the mark remains after you clean the surface, inspect for possible clear-coat etching and then decide whether polishing is appropriate.
Can Repeated Acidic Pre-Washing Remove Distinct Water Spots?
An acidic pre-wash is a maintenance process for broad, thin, early-stage mineral film. A water spot that has already developed into a distinct deposit may require a separate removal process. If there is no improvement, increasing only the concentration and dwell time also increases the risks associated with drying and trapped residue.
Do I Need to Use an Acidic Remover and a Fine-Abrasive Remover in Sequence?
Not always. They are different removal methods, not fixed consecutive stages. If one method suited to the current contamination removes the mark, the process ends there.
What Should I Do If an Acidic Remover Does Not React?
Check whether oils, wax, silicone residue, or an existing protective layer are covering the minerals. When necessary, remove the upper film with a residue-free paint cleaner, fully remove the product and contamination, and then reapply the acidic remover.
What Is the Difference Between a Water Spot Remover and a Paint Cleaner?
Product names alone do not provide an accurate distinction. Water spot removers include acidic dissolving products and cream-type products with fine abrasives. Paint cleaners include non-abrasive cleaners, abrasive types, and glaze-containing types. Check the actual ingredients, removal principle, and application method rather than relying on the product name.
If the Mark Disappears Immediately, Did the Process Fully Remove It?
Oils, lubricants, or glaze may have temporarily hidden the remaining mark. Inspect it under the same lighting and from the same angle as before. When the product allows it, degrease a small section to determine whether the process truly removed the mark.
How Quickly Should I Remove Water Spots?
Rather than following a fixed number of days, remove them as soon as reasonably possible after discovery. A mark can form after a single droplet dries, and the risk of a harder deposit and etching can increase if it remains on hot paint or repeatedly becomes wet and dries.
Are Water Spots and Mineral Scale the Same Thing?
Not exactly. “Water spot” is a broad term for a circular mark left where a water droplet dried. “Scale” more often refers to the deposited layer formed by accumulated inorganic minerals such as calcium and magnesium. In practice, identifying what remains on top of the paint matters more than the name of the mark.
Can I Use Vinegar to Remove Water Spots?
The acetic acid in vinegar may react with some minerals, but manufacturers do not formulate household vinegar with the controlled concentration, working characteristics, or material compatibility of an automotive paint product. Hot paint and rapid drying increase risk, so test a purpose-made product on a small area first.
Can Water Spots Form on a Ceramic-Coated Vehicle?
Yes. A coating may reduce the adhesion of water and contamination and make cleaning easier, but it does not remove the minerals contained in water. Mineral residue can still remain when water dries on top of a coating. Do not leave water marks for long periods, and use a maintenance method allowed by the coating manufacturer.
Should I Reapply Protection After Water Spot Removal?
It depends on the method. If an acidic reaction alone removed the deposit, first inspect the existing protection. A paint cleaner, chemical-and-fine-abrasive product, or polish may weaken or remove the coating or wax in the treated area. After degreasing, reapply protection where necessary.
Do Glass and Paint Require the Same Water Spot Removal Method?
The removal principles may be similar, but do not apply the same product and process unchanged. Use glass-specific acidic removers or abrasives on glass, and evaluate the risks to surrounding rubber, metal, and tint film separately. Assess paint according to clear-coat condition and the amount of safe abrasion; each material requires a dedicated method.
Conclusion
Water evaporation leaves both mineral film and water spots, but each takes a different form on the paint and requires a different removal stage.
Use an acidic pre-wash to manage broad, thin, early-stage mineral film that reduces overall gloss. Weaken it through an acidic reaction, separate it during the second wash, and remove it in the final rinse.
Remove visible water spots either by loosening and dissolving the minerals through an acidic reaction or by chemically softening the contamination layer and lifting it with even pad contact and repeated fine-abrasive movement.
If an acidic remover does not react, check whether an organic contamination film or existing protective layer hides the mineral. When necessary, remove the upper film with a residue-free paint cleaner and reapply the remover.
Immediately after the process, oils, lubricants, and glaze may hide the actual condition. Degrease the necessary area and inspect the true result.
If the surface deposit has disappeared but the mark remains, the next subject to inspect is no longer contamination but the paint film. Correct shallow etching by reducing the height difference through polishing. Treat deep etching beyond the safe polishing range as a paint-repair issue.
Water spot removal is not a process of using progressively stronger products in a fixed order. It is a process of identifying whether the surface has a broad, thin mineral film, a visible deposit, or established etching, then changing the removal principle to match what currently remains.