When Should You Use a Paint Cleaner?
“I finished washing the car, so why does the paint still look dull?”
You may have thoroughly pressure-rinsed the vehicle, foamed it, and completed a careful contact wash, yet the paint still feels slightly rough and lacks optical clarity.
At this point, many people either increase the cleaner concentration or apply more pressure during contact washing. But some contamination remains even after a proper wash because it requires a different removal method.
Old wax residue, oily film, paint transfer, and other bonded contamination can remain after normal washing. A paint cleaner is used at this stage to remove what conventional washing leaves behind, without immediately moving to full paint correction.
The important question is not how aggressively you can scrub the surface. It is whether the paint has been prepared well enough to safely increase surface contact.
This guide explains how paint cleaners work, how dry and wet systems differ, when abrasives or glaze become useful, how to use the product, and where to stop before additional contact creates more risk than benefit.
Table of Contents
- How Is a Paint Cleaner Different From Pre-Wash and Alkaline Cleaning?
- What Types of Paint Cleaners Are There?
- When and Where Should You Use a Paint Cleaner?
- Paint Cleaner Application Sequence
- How to Use a Paint Cleaner: Contact, Pressure, and Lubrication
- Paint Cleaner Risks and Limitations
- Frequently Asked Questions
- Conclusion
1. How Is a Paint Cleaner Different From Pre-Wash and Alkaline Cleaning?
When contamination remains after a thorough wash, it is easy to assume that the cleaner was simply not strong enough.
But the decisive variable at this stage is often not chemical strength. It is how safely surface contact can be increased.
The Wash Process Is Not Simply a Progression From Weak to Strong
During pre-washing, a large amount of contamination may still remain across the paint.
Increasing contact at this stage can trap particles between the tool and clear coat, turning them into a source of scratches. Pre-washing therefore focuses on reducing particulate contamination while keeping physical contact low.
Once general contamination has been removed, another type of residue may remain: old wax film, oily residue, transfer marks, or other contamination that normal cleaners do not remove easily.
Chemically, some of these materials could also be addressed with dedicated degreasers or other specialized cleaners.
That tells us something important: the problem is not always that conventional washing chemistry is too weak. The question is which removal method makes the most sense at this stage.
Once the paint has been properly cleaned, the surface condition has changed. Unlike the beginning of the wash, there are fewer loose particles, which means controlled contact can now be increased more safely.
This is where a paint cleaner becomes efficient.
Instead of treating every remaining residue with a different chemical product, the working range is narrowed to the paint surface itself. Solvents reduce the attachment of suitable contamination, while the applicator physically lifts and removes what has been weakened.
The combination of chemistry and controlled surface contact can therefore provide more effective removal than chemistry alone.
Alkaline Chemistry Reacts; Solvents Work by “Like Dissolves Like”
Alkaline cleaners remove certain contamination through chemical action.
Depending on the contamination, the alkaline environment can change its chemical state and make it easier to disperse or rinse away.
Old hardened wax films, silicone-rich residue, and some oily contamination may respond differently. Their structure can become compact or resistant enough that alkaline chemistry alone does not easily penetrate and remove them.
Paint-cleaner solvents work through a different mechanism.
Rather than relying primarily on the same type of chemical reaction, solvents can enter and mix with materials that have compatible chemical properties—the basic principle often summarized as “like dissolves like.”
Oily residue, old wax film, and similar organic contamination do not mix well with water. A compatible solvent can penetrate the film, causing swelling or softening and reducing its adhesion to the paint.
For a deeper explanation of how pH, surfactants, solvents, dilution, and working conditions affect alkaline cleaning, see What Determines the Cleaning Power of an Alkaline Cleaner?.
This difference in mechanism also explains why paint cleaners are used differently.
Solvent-softened contamination does not necessarily detach by itself. An applicator pad still has to make physical contact and separate it from the paint.
That is why paint cleaners are generally applied and worked against the surface rather than simply sprayed on and rinsed away.
2. What Types of Paint Cleaners Are There?
Paint cleaners should not be divided simply into “strong” and “weak” products.
A more useful distinction is based on how the product reaches the contamination, how the contamination is separated, and how the residue is recovered from the surface.
Dry vs. Wet — Different Ways of Delivering the Solvent
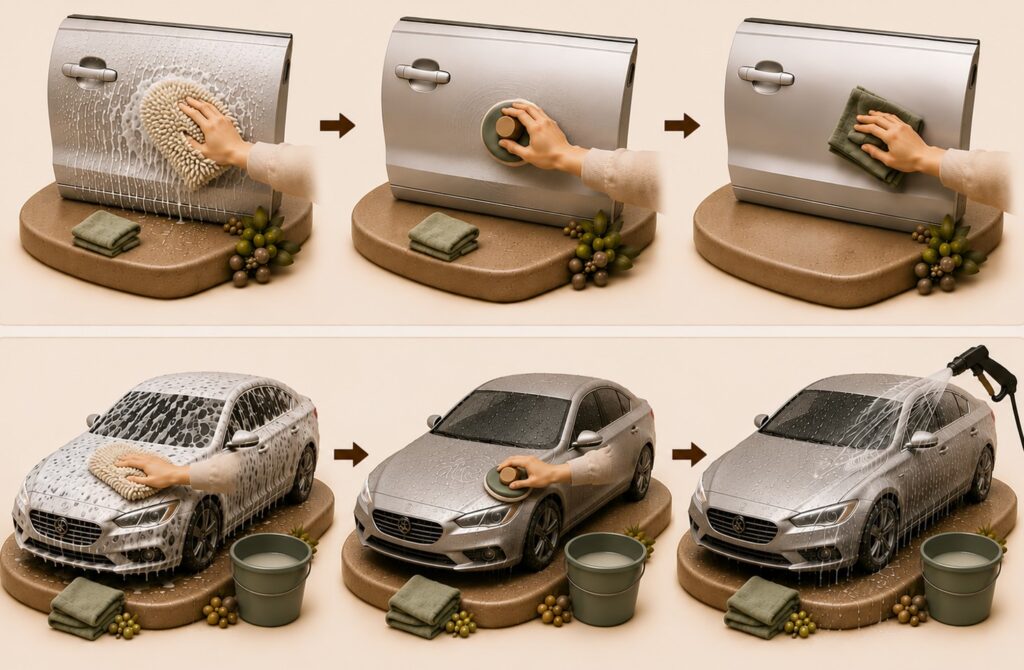
Weakening contamination does not complete the cleaning process.
The weakened material must still be separated from the paint and removed from the working area.
The difference between dry-use and wet-use paint cleaners begins with how the product is delivered to the contamination.
A dry-use paint cleaner keeps the product directly between the applicator and the paint.
Because it is not broadly dispersed through a large volume of water and surfactants, the solvent system can remain relatively concentrated within the local working area. This makes dry-use products well suited to smaller, harder, more localized contamination.
The trade-off is that loosened contamination and product residue remain in the same area and must be physically removed with the pad and towel.
A wet-use paint cleaner uses water and surfactants to distribute the cleaning system more broadly.
This is useful when treating a thin contamination film across a larger surface. After the work is complete, the product and separated contamination can remain dispersed in the wet system and be carried away during the final rinse.
The chemical roles of pH, solvents, surfactants, and supporting additives are explained in more detail in What Determines 3PH Car Wash Cleaning Power?.
| Type | Solvent Delivery | Working Character | Recovery | Best Suited For |
|---|---|---|---|---|
| Dry-use | Held directly in the working area | More locally concentrated | Pad and towel | Small, hardened contamination |
| Wet-use | Broadly distributed by water and surfactants | More uniform over a larger area | Final rinse | Broad, thin contamination film |
Abrasive vs. Non-Abrasive — Should Physical Separation Be Increased?
If the solvent weakens the contamination sufficiently, it may be removed without abrasive particles.
However, older or more firmly bonded contamination may require additional physical separation. Some paint cleaners therefore include very fine abrasives.
The abrasive component does not replace chemical cleaning.
Its role is to assist the physical separation of contamination that has already been weakened but still resists removal.
This also helps explain why a small abrasive content can behave differently in wet and dry systems.
In a wet system, water and surfactants broadly distribute the product and contamination. Fine abrasive particles are also dispersed and lubricated within that working system.
As a result, a small abrasive fraction may spend less time concentrated between the pad and paint under repeated direct contact, limiting how much secondary cutting effect it provides.
In a dry-use system, the product and abrasive particles remain more directly within the pad–paint interface. Repeated contact can therefore allow even a relatively small abrasive fraction to contribute meaningfully to removal.
This does not mean that water prevents abrasion.
A water-based product can still polish aggressively if it contains enough abrasive material and is formulated around an abrasive slurry. In that case, abrasion is a primary function of the product rather than a small supporting element.
Glaze — Filling Is Different From Lubrication
Dry-use paint cleaners often contain oils or other lubricating ingredients to reduce friction while the pad moves across the paint.
These oils can leave the finish looking smoother and clearer, but lubrication and glazing are not the same function.
Lubrication controls friction during the work.
Glaze intentionally reduces the visibility of fine surface defects after the work.
Glaze fillers do not physically remove swirl marks or shallow defects.
They occupy or optically modify microscopic irregularities so that less light is scattered from them, reducing their visual contrast.
Abrasion physically reduces the height of a defect. Glaze reduces the visual contrast of the defect that remains.
A product containing both fine abrasives and glaze can therefore produce two effects at the same time: some actual removal and some concealment.
Compatibility With the Next Protection Step
A dry-use product that leaves glaze fillers or lubricating oils may require residue removal before a coating is applied.
A wet-use paint cleaner designed to rinse clean can often be thoroughly rinsed, dried, and followed directly with a coating.
A panel wipe or degreasing step can still be added when a cleaner bonding surface is desired, and any specific preparation required by the coating manufacturer should take priority.
3. When and Where Should You Use a Paint Cleaner?
The decision to use a paint cleaner should be based on the condition and objective, not on a fixed maintenance schedule.
First decide whether the problem is contamination that should be removed or a visual defect that may be better concealed or corrected through another process.
Choose the Process According to the Goal
| Paint Condition | Purpose | Working Area |
|---|---|---|
| Overall gloss looks dull and a thin film remains | Remove accumulated contamination film | Entire painted surface |
| Old wax needs to be removed before applying new protection | Remove previous protection layer | Area receiving the new protection |
| Hardened mineral residue remains on one panel | Remove the remaining bonded layer | Affected panel |
| Paint transfer or black scuff marks are present | Remove transferred material | Mark and surrounding working area |
| Fine swirls and uneven reflections are visually distracting | Conceal with glaze | Panels where appearance needs improvement |
Full-Vehicle Work vs. Spot Treatment
If the entire vehicle looks dull, full-surface treatment may make sense.
If only one transfer mark remains, work only on that area and the small surrounding section needed for safe pad movement.
A paint cleaner does not need to be applied to the entire vehicle just because one localized defect exists.
Reduce Mineral Contamination Chemically First, Then Physically Separate What Remains
Mineral spots are concentrated and deposited inorganic residues.
They are not primarily the type of contamination targeted by the solvent principle of “like dissolves like.”
When the mineral film is still thin and early in its development, first reduce it chemically with an acidic pre-wash or a dedicated mineral-removal step.
If the surface recovers through low-contact chemical cleaning and rinsing, stop there. There is no reason to increase physical contact further.
If mineral residue remains after the acidic pre-wash or dedicated removal process has been performed correctly, the remaining layer is more likely to be strongly bonded.
At this stage, the role of the paint cleaner shifts toward physical separation through increased pad contact.
If the paint cleaner contains fine abrasives, they can assist this separation.
Some products may also use chelating ingredients to support chemical action against mineral contamination. However, once a correctly performed acidic treatment has already removed what chemistry can easily reach, the central role of the paint-cleaner stage is often the physical removal of the bonded residue that remains.
Acidic cleaning and paint cleaning should therefore be understood as two different stages with different roles.
The acidic step reduces the amount that must be removed mechanically. The paint cleaner then deals with the remaining bonded layer through greater surface contact and, when necessary, fine abrasion.
Starting directly with aggressive contact or abrasion on untreated mineral deposits can require substantially more physical work.
For more detail on why mineral residue can remain after alkaline washing, see Why Acidic Pre-Wash Is Needed: Mineral Contamination Left After Alkaline Cleaning.
4. Paint Cleaner Application Sequence
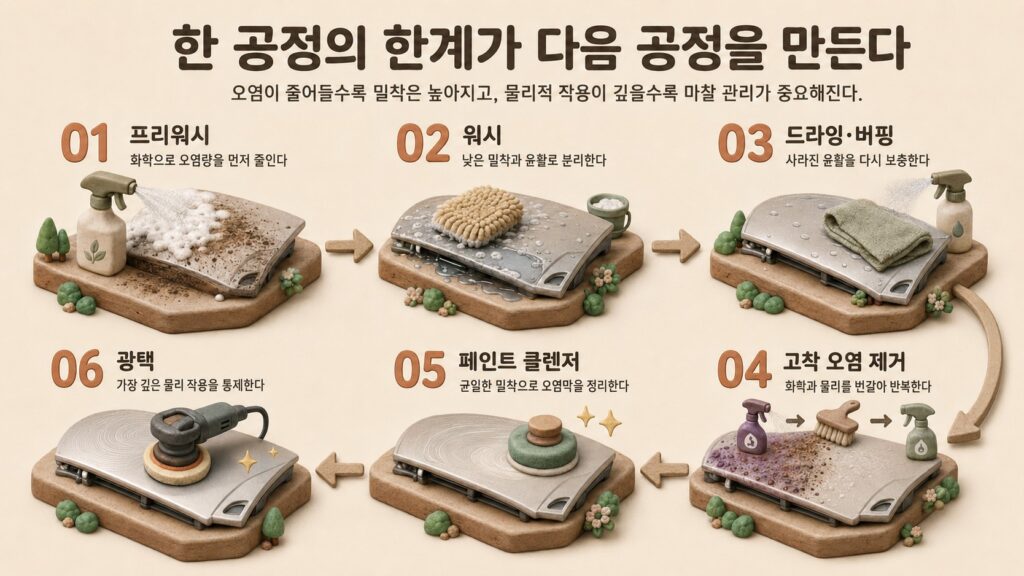
A paint-cleaner process can be organized into six stages:
Preparation → Application → Chemical Action → Removal → Recovery → Finish
Preparation reduces particles that could be dragged under the paint-cleaner pad.
The product is then applied evenly so its cleaning ingredients have time to begin acting before higher-contact removal begins.
The pad separates contamination whose attachment has been reduced, and the separated contamination and product residue are then recovered from the working surface.
Wet and dry systems follow the same overall logic, but they use different recovery methods.
Wet-use: Preparation → Rinse → Application → Chemical Action → Removal → Final Rinse → Drying → Optional Degreasing → Coating or Protection
Dry-use: Preparation → Drying → Application → Chemical Action → Removal → Towel Recovery → Residue Removal or Degreasing When Required → Finish
1. Preparation | Reduce Particulate Contamination as Much as Possible
Preparation creates the surface condition required to use the increased contact of a paint cleaner safely.
A paint cleaner works by placing an applicator directly against the paint. That makes it important to reduce particulate contamination before the pad begins moving.
This is especially important when the process will end with the paint cleaner rather than being followed by machine polishing. Any unnecessary marring created during preparation may remain visible afterward.
A clay bar can effectively remove bonded particulate contamination, but depending on the paint condition and technique, it can also introduce marring or scratches.
When paint correction is not planned afterward, it is reasonable to begin with lower-contact methods and increase contact only as needed.
A 2WASH approach applies two different levels of contact in sequence.
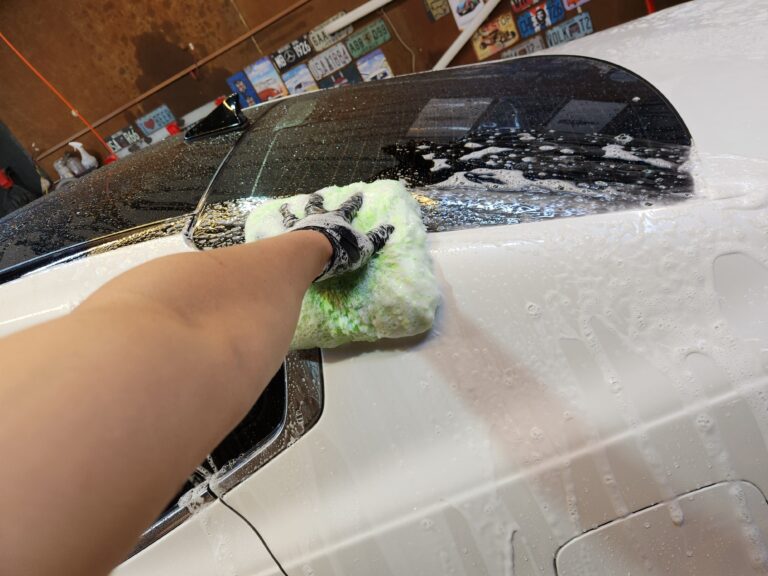
The first wash uses a wash mitt to remove larger particles and loosely bonded contamination.
After the surface is checked, a second wash with a plush microfiber towel uses greater surface conformity to remove thinner surface contamination and fine residue left after the first wash.
| Stage | Tool | Contact Level | Purpose |
|---|---|---|---|
| First wash | Wash mitt | Low | Remove larger particles and loose contamination |
| Surface check | Visual and tactile inspection | — | Identify remaining particles and rough areas |
| Second wash | Plush microfiber towel | Higher than mitt | Remove thin surface contamination and fine residue |
| Rinse | Pressure water | — | Carry separated particles away from the paint |
The purpose of 2WASH is to reduce as much particulate contamination as practical before a high-contact paint-cleaner pad moves across the surface.
2. Application | Spread the Product With Low Pressure
Begin by applying a thin, even layer of product with the pad.
Do not increase pressure at this point in an attempt to remove the contamination immediately.
The logic is similar to spreading polish across a working section before beginning the actual correction cycle.
The first objective is to establish consistent contact between the product, contamination, and paint.
Use only enough hand support to keep the full face of the pad lightly and evenly against the surface.
This creates the conditions for the cleaning chemistry to begin working before higher-contact removal starts.
3. Chemical Action | Give the Chemistry Time to Work First
Chemical action begins as soon as the product is applied.
This stage does not necessarily mean stopping completely and waiting.
The important point is to provide a period in which the cleaning ingredients can act before high contact and repeated mechanical movement are introduced.
Chemical action continues while the product is being spread under low pressure.
With a wet-use process covering a larger area, the application itself may provide much of the required active time.
A short additional period can be used when the product and contamination require it.
Keep the product within its usable wet working window, and consider panel temperature, working environment, and manufacturer instructions.
For a deeper explanation of the relationship between chemical working time and mechanical cleaning, see 3PH Car Wash Cleaning Power: Concentration, Dwell Time, and Mechanical Cleaning.
4. Removal | Separate Contamination After Its Attachment Has Been Reduced
Once the chemistry has had time to act, place the broad face of the pad evenly against the paint and begin removal.
Do not automatically repeat the same area many times.
Work the section, then inspect the change.
Continue only while contamination is clearly being removed and the product, pad, and surface remain within good working conditions.
The next section explains in detail how the pad structure, pressure distribution, and lubrication affect this removal stage.
5. Recovery | Move Removed Contamination Away From the Paint
Separating contamination from the paint is not the end of cleaning.
The product residue and removed contamination must also leave the working surface.
A wet-use product is recovered through the final rinse.
A dry-use product is recovered with a clean towel.
The important point is to prevent material that has already been removed from being dragged back across the paint.
During dry work, change to a clean towel face as contamination accumulates.
During wet work, rinse thoroughly around panel boundaries, trim edges, and gaps where residue can remain.
6. Finish | Protect the Cleaned Surface Again
Paint-cleaner work can affect an existing wax or sealant layer.
After cleaning, reassess the protection and apply the appropriate finishing product where needed.
Before applying a coating, check whether the paint cleaner leaves residual oils, glaze fillers, or other ingredients.
Remove residue when required, and add a degreasing or panel-wipe step when necessary or when specified by the coating manufacturer.
For dry- vs. wet-use coating compatibility, follow the residue principles explained earlier in this guide.
5. How to Use a Paint Cleaner: Contact, Pressure, and Lubrication
The result of paint-cleaner work depends on three variables working together:
surface contact, pressure, and lubrication.
The pad determines how the surface is contacted.
Hand pressure keeps that contact stable and evenly distributed.
The product—and water in a wet system—controls friction and maintains workable movement across the paint.
The Pad Creates the Contact Pattern
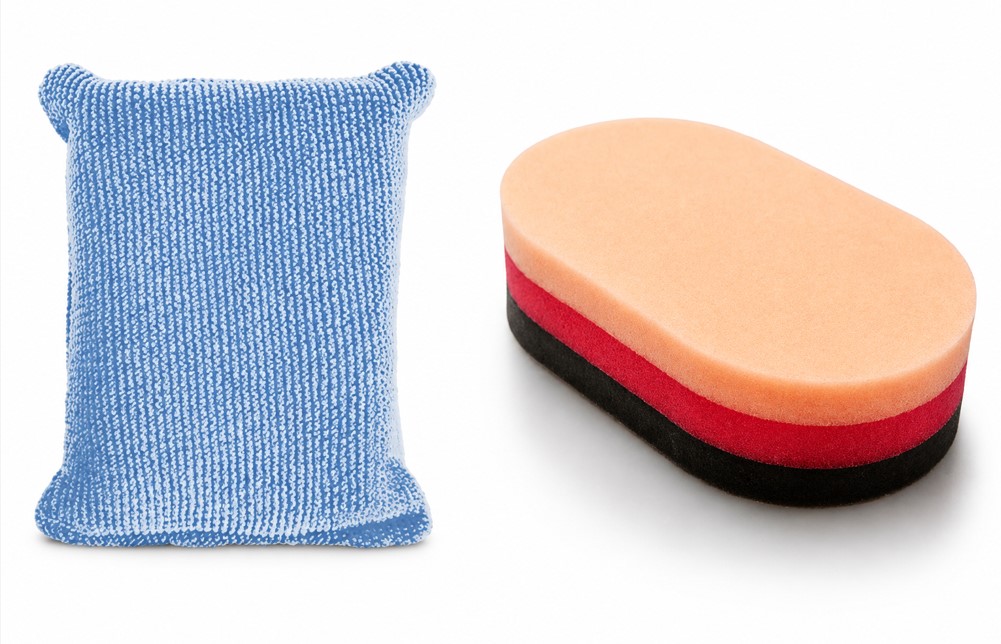
The pad’s surface structure determines how it meets the paint.
| Pad | Contact Pattern | Local Contact Pressure | Suitable Work |
|---|---|---|---|
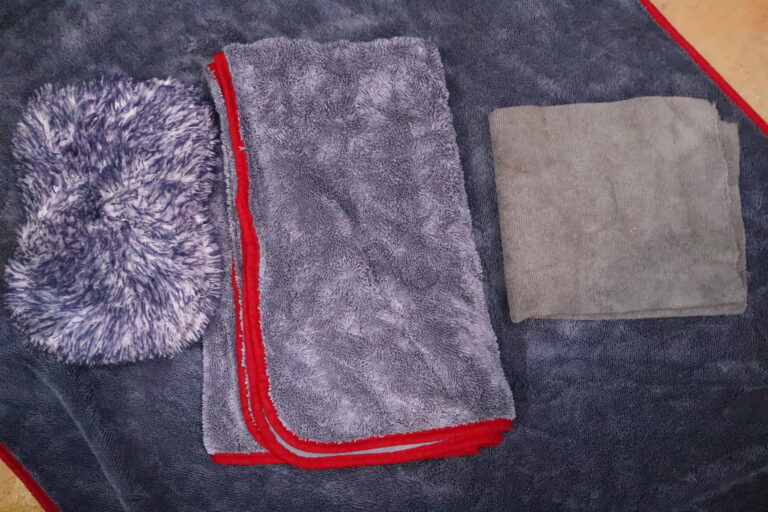
| Microfiber terry applicator | Numerous fiber-tip contact points | Higher | Bonded contamination, paint transfer, higher-removal work |
| Foam / German-style pad | Broad face contact | Lower | General paint-cleaner work, product application, glaze |
A microfiber applicator presents many fiber ends to the paint.
The same hand force is distributed across numerous small contact areas. This can create higher local contact pressure and greater localized removal against bonded contamination and transfer marks.
That extra removal ability also requires more careful pad management.
Once removed contamination accumulates among the fibers, the pad’s strong local contact can turn into a scratch risk.
Microfiber density, pile length, and weave all influence how the pad behaves. Replace or rotate the working face before contamination becomes heavily loaded into the fibers.
A good pad is useful only while its working surface remains clean.
Pressure Establishes Even Contact
The pad structure and thickness create the basic contact shape.
Hand pressure should support that shape and keep the pad evenly seated against the paint.
Pressing through the fingertips concentrates force into a narrow area.
The center of the pad compresses, and friction becomes stronger directly beneath the fingers.
Supporting the pad with the palm spreads the same force over a larger area.
The entire pad face remains more evenly engaged and the contact pattern remains more stable while moving.
Fingertips concentrate pressure. The palm distributes pressure and establishes even contact.
The relationship between contamination, pressure, friction, and scratch risk throughout detailing is explained further in How to Prevent Car Scratches: The Ultimate Detailing Guide.
Excessive pressure changes the pad structure:
- The working face bends or tilts.
- Foam pores and microfiber spaces collapse.
- There is less room to accept removed contamination.
- Product is squeezed away from the contact zone.
- Lubrication decreases.
- Friction concentrates near pad edges or beneath the fingers.
Removal does not increase in a simple linear relationship with added pressure.
Once the contamination no longer responds, adding pressure may increase friction and movement far more than it increases actual removal.
When progress slows, first check the pad, product condition, and type of contamination rather than automatically pressing harder.
Lubrication Comes From the Product and Water
Lubrication controls friction between the applicator and paint and helps reduce the risk of separated contamination being dragged across the surface.
While the product remains in a workable liquid state, the pad can move with relatively stable resistance.
Once the product begins to dry, the applicator may start to grab or skip, residue can build up, and friction increases.
A dry-use process depends heavily on the lubrication provided by the product itself.
Work smaller sections and complete removal and recovery while the product remains workable.
A wet-use process also has water present in the working system, which supports pad movement and makes it easier to connect larger working areas.
In either system, accumulated contamination and product residue eventually degrade the working conditions.
The available internal space of the pad decreases, while material that has already been removed begins contacting the paint again.
Changing or cleaning the applicator is therefore not merely a matter of convenience.
It is risk management that restores proper contact and lubrication conditions.
What Changes When a Machine Is Used?
A small orbital or dual-action machine can be used for product spreading and low-intensity repeated movement with suitable paint cleaners.
The sequence remains the same as hand work:
Low-Speed Application → Chemical Working Time → Low-Speed Removal
The advantage of a machine is consistency.
Movement and repetition can be controlled more evenly.
At the same time, however, the number of contacts occurring within the same period increases significantly.
| Variable | What Changes With Machine Use |
|---|---|
| Surface contact | Easier to maintain uniformly on flat panels, but contact can concentrate on one side of the pad on curves and edges |
| Pressure | Machine weight already creates a baseline load; additional downward pressure increases pad deformation, friction, and heat |
| Lubrication | Repetition and generated heat can dry the product faster than hand work |
Use low machine speed and low additional load.
Avoid remaining in one area for too long.
Switch to a smaller pad or hand application around curves, edges, and other areas where full-face contact is difficult to maintain.
The key to using a paint cleaner is not increasing force.
It is maintaining the pad’s intended contact pattern and restoring the working conditions before contamination, residue, or loss of lubrication begins to compromise that contact.
6. Paint Cleaner Risks and Limitations
📉 Gloss is the reward for contact, and scratches are the cost of that same contact.
A paint cleaner removes contamination through direct physical contact.
As contact increases, the range of contamination that can be removed also expands—but so does the risk of scratching.
The critical decision is therefore to identify the point where the benefit of further removal becomes smaller than the risk created by additional contact.
Why Can Side Effects Appear Later?
Paint-cleaner work can look deceptively similar to applying a wax or sealant.
The product is applied by hand and then wiped away with a towel.
But during the actual removal stage, the applicator is pressed against the paint and repeatedly moved over the same working area.
This is where the number of contacts and the amount of friction begin to increase.
Glaze can make the result even harder to judge immediately.
Glaze fillers can reduce the visibility of existing swirl marks. Fine marks introduced during the paint-cleaner process may also become less visible for the same reason.
Immediately after the work, several effects are mixed together:
- gloss gained from contamination removal,
- visual improvement from filling,
- existing defects that have become less visible,
- and any fine marks created during the process.
By the time the filler has gradually washed away and swirls become more visible again, several washes, drying cycles, and buffing sessions may already have occurred.
It then becomes difficult to determine exactly where each mark originated.
This experience can influence the next paint-cleaner session.
Because the immediate result looked good, the same pad, pressure, and number of passes may be repeated.
Over time, many small contact events can accumulate into visible micro-marring even without one obvious major mistake.
When Does Scratch Risk Begin to Increase?
At the beginning of the work, the visual improvement per unit of contact is usually high.
When chemically softened contamination is removed with low, evenly distributed pressure, visible residue transfers to the pad and the finish can improve quickly.
This is the efficient zone: large improvement from relatively little contact.
As contamination decreases, the rate of improvement slows.
Another pass removes less material.
The visual change under the same inspection light becomes smaller.
Meanwhile:
- the pad continues to move,
- residue continues accumulating inside the pad,
- lubrication gradually decreases,
- and in outdoor work, new airborne dust may settle on the surface.
Early in the process, a relatively small amount of risk can produce a large improvement.
Near the working limit, more and more contact is required to produce a smaller and smaller change.
From this point onward, scratch risk begins increasing faster than the benefit of additional removal.
How Do You Know When to Stop?
There is no universal pressure setting or fixed number of passes that determines the stopping point.
Judge it from what changes during the work.
Visual signal:
Choose a small section and make one or two controlled passes with low pressure.
If the mark becomes lighter or contamination transfers to the pad, removal is still occurring.
When the same process produces almost no further change, the benefit of additional contact has become small.
Tactile signal:
If the pad begins to feel grabby, skip, or resist movement, reassess the working conditions.
The product may be drying, the pad may be loaded with contamination, or new particles may have entered the surface.
Correct the cause before deciding whether to continue.
Environmental signal:
If wind deposits dust on the working area or nearby pressure washing introduces contaminated water, the original surface condition is no longer controlled.
Clean the panel and pad again before continuing, or stop the work on that section.
The moment you feel the urge to press harder is the moment to reassess what you are actually trying to remove.
Ask whether the remaining mark is:
- contamination that can still be removed,
- contamination requiring different chemistry,
- a minor visual defect suitable for glaze,
- or actual paint damage requiring correction or repair.
That classification should come before additional pressure.
After Removal Stops, Glaze Can Take Over the Appearance Work
A paint cleaner should remove contamination only within a range where the removal remains reasonably controlled.
When further contact begins creating more risk than improvement, stop the removal process.
Fine visual irregularities that remain can then be reduced with glaze when appropriate.
Removal cleans the paint.
Glaze manages the appearance that remains afterward.
However, inspect the surface before applying glaze.
Raised particles, tar, ferrous contamination, and other actual deposits can still be dragged across the paint during application or buffing.
Glaze is best reserved for visual irregularities that remain after safe cleaning has been completed.
For more on how finishing, residue removal, protection, and surface appearance connect after washing, see How to Buff Car Wax by Hand Without Streaks or Swirl Marks.
Deep scratches, defects that catch a fingernail, clear etching, and clear-coat damage fall outside the normal working range of a paint cleaner.
Those conditions require a separate decision about polishing, paint correction, or professional repair.
The limit of a paint cleaner is determined when the risk of further contact becomes greater than the improvement gained from additional removal.
7. Frequently Asked Questions
Should I Use a Paint Cleaner Every Time I Wash the Car?
No.
If normal washing restores the paint’s clarity, there is no reason to increase surface contact further.
Use a paint cleaner when a removable contamination film or transfer mark remains, or when a product containing glaze is intentionally being used to reduce the visibility of minor cosmetic defects.
How Should I Choose a Paint Cleaner?
Start with the condition rather than the brand name.
First decide whether the contamination is small and hardened or broad and thin. This helps determine whether a dry-use or wet-use product is more suitable.
Next determine whether solvent cleaning and pad contact are sufficient or whether fine abrasion or glaze is needed.
Finally, consider what comes afterward.
A product being followed by wax may have different residue requirements from one being used immediately before a ceramic or glass coating.
Which Is Stronger, a Wet or Dry Paint Cleaner?
Neither is always stronger.
A dry-use product can keep the cleaning system relatively concentrated within a small working area.
A wet-use product can distribute the product evenly over a larger area through water and surfactants.
The better choice depends on the size, thickness, and hardness of the contamination.
The Contamination Is Not Coming Off. Can I Press Harder?
First check whether the chemistry has had enough time to act.
Continue only while the product remains workable, the pad is clean, and low, evenly distributed pressure is still producing visible change.
If the mark stops changing, reconsider what remains.
It may no longer be removable surface contamination.
Identifying the remaining defect is more important than adding pressure.
Can Frequent Paint-Cleaner Use Create Swirl Marks?
Yes, it carries some risk.
Paint-cleaner work places an applicator directly against the paint and uses repeated movement.
The risk rises substantially when particulate contamination remains, pressure becomes excessive, lubrication decreases, or a loaded pad continues to be used.
Reduce particles during preparation, keep pressure low and broad, maintain lubrication, and stop when additional passes produce little further improvement.
Can a Paint Cleaner Remove Water Spots?
Mineral spots are not primarily the type of contamination targeted by the solvent principle of “like dissolves like.”
Thin, early mineral film should first be reduced chemically with an acidic pre-wash or dedicated mineral-removal process.
If a bonded layer remains afterward, a paint cleaner can use higher surface contact and, when necessary, fine abrasion to physically separate what remains.
Some products may also use chelating ingredients to support mineral removal.
Acidic cleaning and paint cleaning should therefore be treated as different stages with different roles rather than as simply weaker and stronger versions of the same process.
Is a Defect Gone Once Glaze Hides It?
No.
Glaze fillers reduce light scattering from microscopic irregularities, making the defect less visible, but the physical defect remains.
As the fillers gradually wash away, the mark may become visible again.
Because glaze itself does not remove clear coat to eliminate the defect, the concealment can be renewed later when desired.
What Type of Paint Cleaner Should I Use Before a Coating?
The more important criterion is what remains on the paint after use.
A dry-use product that leaves glaze fillers or lubricating oils should have those residues removed before coating.
A wet-use product designed to rinse clean can often be thoroughly rinsed and dried before coating.
Add a panel-wipe or degreasing step when a cleaner bonding surface is required or when specified by the coating manufacturer.
8. Conclusion
A paint cleaner is a maintenance process used to remove contamination films that remain after washing and, depending on the product, to add fine abrasion or glaze for further appearance improvement.
The central factor is creating a surface condition where increased contact can be used safely.
Once proper preparation has reduced particulate contamination, solvents can soften or reduce the adhesion of compatible oily, waxy, and organic residues, while the applicator physically separates them from the paint.
For bonded contamination such as mineral residue, chemical cleaning should first reduce what can be removed chemically. Greater pad contact and, where necessary, fine abrasion are then used against the remaining bonded layer.
During application, give the chemistry the first opportunity to work before increasing contact. Then monitor pad condition, lubrication, and actual surface change as removal continues.
The working limit of a paint cleaner is determined by the balance between additional improvement and additional contact risk.
When the risk begins increasing faster than the result, it is time to stop.
Any minor visual irregularity that remains can then be managed with glaze when appropriate.
Professional paint correction physically changes the surface to alter the shape of defects.
A paint cleaner is better understood as a repeatable maintenance process that aims to improve cleanliness and appearance while minimizing unnecessary clear-coat removal.