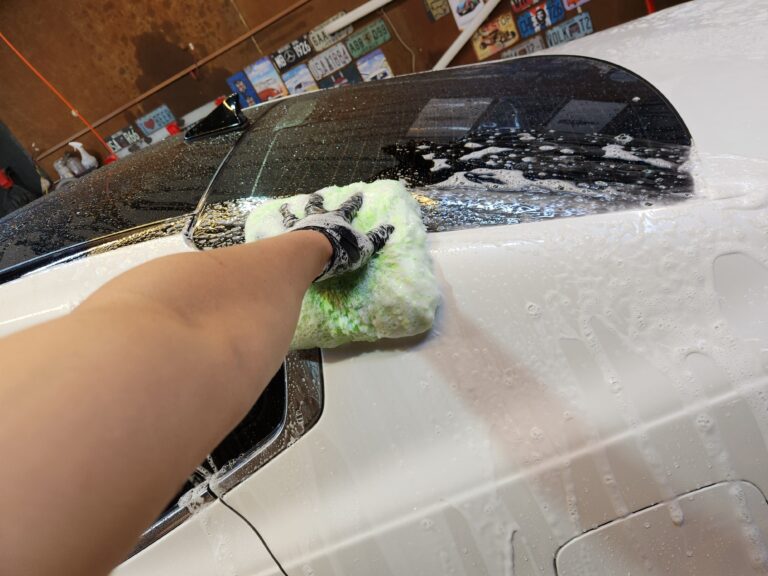
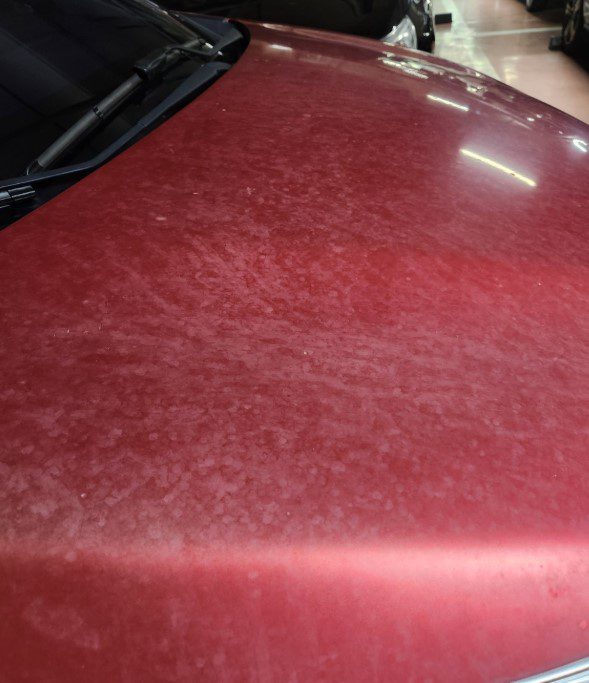
How to remove bugs from a car safely starts with softening dried bug remains before trying to wipe them away. After a summer highway drive, the front bumper, hood, and side mirrors can become covered with bug remains. As they lose moisture and dry, they become much harder to remove.
When pressure water does not remove the bugs, many drivers start rubbing them with a towel or sponge. The more stubborn the contamination is, the more pressure they use and the more often they rub the same area.
This becomes a bigger problem in summer because bug remains can lose moisture quickly and harden on hot paint. Repeatedly rubbing hardened remains and exoskeleton against the paint increases the risk of fine scratches.
Bug contamination can also become a chemical problem. Some bug remains may contain reactive components that can affect the clear coat, while high panel temperatures and longer exposure can increase the risk of etching.
Safe bug removal therefore follows two basic rules.
Remove bugs as soon as practical, and give already dried bugs enough time to soften before removing them.
Think of dried rice stuck to a rice paddle. Fresh rice comes off easily. Once it loses moisture and hardens, much more force is needed to scrape it away. Give it enough water and time to soften, and it can be removed with much less force.
The same principle applies to dried bug contamination on automotive paint.
Contents
- Why Are Bug Marks Harder to Remove in Summer?
- How to Safely Remove Dried Bugs in 3 Steps
- What If Bug Marks Remain After Washing?
- Car Bug Removal FAQ
- Summary | Remove Bugs Early and Give Dried Bugs Time to Soften
Why Are Bug Marks Harder to Remove in Summer?
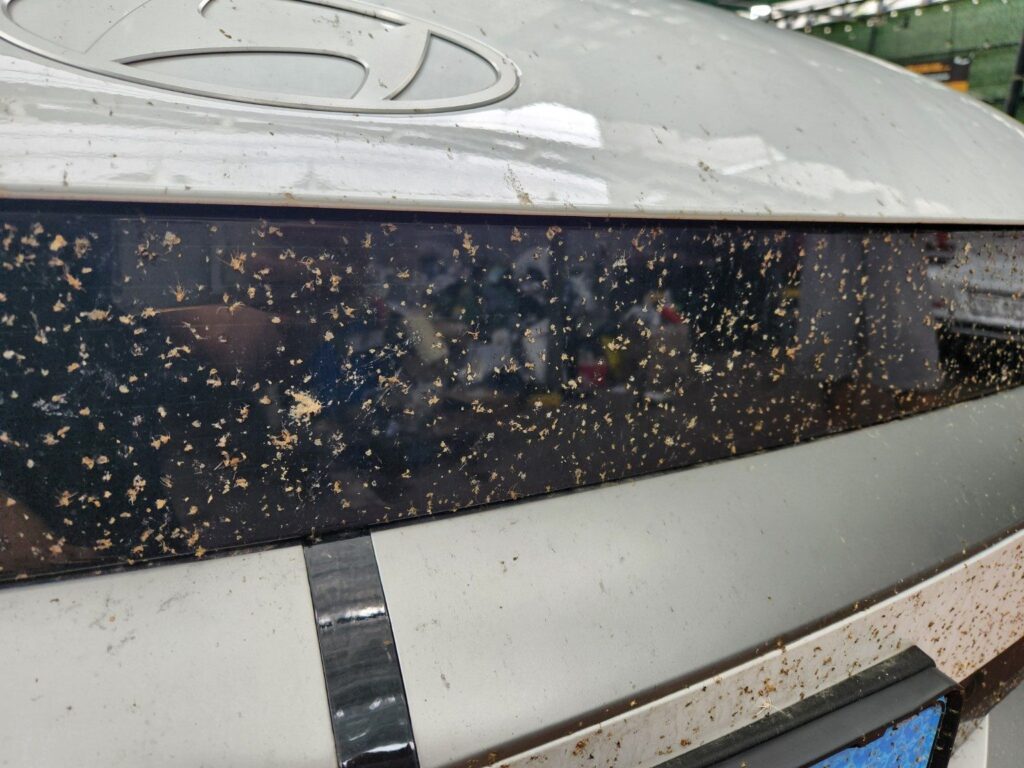
High panel temperature is one reason bug contamination becomes more difficult to remove during summer.
On hot paint, moisture in bug remains and body fluids can evaporate quickly. As moisture decreases, the remaining material becomes concentrated, dries, and bonds more firmly to the surface.
Higher temperatures can also influence the way some reactive components in bug contamination affect the clear coat.
As a result, summer bug contamination can become difficult to remove through faster drying and stronger adhesion, while longer exposure may also increase the possibility of etching.
1. Bug Remains Harden Faster on Hot Paint
Bug remains and body fluids contain water along with proteins, lipids, sugars, salts, tissue, and exoskeleton material.
In summer, bumpers and hoods exposed to sunlight can become very hot. When bugs strike these panels, moisture can evaporate quickly.
As water is lost, the remaining material becomes concentrated and dries into a harder deposit that adheres to the paint.
Dried rice stuck to a rice paddle is a useful comparison.
Fresh rice can be removed easily. Once it loses moisture and hardens, however, it can stick firmly enough to require considerable force to scrape away. Give it enough water and time to soften, and much less force is required.
Dried bug contamination behaves in a similar way.
If hardened bug remains are immediately rubbed with a towel or sponge, dried tissue, exoskeleton, and residue can move across the clear coat. When the contamination does not release, pressure and repeated contact tend to increase.
For this reason, dried summer bug contamination should first be rewetted and given enough time to soften.
2. Heat and Exposure Time Can Also Affect Etching Risk
The bugs that strike a vehicle are not all the same species, and their body fluids and tissues do not have identical chemical compositions.
Some bug remains may contain acidic substances, enzymes, or other reactive components that can affect automotive clear coat. The degree and speed of this effect can vary depending on the type and composition of the contamination.
Panel temperature and exposure time also influence the process.
Higher temperatures generally affect chemical reaction rates. On hot summer paint, bug remains can dry and harden faster, while some reactive components may also affect the clear coat more quickly.
You usually cannot identify the exact species or chemical reactivity of a bug simply by looking at the splatter on the vehicle. This makes it difficult to define one universally safe waiting period for every bug mark.
A practical maintenance rule is therefore simple: remove bug remains as soon as reasonably possible, especially during hot weather.
3 Bug-Removal Mistakes to Avoid
When bugs refuse to come off, it is tempting to use a stronger tool or simply rub harder. Safe bug removal also means avoiding unnecessary damage to the clear coat.
1. Scrubbing with a melamine sponge
Melamine foam has a mild abrasive action. It may remove bug contamination, but it can also reduce gloss or create fine surface damage when used on automotive clear coat. It is therefore not suitable for routine bug removal from painted panels.
2. Repeatedly rubbing dried bugs with a wet wipe
The main problem is not simply the wet wipe itself. The risk comes from repeatedly rubbing hardened bug remains and surrounding particulate contamination before they have been sufficiently softened.
Hard exoskeleton fragments, dust, and other particles can move across the clear coat during repeated contact and contribute to fine scratching.
3. Letting bug remover dry on hot paint
On a hot panel, water can evaporate rapidly from the cleaning solution. The product can become concentrated or leave residue on the surface.
Whenever possible, cool the panel before working, follow the manufacturer’s recommended dwell time, and do not allow the cleaner to dry on the paint.
The harder a bug is to remove, the more important it becomes to increase wetting and dwell time before increasing mechanical force.
How to Safely Remove Dried Bugs in 3 Steps
Bug removal becomes easier to understand when two different types of time are separated.
Keep exposure time short, but give the removal process enough dwell time.
Fresh bug contamination should be removed before it becomes heavily bonded or progresses toward etching.
If the bugs have already dried and hardened, use enough water and suitable cleaning chemistry during the pre-wash stage and give the contamination enough time to soften before removal.
Step 1. Remove Fresh Bugs With a Targeted Wash
The first concern when you notice bug contamination is the possibility of clear-coat etching.
There is no fixed number of hours or days that applies to every bug mark. The chemistry of the contamination, panel temperature, sunlight, and exposure time can all influence the result.
Instead of trying to define one universal “golden time,” use a simpler rule: remove the contamination when you find it.
If your next full wash is several days away, clean only the affected areas, such as the bumper, hood, or side mirrors.
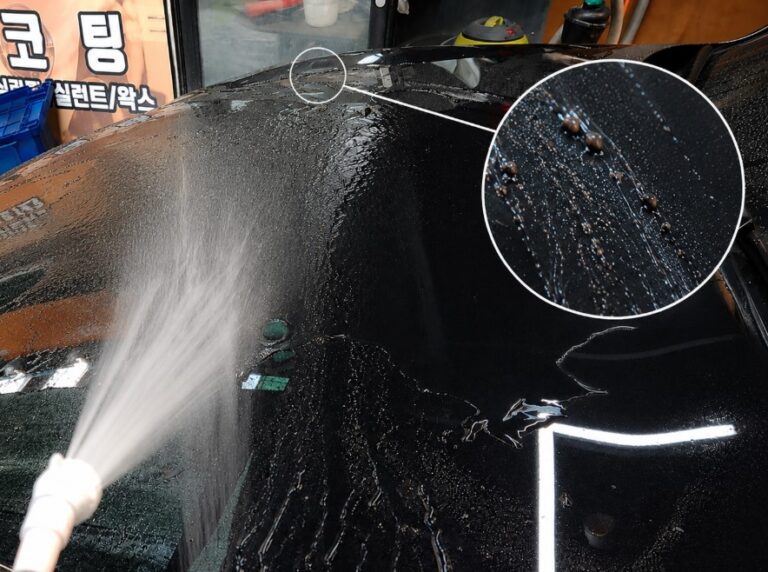
When the bugs have not yet hardened, pressure water alone may remove them relatively easily.
A more controlled approach is to apply bug remover, allow the recommended dwell time, and then pressure rinse.
Bug remover → dwell time → pressure rinse
If the contamination releases during this process, there is no need to add towel or sponge contact.
The purpose of this targeted wash is to remove bug contamination before the next full wash, reducing the time available for drying, stronger adhesion, and possible etching.
Step 2. Soften Dried Bugs During the Pre-Wash

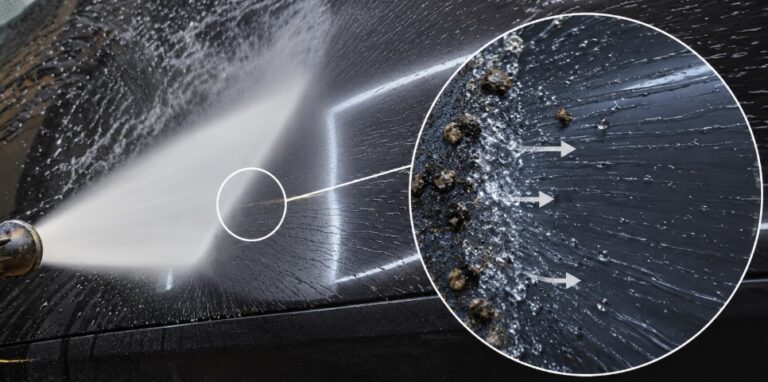
Once bug remains have lost moisture and hardened, they may not release easily under pressure water alone.
Applying more pressure with a towel or sponge can move hardened body fragments, exoskeleton, and residue across the paint, increasing scratch risk.
During a full wash, start by softening and weakening dried bug contamination during the pre-wash stage before direct contact begins.
Why Water Alone May Not Provide Enough Soaking Time
Water is the foundation of the softening process.
When water is supplied to dried bug contamination, it can penetrate the deposit and gradually soften it.
The problem is maintaining that condition long enough.
Water runs quickly from vertical and curved automotive panels. On hot paint, evaporation can also be rapid. Keeping dried contamination wet with water alone may therefore require continuous water supply.
Bug remains also contain proteins, lipids, tissue, and other components, so simple wetting may not quickly remove every type of residue.
This is where cleaning chemistry becomes useful.
A cleaner supplies water while surfactants, solvents, and other ingredients help wet, penetrate, and weaken the contamination.
Water + chemical action + dwell time
For a deeper explanation of how pH, solvents, surfactants, and other ingredients contribute to cleaning performance, see 3PH Car Wash Cleaning Power | pH, Solvents and Surfactants.
Alkaline Pre-Wash or Bug Remover: Which Should You Use?
Dried bug contamination can be treated with an alkaline pre-wash or a dedicated bug remover.
The main difference is the formulation objective.
An alkaline pre-wash is a general-purpose cleaner designed to address widespread oily and organic road contamination. Depending on the product, manufacturers adjust pH, surfactants, solvents, and other cleaning ingredients to achieve the intended performance.
A bug remover is a specialized cleaner formulated specifically around bug splatter, body fluids, and dried residue.
Alkaline pre-wash → general-purpose cleaning for oily and organic contamination across the vehicle
Bug remover → specialized formulation for bug remains and bug residue
General-purpose and specialized do not mean weak and strong.
Alkaline pre-washes vary significantly in actual cleaning performance. A sufficiently capable alkaline cleaner can handle both widespread road film and heavily dried bug contamination.
When using an alkaline pre-wash for bug removal, first understand the cleaning capability of the product you already have.
Check the manufacturer’s recommended dilution and application method, then choose an appropriate concentration for the contamination while staying within the recommended range.
Dedicated bug removers also vary in formulation and cleaning strength. A product being labeled “bug remover” does not automatically make it stronger than every alkaline pre-wash.
For more on choosing alkaline cleaning strength according to the contamination, see How to Choose an Alkaline Pre-Wash.
Dried Bugs Need Enough Dwell Time
Once the cleaner has been selected, dwell time becomes one of the most important variables.
Immediately after spraying a cleaner, water and cleaning ingredients have only been delivered to the outer surface of the contamination. They need time to wet and penetrate hardened residue and reduce its resistance to removal.
This is especially important with liquid bug removers. On bumpers and side mirrors, the liquid can run down quickly.
Apply the bug remover first to the heavily contaminated areas. Once that targeted reaction has started, apply alkaline pre-wash foam over the entire vehicle.
The foam covers the bug-contaminated areas again and helps maintain water and cleaning solution on the surface for longer. The time spent applying and dwelling the full-vehicle pre-wash can therefore be used as additional softening and reaction time for the dried bugs.
Targeted bug remover → reaction begins → alkaline pre-wash foam → additional dwell time → pressure rinse
The key condition throughout this process is that the cleaning solution must remain wet. Hot paint and direct sunlight can shorten the safe working window, so check the working conditions and follow the manufacturer’s recommended dilution, application method, and dwell time.
Treat Bug-Heavy Areas First
When combining targeted bug remover with a full-vehicle alkaline pre-wash, start with the areas carrying the heaviest bug contamination.
Thick, dried bug remains on the front bumper and side mirrors may need more softening time than the thin, widespread road film covering the rest of the vehicle.
Applying cleaner to those areas first starts the wetting and chemical action earlier. The time required to apply the full-vehicle pre-wash then becomes additional dwell time for the bug contamination.
Treat bug-heavy areas first → allow softening to begin → apply full-vehicle pre-wash → pressure rinse
A sufficiently capable alkaline pre-wash may also handle both bug contamination and general vehicle contamination without a separate bug remover.
The important question is whether the hardened contamination receives enough cleaning action and enough dwell time.
For more on why alkaline chemistry is useful when road film, oily contamination, and organic contamination are mixed together, see Why Alkaline Pre-Wash Comes First for Mixed Contamination.
Step 3. Remove the Remaining Residue With Car Shampoo and a Wash Mitt
After the pre-wash and pressure rinse, most of the larger bug remains may be gone, while pale or cloudy traces remain where the bugs originally struck the vehicle.
These traces can be thin residue from body fluids and tissue spread across the paint during impact.
If the pre-wash has provided enough wetting and chemical action, this remaining residue should already be easier to remove.
Lower adhesion means the wash mitt can separate the remaining residue with less pressure and fewer repeated passes.
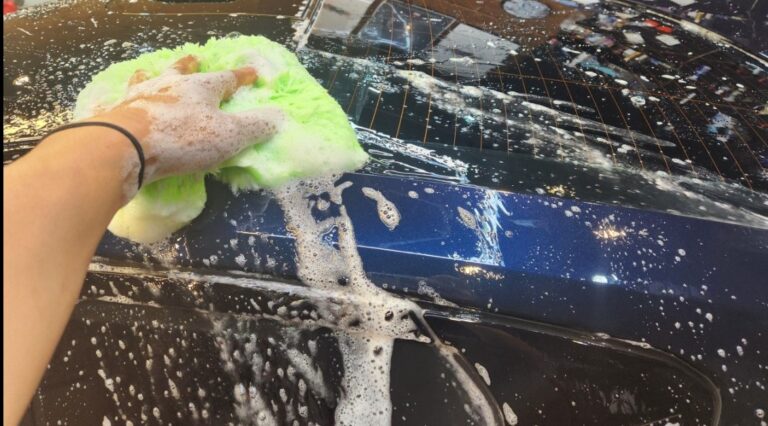
Use plenty of car shampoo for lubrication and lightly wash the remaining contamination with a clean, saturated wash mitt.
Pre-wash softens and weakens → pressure rinse removes larger remains → contact wash removes the remaining residue
The pre-wash does not need to erase every visible trace by itself.
Its role is to change the contamination into a condition that can be removed during the contact wash with less mechanical force.
For the principle behind weakening contamination before a wash mitt touches the paint, see Why Pre-Wash Before a Contact Wash?.
What If Bug Marks Remain After Washing?
After the bug remains and residue have been removed, you may still see an outline, a difference in gloss, or a slight depression where the contamination was located.
At this point, stop repeatedly rubbing the same area. Determine whether removable contamination still remains or the clear coat itself has changed.
- Bug material is still present → add more wetting and dwell time.
- A thin residue remains → remove it during the contact wash.
- The paint is clean but an outline, gloss difference, or depression remains → inspect for clear-coat etching.
The contact wash therefore becomes an important decision point between contamination removal and paint correction.
1. Start With a Paint Cleaner for a Light Remaining Mark
If the remaining mark appears shallow, a paint cleaner can be the next controlled step.
Paint cleaners vary considerably. Some focus mainly on chemical cleaning, while others include fine abrasives or glaze.
A fine-abrasive paint cleaner may lightly refine the clear-coat surface and improve shallow etching or a small difference in gloss.
A glaze-containing product can reduce the visual contrast of a defect by filling or optically masking fine surface irregularities.
That means a mark that appears to disappear immediately after using a glaze-containing product may have been concealed rather than fully corrected.
Wash → paint cleaner → inspect the result
If the mark improves sufficiently within the working range of the paint cleaner, stop there.
For the differences between dry-use, wet-use, abrasive, and glaze formulas, see What Is a Paint Cleaner? | Dry vs. Wet, Abrasive, Glaze Types & How to Use.
2. If the Mark Remains, Consider Compound Polishing
If the outline, gloss difference, or surface deformation remains after the paint-cleaner stage, compound polishing may be the next step.
Paint cleaners vary in abrasive strength, so failure to remove the mark does not by itself tell you exactly how deep the etching is.
It indicates that the defect is beyond the correction range of the product and method you just used.
Polishing removes a small amount of clear coat around the defect to reduce the height difference and improve the reflection.
Start with a mild combination suited to the paint condition, inspect the result, and increase correction only when necessary.
Paint cleaner → insufficient improvement → compound polishing → reassess
Do Not Chase Deep Etching Indefinitely
Deep etching may require removing a substantial amount of surrounding clear coat before the depression becomes visually level.
At that point, preserving the paint film becomes more important than making one bug mark completely invisible.
The full decision path can be summarized as:
Targeted wash or pre-wash → sufficient dwell time → pressure rinse → contact wash → inspect for etching → paint cleaner → compound polishing if required
Stop as soon as the current stage produces an acceptable result.
Car Bug Removal FAQ
Should I Remove Bugs From My Car Immediately?
Remove them as soon as practical. The chemical composition of bug contamination varies, and panel temperature, sunlight, and exposure time can all affect how the contamination behaves.
If your next full wash is several days away, a targeted wash of the affected area can reduce the time the contamination remains on the paint.
Can I Remove Bugs With a Pressure Washer Alone?
Fresh bug contamination may sometimes release with pressure water alone.
If it does not, avoid immediately increasing physical force. Supply water and suitable cleaner, allow the contamination to soften, and then rinse again.
What Is the Difference Between Bug Remover and Alkaline Pre-Wash?
An alkaline pre-wash is generally formulated as a broad cleaner for oily and organic road contamination across the vehicle.
A dedicated bug remover is formulated specifically around bug remains and dried bug residue. Actual cleaning strength varies by product, so specialized does not automatically mean stronger.
Can an Alkaline Pre-Wash Remove Dried Bugs?
Yes, if the product provides enough cleaning action for the contamination.
Check the manufacturer’s recommended dilution and application method, then give the cleaner sufficient dwell time without allowing it to dry.
Should I Rinse Bug Remover Immediately After Applying It?
Heavily dried bug contamination needs time for water and cleaning ingredients to penetrate and soften the residue.
Use the manufacturer’s recommended working time and keep the surface wet until rinsing.
Why Use Alkaline Pre-Wash Foam After Bug Remover?
Liquid bug remover can run off quickly from bumpers and mirrors.
Applying alkaline pre-wash foam afterward covers those areas again and helps maintain a wet working environment while the rest of the vehicle is being pre-washed. This turns the full-vehicle pre-wash period into additional dwell time for the bug contamination.
Is a White Mark Left After Bug Removal Always Etching?
No. A thin film of body-fluid or tissue residue may remain after the larger bug material has been removed.
Complete the normal contact wash first. If the paint is clean but an outline, gloss difference, or depression remains, inspect the area for possible etching.
Can a Paint Cleaner Remove Bug Etching?
A fine-abrasive paint cleaner may improve shallow surface changes.
A glaze-containing product may also make the mark less visible without fully correcting it, so inspect the actual surface condition after treatment.
Marks beyond the correction range of the paint cleaner may require compound polishing.
Should I Compound an Old Bug Mark Immediately?
First remove all bug contamination and residue and inspect the clean paint.
For a shallow remaining mark, start with a less aggressive paint-cleaner process. Move to compound polishing only when the remaining defect requires actual clear-coat correction.
Summary | Remove Bugs Early and Give Dried Bugs Time to Soften
Bug contamination becomes harder to remove as it loses moisture and dries. Some bug remains can also contribute to clear-coat etching depending on their chemistry and the conditions in which they remain on the paint.
Safe bug removal therefore requires managing two different types of time.
Keep the time bugs remain on the vehicle short.
If you find bug splatter and your next full wash is still several days away, remove the contamination with a targeted wash instead of leaving it on the paint.
Give already dried bugs enough dwell time before removing them.
Supply water and suitable cleaning chemistry, allow the hardened contamination to soften, then use the pressure rinse and contact wash to complete removal.
If a mark remains after the paint is clean, stop adding scrubbing force and determine whether you are looking at residue or clear-coat etching.
Use a paint cleaner for a suitable shallow mark, then move to compound polishing only when the defect lies beyond the paint cleaner’s correction range.
Remove bugs early. Give dried bugs enough time to soften.
When a bug does not come off easily, the safest first response is to change the condition of the contamination so that less force is required to remove it.